Although it took us a day to figure out how to get the Raspberry Pi to work–a faulty SD card turned out to be a major delay–we still had most of a week of the Creativity Interim for students to get some projects done.
That is, until it started to snow. We lost more two days.
Still, we had a small cadre of determined students, one of whom (N.D.) decided that she wanted to make the Pi play sounds to go with the blinking LED lights.
To do this she needed to:
- Learn how to use the LINIX command line to connect to the Pi and execute programs.
- Learn how to write programs in Python to operate the Pi’s GPIO (input/output) pins.
- Learn how to make circuits on a breadboard connected to the Pi.
A Quick and Incomplete Introduction to the Command Line: Basic Navigation
We started by using the Terminal program on my Mac to learn basic navigation.
To see a list of what’s in a folder use ls:
> ls
For more details on the items in the folder, use the -l option:
> ls -l
To see all the options available for the ls command you can lookup the manual using man:
> man ls
To create a new directory (e.g. Pi) use mkdir:
> mkdir Pi
To change directories (say to go into the Pi directory) use cd:
> cd Pi
Connecting to the Pi
I detail how to connect to a Pi that’s plugged into the wall via the local network here, but to summarize:
Use ifconfig to find the local IP address (under eth1).
> ifconfig
Use nmap to identify where the Pi is on the network. E.g.:
> sudo nmap -sP 191.163.3.0/24
Finally, connect to the Pi using the secure shell program ssh:
> ssh pi@191.163.3.214
(the default password is “raspberry”)
Wiring an LED Light Circuit

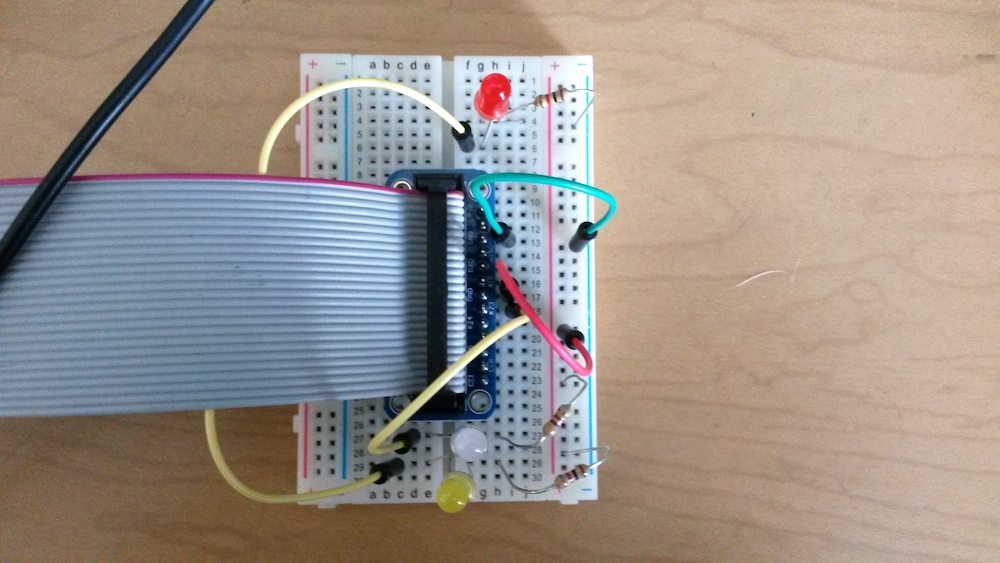
We created an initial circuit going from the #17 General Purpose Input/Output (GPIO) pin to a red LED then through a resistor then back into one of the ground pins of the Pi. We’ll turn the current going through GPIO #17 on and off via our program on the Pi. The resistor is needed to reduce the amount of current flowing through the LED, otherwise it would likely get blown out. The circuit is shown in the picture where I’ve taken the wire ribbon out for the sake of visibility.
Wiring on a breadboard is quite simple if you remember a few rules.
First, the columns of holes on the sides are connected vertically, so the right end of the yellow wire (in the + column) is connected to the resistor.
Secondly, the holes in the middle are connected horizontally, but not across the gap in the middle. That’s why the GPIO pin #17 is connected to the lower end of the black wire, and the left end of the resistor is connected to the ground (GND) pin. The LED light reaches across the two gap to connect the two rows with the upper end of the black wire and the left end of the yellow wire. Without something to bridge the gap, the circuit would not be complete.
The resistor has a resistance of 420 Ohms. You can tell by the color bands. In the sequence–yellow, red, brown–the first two bars represent numbers (yellow=4; red=2) and the third number represents a multiplier (in this case brown represents 10x).
Light: Programming the Pi in Python
Once you ssh to the Pi you can start programming. We used the command line text editor Nano. A simple text editor is all you need to write simple Python programs. We’ll create a program called flash.py (Note: it’s important to include the .py at the end of the file’s name, otherwise it becomes hard to figure out what type of file something is, and the extension also clues Nano in to allow it to color-code the keywords used in Python, making it a lot easier to write code.
pi> nano flash.py
You can then type in your program. The basic code for making a single light flash on and off ten times (see here) is:
flash.py
#!/usr/bin/env python

from time import sleep
import RPi.GPIO as GPIO

cpr = 17  ## The GPIO Pin output number

GPIO.setmode(GPIO.BCM) ## Use board pin numbering

GPIO.setup(cpr, GPIO.OUT) ## Setup GPIO Pin 7 to OUT

for i in range(10):
	GPIO.output(cpr, True)
	sleep(0.5)
	GPIO.output(cpr, False)
	sleep(0.5)
GPIO.cleanup()
This requires wiring a circuit to the GPIO pin #17. The circuit has a LED and a resistor in series, and circles back to the Pi via a grounding pin.
Run the program flash.py using:
pi> sudo python flash.py
Finally, let’s tell the program how many times to flash the light. We could create a variable in the Python code with a number, but it’s more flexible to set Python to take the number from the command line as a command line argument. Any words you put after the python in the command to run your program are automatically stored in an array called sys.argv if you import the sys module into your program. So we rewrite our flash.py program as:
flash2.py
#!/usr/bin/env python

from time import sleep
import RPi.GPIO as GPIO
import sys

cpr = 17  ## The GPIO Pin output number

GPIO.setmode(GPIO.BCM) ## Use board pin numbering

GPIO.setup(cpr, GPIO.OUT) ## Setup GPIO Pin 7 to OUT

for i in range(int(sys.argv[1])):
	GPIO.output(cpr, True)
	sleep(0.5)
	GPIO.output(cpr, False)
	sleep(0.5)
GPIO.cleanup()
So to flash the light 8 times use:
pi> sudo python flash2.py 8
Note that in your Python code you use int(sys.argv[1]) to get the number of times to flash:
- sys.argv[1] refers to the first word on the command line after the name of the python file. sys.argv[0] would give you the name of the python file itself (flash.py in this case).
- the int function converts strings (letters and words) into numbers that Python can understand. When Python reads in the “8” from the command line it treats it like the character “8” rather than the number 8. You need to tell Python that “8” is a number.
Sound: Using SOX
You can do a lot with sound–record, play files, synthesize notes–on the Pi using the command line program SOX. Install SOS (and mplayer and ffmpeg which are necessary as well) using:
pi> sudo apt-get install sox mplayer ffmpeg
Installation may take a while, but when it’s done, if you plug in speakers or headphones–the Pi has no onboard speakers–you can test by synthesizing an E4 note, which has a frequency of 329.63 Hz (via Physics of Music Notes), that lasts for half a second using:
pi> play -n synth .5 sin 329.63
Now play is a command line program that’s part of sox, so to use it in your Python program you have to tell Python to import the module that lets Python talk to the command line: it’s called os. Then you make a Python program to play the note using os.system like so:
test_sound.py
import os
os.system('play -n synth .5 sin 329.63')
And run the program with:
pi> sudo python test_sound.py
Combining light and sound
Now we bring the light and sound together a the Python program:
flash-note.py
#!/usr/bin/env python

from time import sleep
import RPi.GPIO as GPIO
import sys
import os

cpr = 17  ## The GPIO Pin output number

GPIO.setmode(GPIO.BCM) ## Use board pin numbering

GPIO.setup(cpr, GPIO.OUT) ## Setup GPIO Pin 7 to OUT

for i in range(int(sys.argv[1])):
	GPIO.output(cpr, True)
	os.system('play -n synth .5 sin 329.63')
	GPIO.output(cpr, False)
	sleep(0.5)
GPIO.cleanup()
which you run (repeating the note and light 5 times) with:
pi> sudo python flash-note.py 5
Notice that we’ve replaced the middle sleep(0.5) line with the call to play the note because we don’t need the delay since the note plays for 0.5 seconds.
Playing a Tune
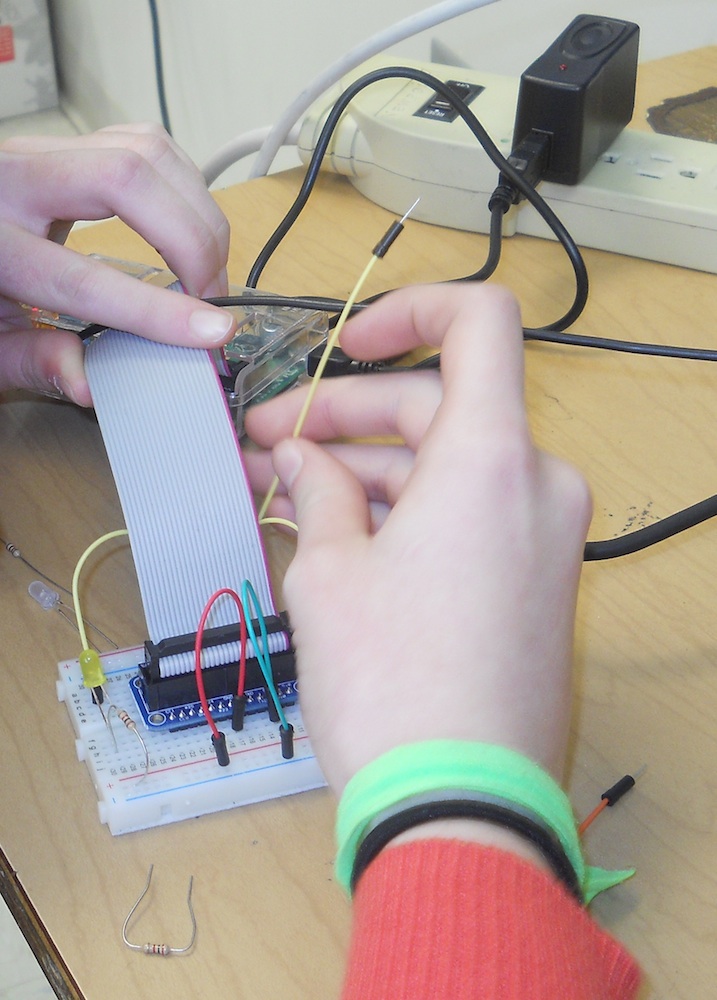
The student, N.D., spent some time working through this programming and adding wiring to the Pi breadboard in order to play the first few notes of Mary Had A Little Lamb. By the time we ran out of time, and she had to do her presentation to the rest of the upper-school, she’d come up with this:
red-light-flash.py
#!/usr/bin/env python

from time import sleep
import os
import sys
import RPi.GPIO as GPIO
os.system('play -n synth 2 sin 543.21')

cpy = 22
cpr = 17
cpw = 23

GPIO.setmode(GPIO.BCM) ## Use board pin numbering

GPIO.setup(cpy, GPIO.OUT) ## Setup GPIO Pin 0 to OUT
GPIO.setup(cpr, GPIO.OUT)
GPIO.setup(cpw, GPIO.OUT)

for i in range(int(sys.argv[1])):
	GPIO.output(cpy, True)
	GPIO.output(cpr, False)
	GPIO.output(cpw, False)
	os.system('play -n synth 1 sin 578.00')
	GPIO.output(cpy, False)
	GPIO.output(cpr, True)
	GPIO.output(cpw, False)
	os.system('play -n synth 2 sin 440.00')
	GPIO.output(cpy, False)
	GPIO.output(cpr, False)
	GPIO.output(cpw, True)
	os.system('play -n synth 1 sin 400.00')
GPIO.cleanup()
which is run (5 times) using:
pi> sudo python red-light-flash.py 5
Creating User-Defined Functions
(As a note to N.D., because we ran out of time before we could get to it.)
You’ll notice it takes four lines to turn a light on, turn the other lights off, and play the note. You’ll also note that you have to repeat the exact same code every time you want to play a specific note and it becomes a pain having to repeat all this every time, especially if you want to play something with more notes. This is the ideal time to define a function to do all the repetitive stuff.
So we’ll create a separate function for each note. Mary has a little lamb uses the notes E4, D4, and C4. So we get their frequencies from Physics of Music Notes and create the functions:
def e4():
	GPIO.output(cpy, True)
	GPIO.output(cpr, False)
	GPIO.output(cpw, False)
	os.system('play -n synth .5 sin 329.63')

def d4():
        GPIO.output(cpy, False)
        GPIO.output(cpr, True)
        GPIO.output(cpw, False)
        os.system('play -n synth .5 sin 293.66')

def c4():
        GPIO.output(cpy, False)
        GPIO.output(cpr, False)
        GPIO.output(cpw, True)
        os.system('play -n synth .5 sin 261.63')
now we can plug these functions into our code and call the notes pretty easily just by using the names of the functions:
flash-mary.py
#!/usr/bin/env python

from time import sleep
import os
import sys
import RPi.GPIO as GPIO

def e4():
	GPIO.output(cpy, True)
	GPIO.output(cpr, False)
	GPIO.output(cpw, False)
	os.system('play -n synth .5 sin 329.63')

def d4():
        GPIO.output(cpy, False)
        GPIO.output(cpr, True)
        GPIO.output(cpw, False)
        os.system('play -n synth .5 sin 293.66')

def c4():
        GPIO.output(cpy, False)
        GPIO.output(cpr, False)
        GPIO.output(cpw, True)
        os.system('play -n synth .5 sin 261.63')

cpy = 22
cpr = 17
cpw = 23

GPIO.setmode(GPIO.BCM)


GPIO.setup(cpy, GPIO.OUT)
GPIO.setup(cpr, GPIO.OUT)
GPIO.setup(cpw, GPIO.OUT)

GPIO.setup(sp, GPIO.IN)

for i in range(int(sys.argv[1])):
	print "switch on"
	e4()
	d4()
	c4()
	d4()
	e4()
	e4()
	e4()

GPIO.cleanup()
which can be run (playing twice) with:
pi> sudo python flash-mary.py 2