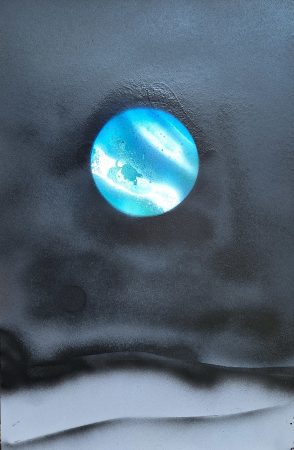
One of my students really got into spray-paint art this year, especially planets. By the time she was done she’d completed over two dozen pieces; some on paper, some on wood, some on clear plastic or acetate, and some of which we backlit with LED’s. Her paintings are all over the Makerspace, which generates a lot of interest.
However, now that this student has graduated, we’ve had to find another way to teach the process. I’m using the above video as a quick introduction to the process (note: it starts at 36 seconds because the author uses a single rude word in her preamble).
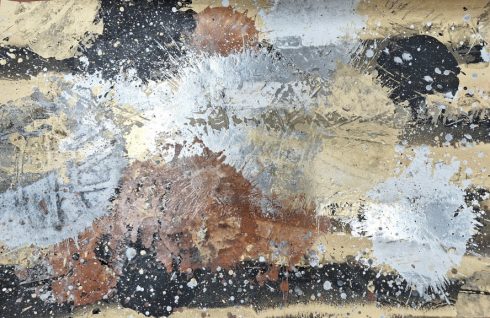
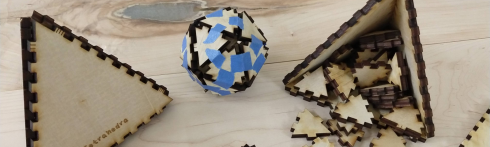
A few examples of students’ work from the Makerspace Summer camp (2023).
Laser-cut triangles showing the incenter, centroid, and circumcenter of an obtuse (slightly) triangle.
There are a few different ways of looking for the center of a triangle. My geometry students did the section in the textbook, then made cutouts on the laser.
They got some practice designing the triangles using a vector graphics program (Corel Draw). This did require an explanation of the difference between vector and raster images, since the majority of the class was unfamiliar with the concept. Raster images are made up of a grid of pixels, while vector images have instructions for where points go and where to draw lines. Vector images are great for diagrams like these because the files can be much smaller, the lines are more precise, and you can scale them up or down without losing any of that precision.
It turned out to be very useful to have them create the shapes and intersecting lines on the computer. It was pretty easy for them to precicely measure angles and find midpoints, so they could find the center points with much more accuracy than they could on just paper.
Having the final triangle cut-outs were also interesting. The centroid–the point of intersection of lines going from the vertices to their opposite side–is the center of gravity of the triangle, which means that, if you’re careful, you can use that point to balance the cut-out triangle on the tip of a pencil.
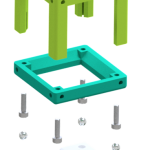
All of a sudden, we have two projects that require us to CNC aluminum.
We managed to make it work with the regular 2-fluted 1/8 inch bit. It cut pretty easily with the settings:
Bit: 2-flute straight, 1/8 inch
Feed Rate: 254 mm/min
Plunge Rate: 76.2 mm/min
Depth per Pass: 0.2 mm
Of note: For the very thin material we tried (0.8 mm thick), I found that instead of using regular tabs, where the machine cuts through most of the material and just leaves a thin tab holding the cut-out pieces in place, just leaving gaps in the design seemed a better option. We have a slight tilt to our surfacing table and it was just way too easy to cut through the entire place where the tab should have been.
Teaching programming using the LED light strips is going much better than expected. I tried it with the 9th grade Algebra class during our weekly programming session using a set of coding lessons I put together. I went so well that though we started by having everyone (about 10 kids) share two LED strips, by the end of the year I had three students from that class build their own.
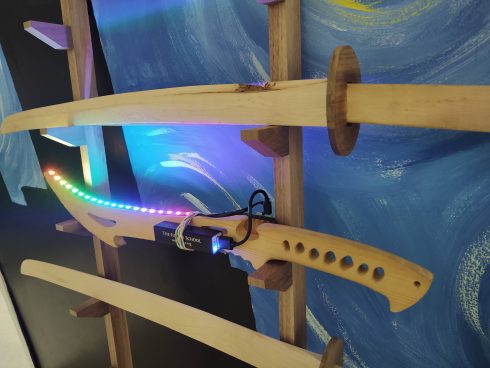
Student’s LED strip on a sword. The battery can power it for at least 15 minutes.
The coding lessons are still a work in progress, but it has them learn the basics by running some of the test programs, then then explore sequences using for loops. There are a lot of directions to branch off after the for loops. I’ve had some of my Algebra II students make static patterns using linear and exponential functions, while a couple of the kids in my programming class used different functions to make dynamic lighting patterns; our hydroponic system (see here and here) now has a neat LED indicator that runs different sequences depending on if the pumps are running or not.
Some of the students who built their LED strips in the Makerspace posted about their projects: LED Thingy and LED Light Strip Project. The process (rpi-led-strip) is not too hard but required them to be able to do a little physical computing (with Raspberry Pi’s), use ssh and terminal commands (terminal instructions), and then run and write python programs.
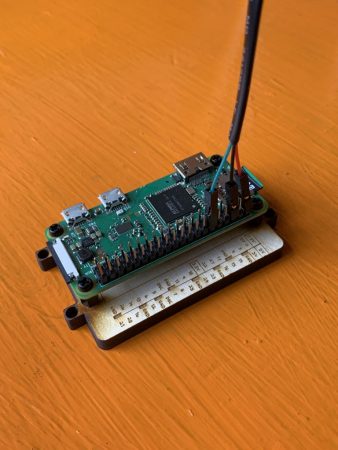
Raspberry Pi that controls one of the LED strips from a student’s project.
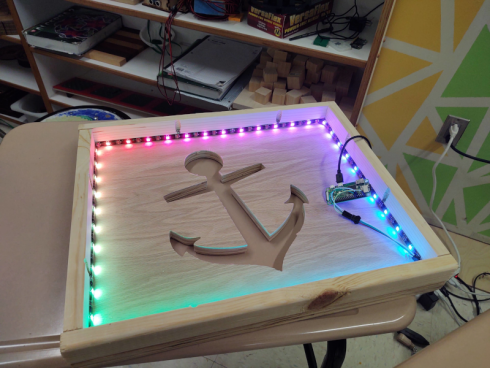
Since the setup uses the same GitHub repository (rpi-led-strip) it’s also easy to update some of our existing projects like the Wall Anchor.
Wall anchor project.
I am amazed at how much the students have engaged with what are, ultimately, very simple systems (a Raspberry Pi and a strip of 20 lights), and I’m really excited to see where it takes us.
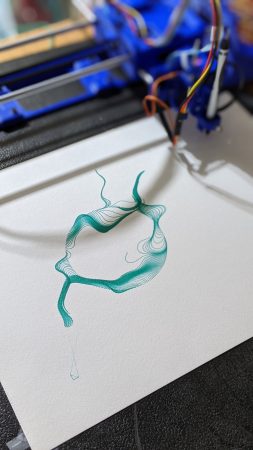
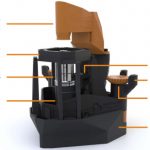
The PlottyBot project looks like a nice introductory project for building computer controlled devices, like 3d printers, laser cutters, and CNC machines. It draws designs using a pen, and is built off a Raspberry Pi Zero, which I’ve been using a lot.
Raspberry Pi Zero controlling a LED strip, with a hardwired clear button.
I wanted to set up a small (20 LEDs) light strip using a Raspberry Pi Zero, so students could learn how to remotely log in to a device, work with the Linux command line, run python programs, and get visible, real feedback on their progress.
Instructions and code are in the Github rpi-led-strip repository.
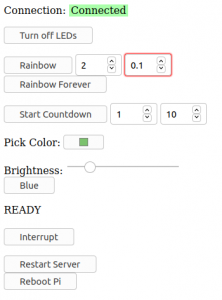
Web control for the LED strip.
The repository also has instructions and code for setting up a local server on the Pi so you can control the LED strip via a webpage. Students working on their own LED projects in the Makerspace will appreciate this.
The main idea here was to make the project as simple as possible. The web page is basic with minimal styling, so it should be easy to edit, but I do test out some of the newer HTML input elements, like the color picker. The README in the repository also includes instructions on how to, step by step, add components to the webpage to control the Pi: the “Blue” button is used as the example (it sets the entire strip to blue).
With only 20 LEDs you don’t need an external power supply so everything can be run through the Pi.
Adafruit’s CircuitPython NeoPixel library makes controlling the lights really easy. There are a few example programs in the rpi-led-strip/pyLED/ directory of the repository.
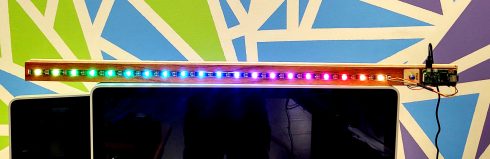
The full strip.
I’ve also included a physical button (it’s optional) that I’m using right now to just clear the LED strip. I may change it to just reboot the Pi, because I anticipate that things will get interesting when I have an entire class trying to connect to one or two devices. So far, I’ve had a small group of four students try this with some success.
A few interesting, low-cost but potentially lab-grade, microscopes that would be great Makerspace projects for students.
OpenFlexure: Out of the University of Bath, this has a Raspberry Pi at the core that can control the stage, focus, and sensor (using the RPi camera module). Since it’s modular the cost varies with the image quality you’re aiming for, but it looks like you can achieve even high resolution results relatively cheaply. They have great detail on their website, including their own version of Raspbian to install on the Pi, so this looks like an good starter project.
UC2: I really like the look of this building block, LEGO-style, system. It seems extremely flexible and there are some interesting projects that go beyond your standard microscope. There are a lot of designs you can go with, including an Arduino or using a Raspberry Pi and camera, but they claim to get good results just with smartphones. This is a big, sprawling project, which suggests a slightly steeper learning curve.
Hat tip to Maggie Eisenberger for introducing me to these.
I’ve created a new Makerspace Blog for my students to post their projects. Sharing what you’ve learned and done is an important part of our learning. We always have a sharing session at the end of interims that we invite the rest of the school to take a look at what the makerspace students have accomplished.