If I have seen further it is only by standing on the shoulders of giants
— Isaac Newton (1676) via Wikiquotes.
Science advances when scientists share their results. If someone tests an hypothesis and finds that it’s wrong, if they share their results, others won’t have to waste time by repeating the same experiments. If someone makes a breakthrough and publishes what they found, then scientists all around the world can use that information to develop new experiments and new applications of that newly discovered principle. Sharing is essential, so it’s important for students to learn how to share well.
Scientists usually communicate their results by giving presentations to other scientists at conferences and publishing articles in scientific journals. Often these presentations are full of the specialized language different types of scientists use with each other, so sometimes science journalists will translate that into regular English news articles that everyone can read and understand. The New York Times and the BBC have good science sections, but what they present comes first from scientists’ formal presentations and articles.
As a result, good presentations and good lab reports are a great way to start learning how to communicate like a scientist.
Lab Reports
A good way to figure out what should go into a lab report is to look at a published article. We have a bunch of copies of Science, which has research articles toward the middle and the back. Articles in Science tend to be brief and fairly dense because it’s one of the premiere journals, so the outlines are not as explicit as you’d find in other places; an Open Access Journal might provide better examples, especially if you’re looking them up online.
Based on our observations, we decided on the following parts for a good lab report:
- Title: Be short, but unique to give a good idea of what your project is about. Since my classes seldom all do the same experiment, this is very useful. Answer the questions: What did you do? Why did you do it? and What did you find?
- Authors: Who gets the credit for the work. Usually authors are listed by who did the most work first, but since everyone’s expected to work equally on their group projects you can choose some random or arbitrary order.
- Abstract: A brief summary of the work, include: what is the problem you’re trying to solve; what you did to solve the problem; and what results you came up with. The abstract should contain all the spoilers.
- Introduction: Go into some more detail about what the problem is you’re working on, and why it’s important. State your hypothesis and how you’re going to test it. Overview previous work your project is based on.
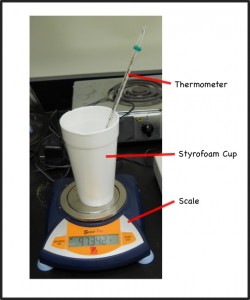
- Procedure/Methods: Describe, in detail, what you did, what apparatus you used. Both words and diagrams are useful here.
- Results: Tell us what you found. Graphs, charts and tables will be very useful here.
- Note on Figures: You should have figures, charts, diagrams and tables in your Procedure and Results sections, but you can have them anywhere they’re appropriate. Each figure needs to have a caption explaining the figure. A useful approach to figures and captions is to try to write them so that someone could understand the entire article by only looking at the figures and reading their captions. One of my students says that popular magazines, like People, are written that way (or at least that’s how they’re read).
- Analysis and Discussion: To paraphrase a student, “Explain why you think you got those results.” Even if the results are unexpected, or especially if they’re unexpected, you need to explain them. This is also your chance to explain why all of your critics are wrong and you were right all along. If you do that though, it should be written in scientific, passive-aggressive language.
- Conclusions: Summarize. In the abstract you’re telling them what you’re going to tell them. In the Introduction, Procedure, Results and Discussion sections you’re telling them. In the Conclusion, you’re telling them what you told them. Hopefully by that time they’ll have had enough chances to figure out what you were trying to tell them.
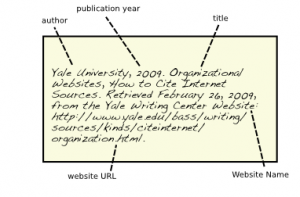
- References: Be sure to include a list of the references you used to do your work. This is how you give credit to the people who’s work you are building on. The Yale Library has an excellent page on citing sources. There are a different citation styles you can use but remember the purpose: to give credit where it’s due, and to allow others to be able to find those references easily. All citations should have the author, the date published (or when you accessed it if it is a website), the title, and a way to track down the work.


Note that scientific magazines, like Science and Nature, are very different from a popular magazine like People, for one thing, as was pointed out to me today, the pages don’t smell like perfume (instead they smell like science).
Updates
This paper, on how to bend a soccer ball, is a good example of a student research paper.