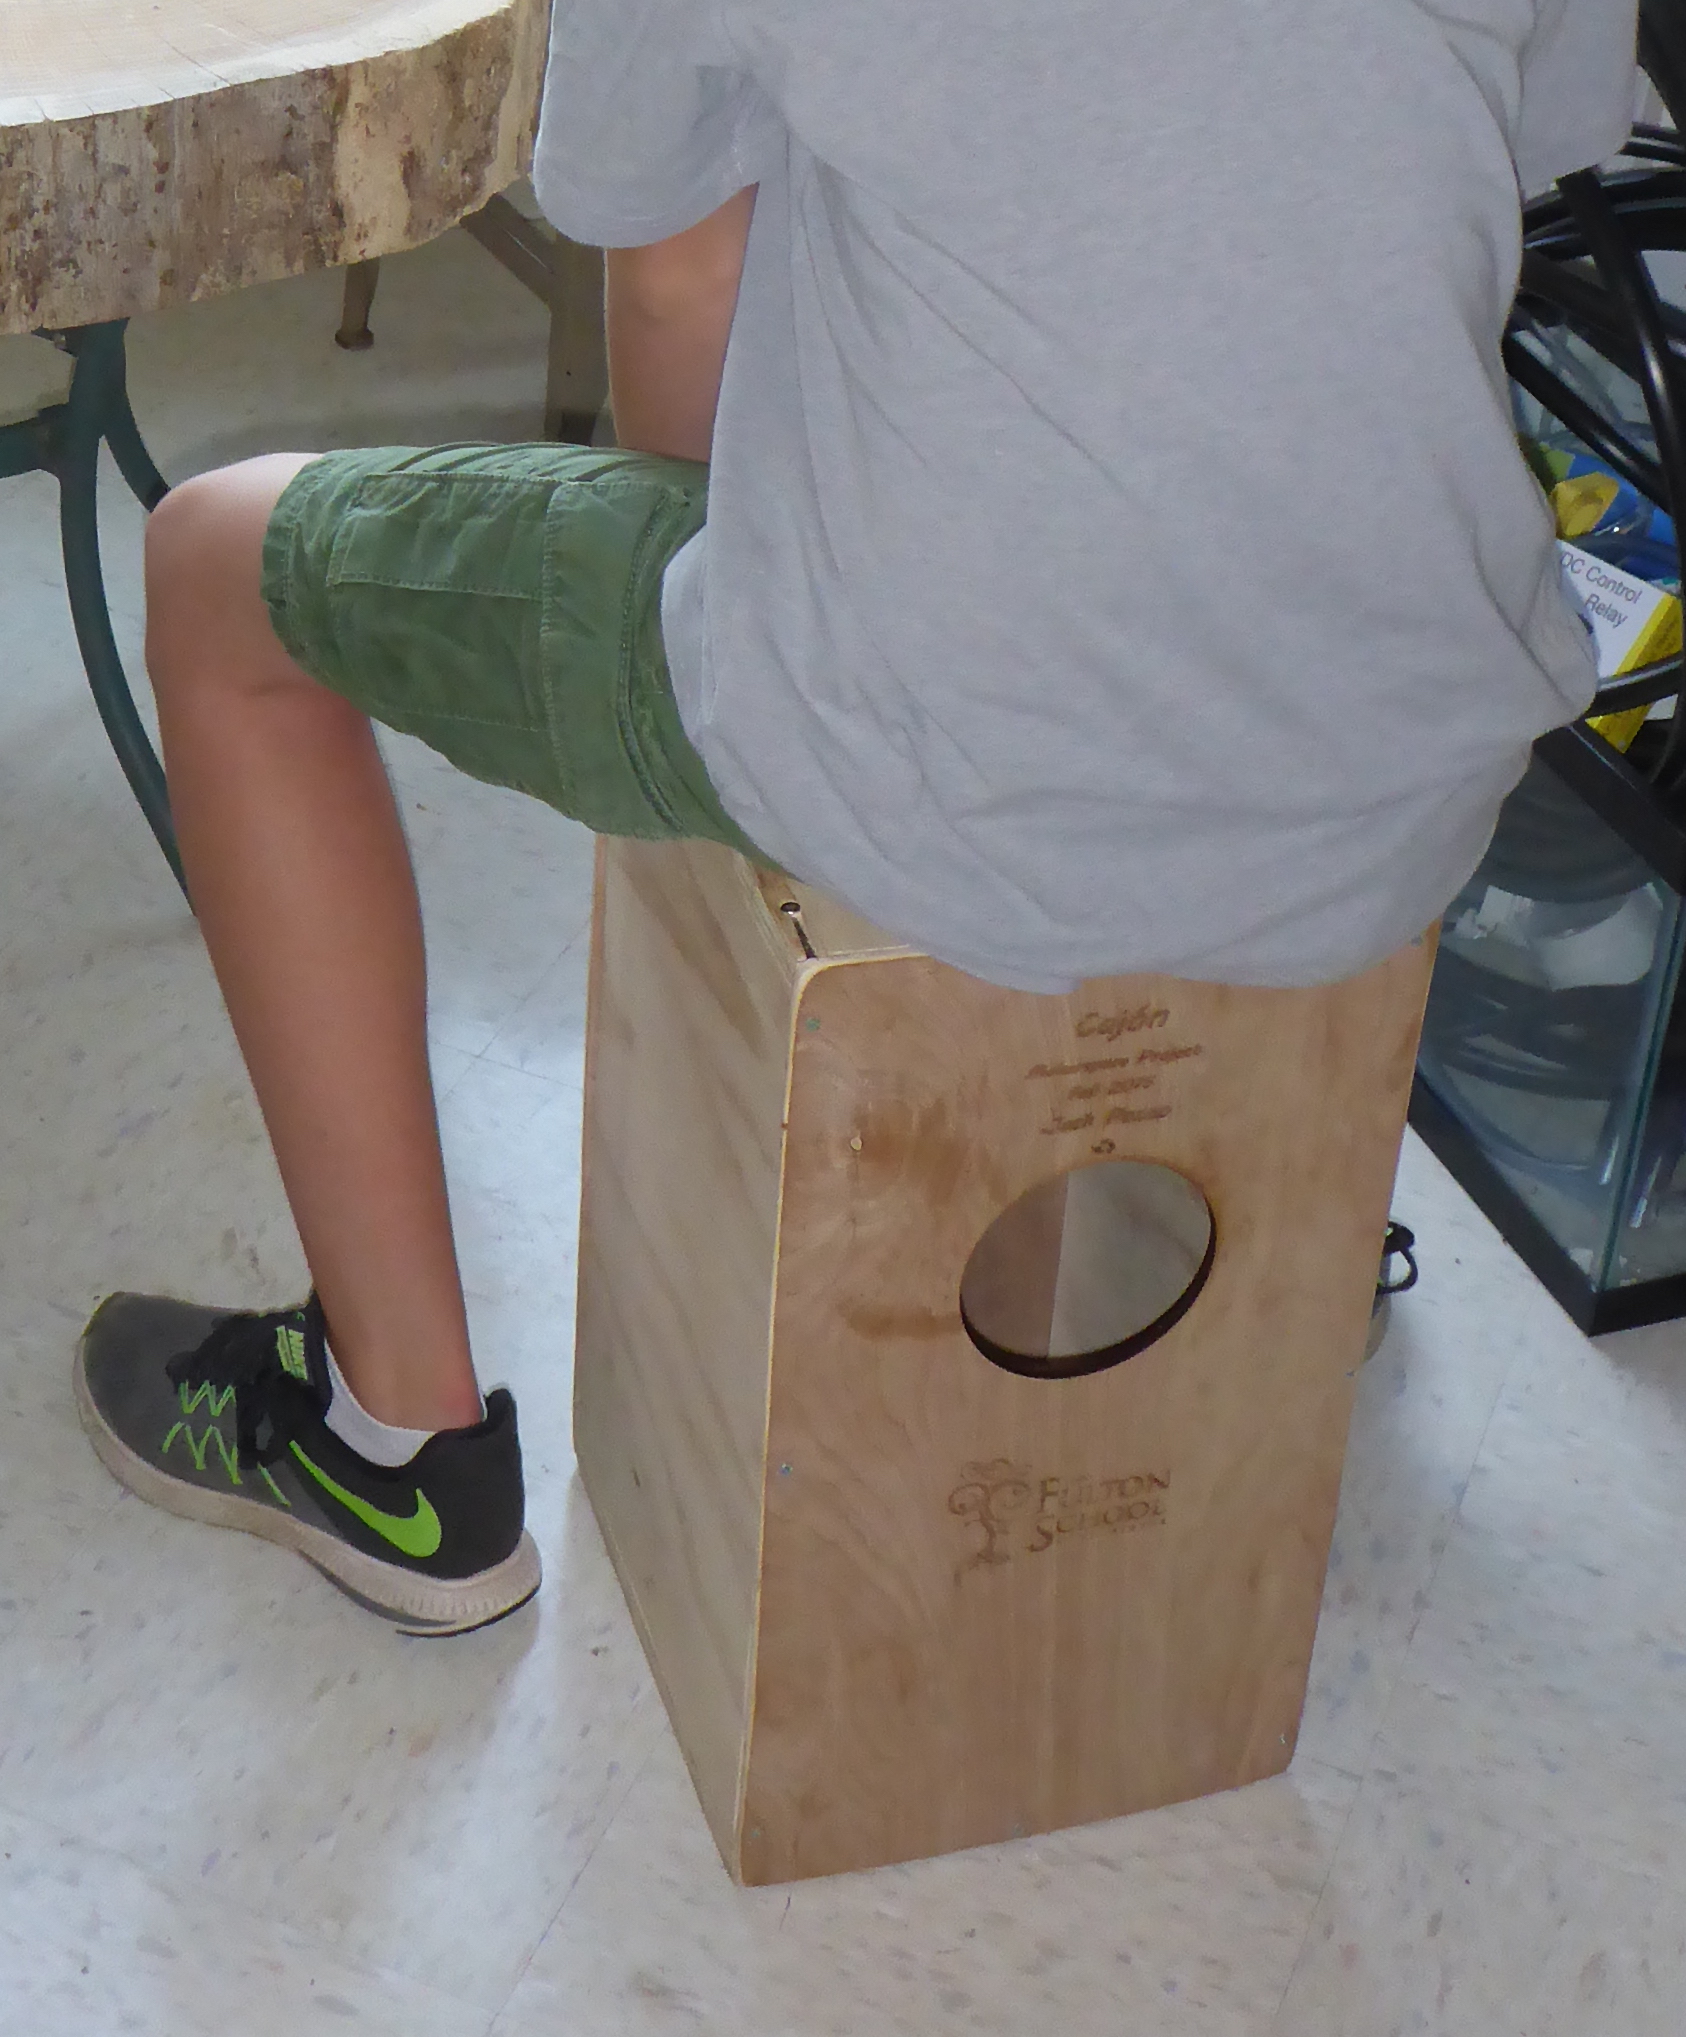
Last year, for an interim project, one of my more musically inclined students decide to build a Cajón. It’s a box shaped drum that you can sit on, with a snare inside. He worked up a simple design in Inkscape and I cut it out on the CNC machine at the Techshop. It turned out quite well, and he even built one that I could keep at school.
My crew from the Gaga Ball pit decided to make a trail through the woods and across the creek. So they built two short (12 ft long) bridges to cross the creek itself, and a third, “natural” log bridge to cross a small ravine that runs into the creek and cuts across the trail.
The short bridges were made of overlapping 2×4’s for structure (held together by 2.75 inch structural screws), with 24 inch long, 1×6 planks across the top.
Short bridge under construction.
The short bridges needed to be small and light enough to be moved when the creek rises, like it did today. I’ll attest that they can be moved, but not easily. They’re pretty heavy: it took a team of three or four middle schoolers to get it down to the creek, and it was hard going trying to drag it over to the side by myself this afternoon. Note to self: next time make sure the structural cross pieces are not at the very end of the bridge.
This September a TechShop branch opened up in St. Louis. I’ve been aware of these neat Makerspaces for a few years now, so it was a pleasant surprise when one turned up in town. Even more surprising (and just as pleasant) was that a parent at our school, who was so excited by the opportunities that a place like the TechShop would offer to a school that tries to emphasize hands-on, experiential education, donated four memberships to the school–one for a faculty member and three for students.
Since there are some age restrictions on which machines minors can use–a lot of the woodshop is off limits until they’re 16 and even then adult supervision is required, I arranged a small application for the student memberships that was only open to middle and high-schoolers. Based on the response I got back, we split the annual memberships by semester, so we have three students using it this fall and three more will have access to them in the spring.
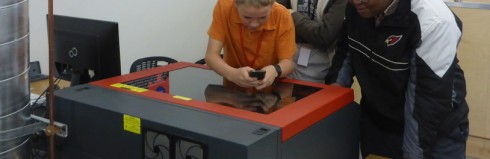
The way the TechShop works is that they have a wide range of equipment under one roof and once you take a safety and basic usage (SBU) class on the particular machine you want to use you can reserve time on the machines. There’s a wood shop with saws, sanders, a lathe, and a CNC machine; a metal shop with the same; a set of 3d printers; a set of laser cutters/etchers; a fabric shop with some serious sowing machines, including one that is computer controlled; an electronics shop; a plastics work area with vacuum forming and injection molding machines. They also do a set of interesting classes on using the design software and some interesting projects that can take advantage of the tools available–I have my eye on the Coptic Bookbinding, and the Wooden Bowl making classes. Finally, they’re set up with classrooms where you can bring students in for small STEAM classes, which includes things like using Arduinos.
Students etching an anodized aluminum luggage tag during their SBU class on the laser cutter/etcher.
So far, we’ve all taken the Laser class, and there’s just so much that you can do with the laser that we’ve been spending a lot of time experimenting. The students have been etching signs–including a grave marker for our goat MJ who recently passed away–as well as pictures, luggage tags, and making presents. Since this is a machine that the older students can use independently I’ve lost track of everything they’ve been doing.
I’ve also taken the woodshop wood CNC class, so my own experiments have been a bit more expansive, including making dry-erase erasers, floor-holders for quivers for the archery program, simple chemistry molecular model sets (just 2d), boxes for Ms. Fu’s math cards, and I’m trying to figure out how to make a clock.
A couple middle-schoolers decided to build a gaga ball pit for their interim project. Since they’d already had their plan improved and I’d picked up the wood over the weekend, they figured they could get it done in a day or two and then move on to other things for the rest of the week. However, it turned out to be a bit more involved.
They spent most of their first day–they just had afternoons to work on this project–figuring out where to build the thing. It’s pretty large, and our head-of-school was in meetings all afternoon, so there was a lot of running back and forth.
The second day involved some math. Figuring out where to put the posts required a little geometry to determine the internal angles of an octagon, and some algebra (including Pythagoras’ Theorem) to calculate the distance across the pit. The sum a2 + a2 proved to be a problem, but now that they’ve had to do it in practice they won’t easily forget that it’s not a4.
Mounting the rails on the posts turned out the be the main challenge on day three. They initially opted for trying to drill the rails in at an angle, but found out pretty quickly that that was going to be extremely difficult. Eventually, they decided to rip the posts at a 45 degree angle to get the 135 degree outer angle they needed. We ran out of battery power for the saw and our lag screws were too long for the new design, so assembly would have to wait another day.
Finally, on day four they put the pit together. It only took about an hour–they’d had the great idea on day three to put screws into the posts at the right height, so that they could rest the rails on the screws to hold them into place temporarily as they mounted the rails. By the time they added the final side the octagon was only off by a few, easily adjusted centimeters.
They did an excellent job and noted, in our debrief, just how important the planning was, even though it was their least favorite part of the project. I’d call it a successful project.
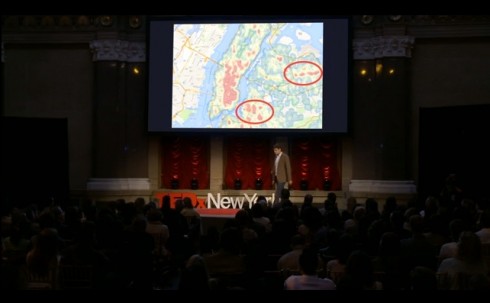
I’m having my students collect all sorts of data for Chicken Middle, their student-run-business. Things like the number of eggs collected per day and the actual items purchased at the concession stand (so we don’t have to wait until we run out of snacks). It takes a little explanation to convince them that it’s important and worth doing (although I suspect they usually just give in so that I stop harassing them about). So this talk by Ben Wellington is well timed. It not goes into what can be done with data analysis, but also how hard it is to get the data in a format that can be analyzed.
Doubly fortunately, Ms. Furhman just approached me about using the Chicken Middle data in her pre-Algebra class’ chapter on statistics.
We’re also starting to do quarterly reports, so during this next quarter we’ll begin to see a lot of the fruits of our data-collecting labors.
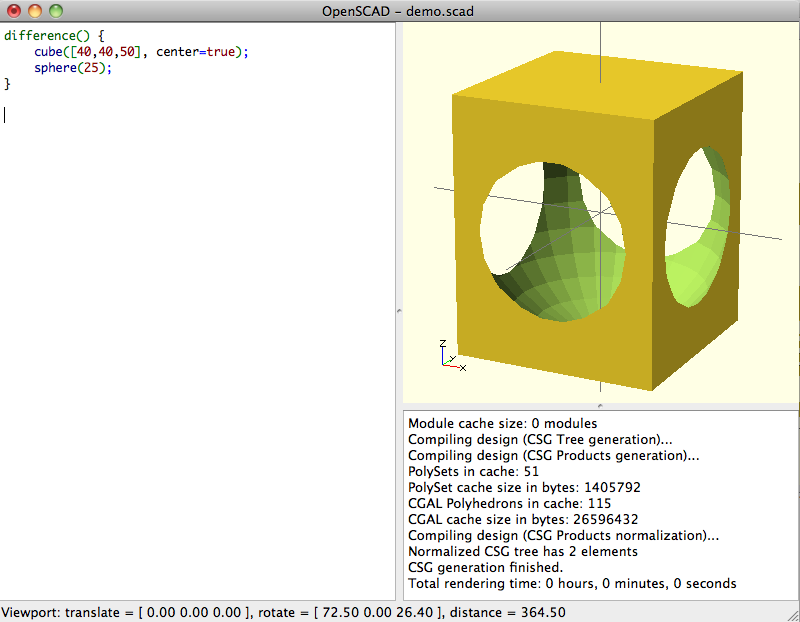
To create a rectangular prism and then take a circle out of the center requires just a few lines of code.
OpenSCAD bills itself as “The Programmers Solid 3D CAD Modeller”. It does this job pretty well, which is probably why I like it so much. Like POV-RAY, which I’ve used before, you create primitive objects–spheres, boxes, cylinders, etc.–and add or subtract them from one another to create the three-dimensional shapes you want.
Unlike the more graphical 3d modeling programs, like SketchUp (which I’ve played with in the past), in OpenSCAD you have to specify in the script the exact dimensions of your primitives, and how to rotate them and translate them to get them where you want them to be in space. This makes it a great language to use in geometry class, or anywhere else you want students to learn about co-ordinate systems.
The script to create the box with a circle cut out of it (see figure above) is:
Vpython requires students of make similar geometric movements of their objects and renders them nicely in 3d, but given the incentive that they can print up a tangible result of their work, I’d be willing to bet that students, especially younger ones, would be quite motivated to work with OpenSCAD. Vpython does retain the advantage that it is able to do animations, while you can only print static objects. In addition, OpenSCAD is more of a scripting language than a programming language like Python (see some of my Vpython programs here).
8th grader models a “fez” he modelled in OpenSCAD. This was the first object, other than the test cube, that was printed on our 3d printer.
The OpenSCAD documentation is quite good. I also found it easy to find instructions on how to create a 3d object from a black and white image, simply by extruding it in the third dimension (by iamwil on the Cubehero Blog and by I Heart Robotics).
One note: I’m using OSX 10.6.8 at the moment, and the current version of OpenSCAD does not work on it. Since I’m loathe to upgrade, I had to use the prior release of OpenSCAD-2013.06.dmg.
So I made the guitar. The guitarbuilding group make it hard to make a bad guitar, with the beautiful materials they provide, and their expert instruction, however, I’m inordinately proud of myself as well.
Indeed, as more and more of the elements fell into place over the course of the week, it really brought home the affective power of a) building something with your own hands, and b) the iconography of the electric guitar.
Now I have to figure out the logistics of doing this at Fulton. But as the workshop instructors pointed out, even if you don’t have students build one, just bringing the electric guitar into the classroom and saying, “Today we’re going to study sound,” really catches the attention.
Sanding and sculpting the guitar bodies was loud, dusty and took a while.
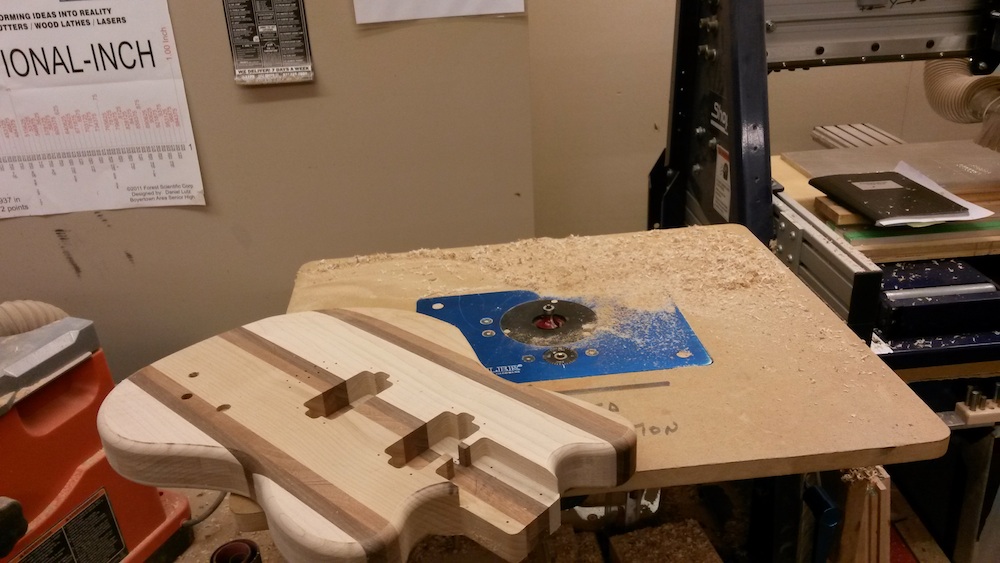
Sculpting the guitar body.
The shape of an electric guitar’s body does not matter that much–they’ve even been made out of 2×4 (inches) pieces of wood–, so there’s a lot of room for creativity when sculpting your guitar’s shape. There’s a little more restriction for the guitar bodies from the guitarbuilding project because they come with cutouts for the electronics that have to be avoided. However, your main limitation is time.
Even with the big rasp, sculpting is not easy, especially since some of the types of wood used for the bodies can be quite hard. The darker strip in mine was particularly difficult.
I chose to carve out two parts of the body. First, it’s a lot more comfortable if the bit where the guitar tucks into your ribs is curved and smoothed; second, shaving down the area where your strumming forearm comes across the guitar makes the strings easier to get to.
Once the sculpting was done, I used a router to round all the other edges.