Bread Baking

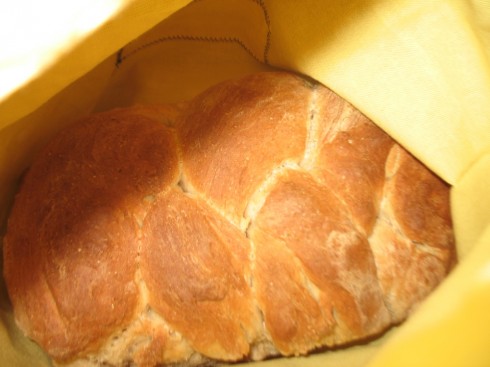
A beautiful loaf, nested in a hand-made bread bag.

Our bread-baking enterprise was quite popular last year. In the afternoons, just as the loaves were about to come out of the ovens, we’d get the occasional visitor poking their head into our room for “aromatherapy”.
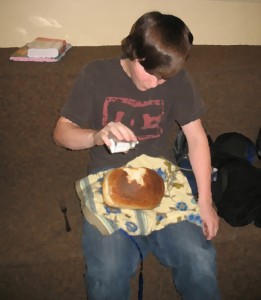
Consumption in progress.

Students also liked the freshly baked bread. Some favored the crust while others liked the insides; which worked out quite nicely most of the time, but I did on occasion come across the forlorn shell of crust, and once, a naked loaf with the crust all gone.

I liked the bread baking for the ancillary reasons: the biology of yeast; the data collection and analysis for the business; having to graph and problem solve with the oven calibration; the chemistry of cooking; and even the chance to study geographic features (primarily lakes and islands, but also dams and erosion).

Equipment

We’d made loaves two at a time. They were big loaves, and that was as much as the students could comfortably kneed.
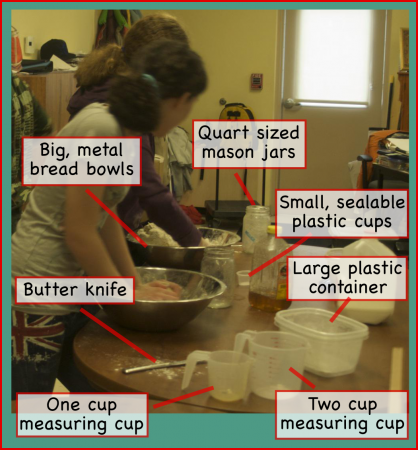
Equipment for making bread.

Small equipment:

  • Big mixing bowls: For mixing and kneeding the bread. We used metal ones from the restaurant supply store.
  • Quart sized mason jars: For collecting all the liquid ingredients (honey, milk, water and butter). These can go in the microwave (take the metal lids off) to quickly melt the butter and warm the liquids for the yeast.
  • Bread load pans: I prefer glass because, with metal the bottoms tend to burn in our toaster ovens. We can fit two pans per oven.
  • Two cup measuring cup: For measuring milk and water.
  • One cup measuring cup: For measuring honey. There probably is an easier way of doing this but we have not come up with it yet.
  • Dry measuring cup: One cup size.
  • Measuring spoons: You’ll need the tablespoon, teaspoon and half-teaspoon.
  • Butter knife: For cutting butter.
  • Small, sealable, plastic cups (optional): For collecting and storing enough yeast (4.5 teaspoons) for one batch of bread.
  • Large plastic containers (optional): For storing dry ingredients (flour and salt). They need to be big enough to hold seven cups of flour.

Capital Equipment:

  • Microwave oven: Necessary for quickly warming the liquids (for the yeast to make the dough rise).
  • Oven: We used table-top, toaster ovens. If the loaves rose well, they’d get too large and get burned by the top of the oven. We probably could reduce the recipe to prevent this. The ovens were not always reliable, and we had to do a regular calibration to make sure the set temperatures were accurate.

Recipe

The simple ingredients can be bought in bulk. This recipe makes two loaves.

Making the Dough

Dry ingredients: These can be combined ahead of time and stored in a large plastic container. When you’re ready to make the bread just dump them into a large mixing bowl.

  • Bread flour: 7 cups
  • Salt: 4 teaspoons

Wet ingredients: Combine these in a mason jar. They can be kept in the refrigerator for about a week.

  • Honey: 6 tablespoons.
  • Butter: 4 tablespoons.
  • Milk: 2 cups
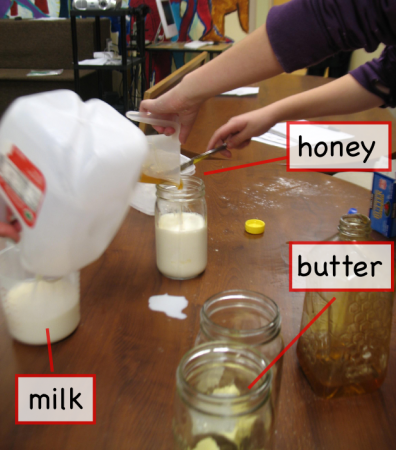
Students put together the wet ingredients in the mason jars. The butter is sliced into smaller pieces and put in first (lower right), then the milk is added (left) and finally the honey (middle).

Microwave: Usually, we microwave the mason jar for about two minutes, which melts the butter nicely but gets the jar a little warmer than is good for the yeast. This is usually a good time to talk about density and stratification, because the honey sits at the bottom, the milk above it, and the butter floating at the top.

Cooling it down: So to make the yeast happy, we usually add some cold (tap) water to the mason jar with the other wet ingredients.

  • Water: two thirds (2/3) of a cup (cold from the tap).

Once everything is well mixed and the liquid mixture in the mason jar is at or just above body temperature, add the yeast.

  • Yeast: 4.5 teaspoons (which is equivalent to two of the small packets you buy from the store).
    • Yeast is much, much cheaper if you buy it in bulk. Even the small, 4 ounce jars at the supermarket are around $4, while a 1 pound bag is about $7. We get ours from Sam’s Club, and store the yeast we have not used yet in a mason jar in the refrigerator.

Stir the yeast in well. Don’t stress if there are still some small clumps.

Combine wet and dry: Dump the contents of the mason jar into the large mixing bowl with the dry ingredients. Do it quickly, otherwise the yeast will settle to the bottom of the jar and not all come out.
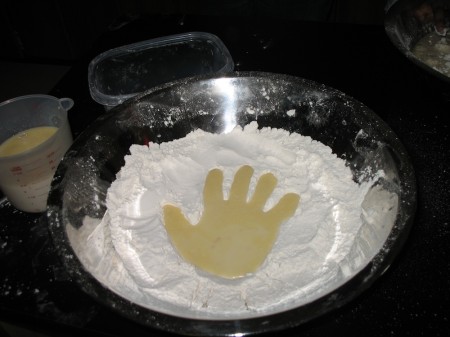
A hand shaped lake in a land of flour.

Now, kneed the dough. We usually use our hands and kneed in the mixing bowls. You may need to add a little more flour as you’re kneeding it if the dough is too sticky. Alternatively, you can add a bit of water if it’s too dry, but I’ve found it much easier to start with the dough too wet and add flour than doing it the other way around.

You can tell when the moisture is right, and the dough is ready, when it stops sticking to your fingers.
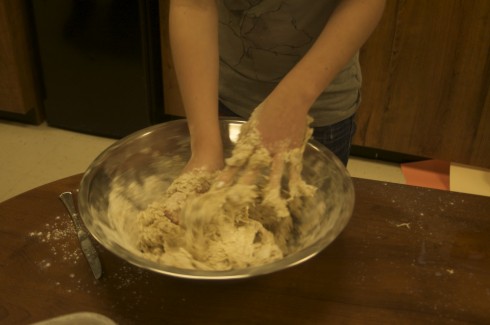
This dough seems a little too wet. They'll sprinkle a little flour on the top and kneed it in. When the dough is ready, it won't stick to your fingers. The last time I said something about their dough needing a bit of flour, the student told me that they knew very well and I should go away because I was just causing trouble. I consider this a success.

I’ve not had any student who was unable to manage the dough, but the quality of the end result depends on the amount of care and effort the students put into it. Unsurprisingly, the more tactile oriented students tend to produce some magnificent dough.
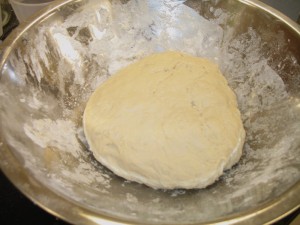
The kneeding is done, and the dough is ready to rise.

Rising and Baking

Once you have a nice dough, it needs to rise for about an hour, although we’ve found that 45 minutes works better since we prefer slightly smaller loaves. Drape a damp towel over it to keep it moist. Use a big enough towel, because if you’ve done everything right, and the yeast is happy, the dough should double in size.

If the dough is left too long it will expand to fill the entire bowl and begin to collapse in on itself.

After it’s risen, punch the dough down, split it into two, roll each piece into the shape of a loaf, and place them into loaf pans.

Now let it rise again for another hour, or 45 minutes in our case (don’t forget the damp towel).

After the second rise (in the pans), place the loaves into the oven at 350 degrees Fahrenheit for 45 minutes. It usually takes the ovens about 10 minutes to preheat to the correct temperature.

And then, you’re done. Enjoy.
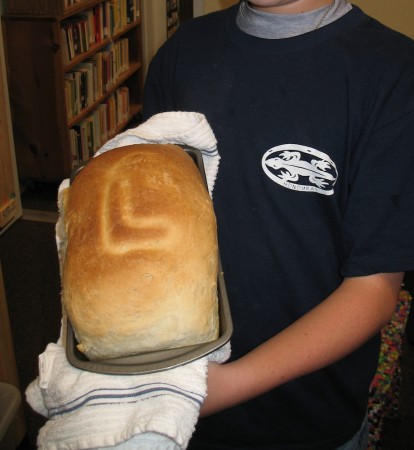
Hot out of the oven, a loaf of bread with the school logo. We set an aluminum foil cutout of the logo on top of the bread while it was baking to imprint the shapes in the crust.

Time

Managed well the entire process can fit nicely into the afternoon schedule. We mixed and kneeded the bread during the half hour of Personal World just after lunch (around 12:30).

With the dry and wet ingredients already measured out ahead of time (once a week during the Student Run Business period) our expert bakers could kneed the dough and clean up after themselves in less than 15 minutes.

Then, all that’s left is to transfer the dough to the bread pans, which takes about 5 minutes (including washing up); put the bread in the ovens an hour later (1 minute); and then taking them out of the oven and washing the big mixing bowl (another 5 minutes). Timed right, the bread is finished just in time for everyone to get to their classroom jobs. It helps that everything, except the mixing bowls, can go into the dishwasher.
Good Relationships are Built on Verbal Communication

Leslie Becker-Phelps highlights a study (pdf) that showing that couples who delayed having sex (showed “sexual restraint”) ended up with more successful marriages.

Why?

Because early sex may indicate less commitment to the long-term relationship. Also, it may undermine the couple’s ability to communicate verbally. The study’s authors speculate:

… we speculate that the rewards of sexual involvement early on may undermine other aspects of relationship development and evaluation such that individuals may not put as much energy into crucial couple processes such as communication and may stay with partners who are not as skilled in these processes, thereby resulting in a marriage that is more brittle.

Busby et al (2010) (pdf): Compatibility or Restraint?: The Effects of Sexual Timing on Marriage Relationships

This is an important concept for adolescents to grasp, as Becker-Phelps points out:

These are the very messages that adults often deliver to adolescents who want to begin exploring their sexuality. Wait, they say. If you are meant to be together, it will happen. In the meantime, get to know each other and grow together. Decide whether this relationship really is right for you before you become sexually involved. It’s great advice.

— Becker Phelps (2011): Premarital Sex — Why Wait? on The Art of Relationships Blog

Density, Stratification, and Phase Changes in a Jar

Which is denser? Which is least dense? Water, butter or honey? This might be a trick question.

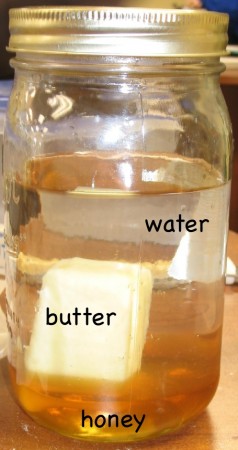
When we bake bread we usually put all the wet ingredients –honey, water and butter– into a mason jar. If you do it carefully, the substances stratify: the honey forms a nice layer at the bottom as the water floats above it; and the butter, which has the lowest density, floats on top. You need to be careful about, since the honey can dissolve into the water if it is mixed, however, with a little careful pouring, this is an easy way to demonstrate density differences.

The butter, however, can be most interesting. If you put the butter in last, it will float on top of the water as it should. However, if you put it in first and then pour the honey on top of it, or even if you put it in second, after the honey is already in the jar, the butter will stick in the viscous honey and not float to the top.

What’s really neat, is what happens when you microwave the mixture with the butter stuck in the honey. The solid butter melts, and, because it’s less dense than the water above it, as well as because water and oils (like butter) don’t mix, little bubbles of butter will form and float upwards to the top. It’s like a lava-lamp only faster. And, in the end, the butter forms a liquid layer floating on the water.

Exothermic Reaction: Epoxy

A little stick of epoxy from the hardware store can be used to demonstrate exothermic reactions, and, if you’re interested, some organic chemistry.

You should be able to find all sorts of epoxies in the store, but the easiest to work with are the little cylindrical sticks that you have to massage with your fingers to mix the resin and hardener. As they combine, you can feel the epoxy getting warmer. The plumber’s epoxy warmed quite nicely.

You can also feel it get softer and easier to work, more malleable, so it could also be a good demonstration of plasticity. Especially since, as the chemical reaction occurs, the material hardens till, after a few minutes, it can’t be worked at all.

Epoxies are used a lot as adhesives and protective coatings, because they are extremely strong when they harden and can be quite sticky.

Image adpated from Wikipedia (resin molecule produced by Cacycle).

Their chemistry is fascinating. Epoxies work by mixing a resin and a hardener. The resin’s molecules have epoxide rings at either end, while the hardener’s molecules also have reactive ends. So when you mix them, they create long chained molecules called copolymers: polymers are long chains of a single molecule (the base molecule is called a monomer); copolymers are long chains with two base molecules instead of one.

The resulting network will not dissolve in any solvents, and resists all but the strongest chemical reagents. The plurality of OH groups provides hydrogen bonding, useful for adhesion to polar surfaces like glass, wood, etc.

–Robello (accessed 2011): Epoxy Polymers

Collecting Garbage on the Beach: The Trip to Deer Island

To the left, a long, narrow, lightly-wooded island. Skeletal trees, dying on the upwind end; drowned by the attrition of the waves. To the right, a narrow, eager, urban strip. Hotels and casinos, pressing against the water’s edge; vying for access to the white sand beaches and gentle waters of the sound. Such different places on either side, yet the one on the right is the reason we’ve come to the one on the left. We’re here as part of our Adventure Trip to pick up any artificial debris that’s managed to float across the sound and collect and contaminate the quiet, isolated beaches of the island.

We’d gotten on a pontoon at the research lab right after breakfast, so the early adolescents were still a little groggy. Our vessel’s captain asked a question about team mascots which promptly woke up approximately 63.64% of the class, and served as a topic of conversation for the twenty or so minutes it took to get to the drop-off point on the west-north-western end of Deer Island.

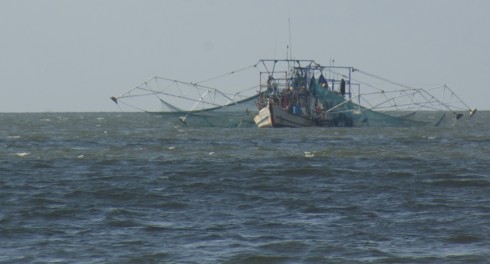
Shrimp boat caught in the act of deploying its nets.

Mostly unobserved by my busy students were the half dozen shrimp boats casting their nets in the sound. Long, spider-like, almost robotic arms spread out from the vessel to lower the nets. It’s quite an impressive sight. Commercial shrimping is a major industry all along the Gulf coast.


Deer Island (and its hike). View Coastal Sciences Camp, Gulf Coast Research Lab in a larger map

Mostly dead trees.

The island itself is long and thin, wedge shaped, no more than a couple hundred meters at its widest at the eastern end, but thinning to less than 100 meters to the west. Although wider, almost all the trees seem to have died on the eastern end. Then there is a gap and the trees are mostly alive. Looking at the satellite image, you can see a clear channel cutting through the island. From the image, I’d guess the channel is tidal, with water moving back and forth, filling and draining the sound with each cycle of the tides. The sediment deposited in the quieter waters of the sound (to the north) seem to be forming a small, white-sand delta; the equivalent deposits on the south are probably washed away by the longshore current pretty quickly since that shore is exposed to the wind and waves.

Deer Island is not an active barrier island: twelve kilometers to the south, Horn and Ship Islands do that job today. However, given the shape of Deer Island, it may have once been a barrier when the coastline was further inland. This is all part of the coastal plains deltas, which includes the Mississippi Delta and smaller rivers. These rivers transport sediment from the mountains inland and deposit them in the ocean, gradually building out the land. As the deltas build out, the barrier islands also push out to accommodate them.

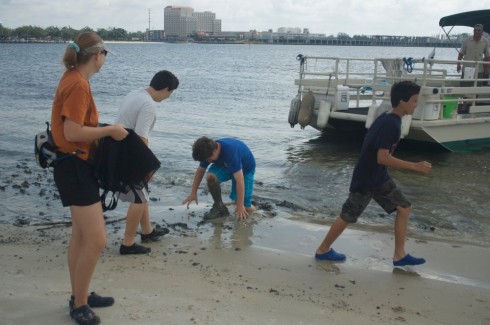
Scrambling for dry land. Note the rich, black mud.

The pontoon pulled up on a broad, sandy beach then retreated to deeper waters where the fishing is better. The white sand beach we landed on was an artifice, just like the East Beach Drive beach we’d walked the day before. Our first steps betrayed the secret. Breaking through a thin cover of sand, we sank knee-deep into a rich black mud that’s the natural sediment in a quiet waterway like the sound.

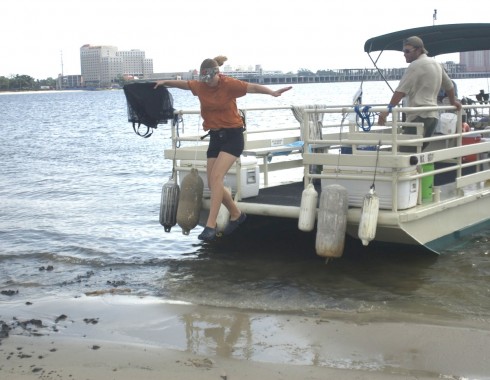
Our guide, on the other hand, seemed to have a preternatural ability to avoid sinking into the mud, or even getting her feet wet, or even touching the water.

Stephanie, our guide, carefully takes her first few steps off the boat. (no photoshopping was involved in the creation of this image).

References

The first image was distorted using a four point distortion method with ImageMagick.

> convert sc-deer-island-1843.jpg -matte -virtual-pixel transparent -distort Perspective ‘0,0,0,200 0,664,0,564 1000,0,1000,0 1000,664,1000,664’ tst2.jpg

> convert sc-deer-island-1841.jpg -matte -virtual-pixel transparent -distort Perspective ‘0,0,0,0 0,664,0,664 1000,0,1000,200 1000,664,1000,564’ tst.jpg

From a Grain of Rice to a Carbon Atom

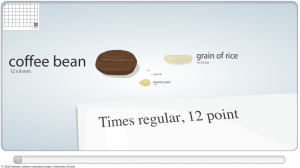
Click for the Cell Size and Scale interactive animation.

The Genetic Science Learning Center (which I’ve mentioned before) has a wonderful slider-bar animation that shows the differences in scale from what we perceive (a grain of rice or a coffee bean) down to the scale of cells, molecules and finally a carbon atom.

The smallest objects that the unaided human eye can see are about 0.1 mm long. That means that under the right conditions, you might be able to see an ameoba proteus, a human egg, and a paramecium without using magnification. …

Smaller cells are easily visible under a light microscope. It’s even possible to make out structures within the cell, such as the nucleus, mitochondria and chloroplasts. [my example] … The most powerful light microscopes can resolve bacteria but not viruses.

To see anything smaller than 500 nm, you will need an electron microscope. … The most powerful electron microscopes can resolve molecules and even individual atoms.

–Genetic Science Learning Center (2011, January 24) Cell Size and Scale. Learn.Genetics. Retrieved June 13, 2011, from http://learn.genetics.utah.edu/content/begin/cells/scale/

Viruses in Glass

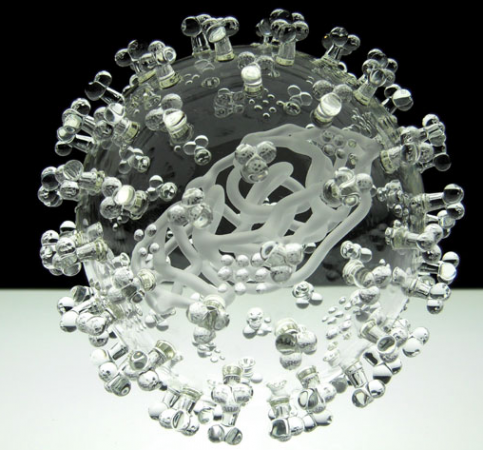
H1N1 (swine flu) virus sculpture by Luke Jerram.

Some people knit bacteria, our students create models of plant and animal cells as an assignment, and Luke Jerram blows viruses in glass.

Interestingly, he does not use colors, just clear, transparent glass, because while almost all pictures you see of viruses, from scanning electron microscopic images to text-book diagrams, have color, the color is added for scientific visualization. So, he believes, his glass replicas are more realistic. This is described in this interview.

About the works:

The pieces, each about 1,000,000 times the size of the actual pathogen, were designed with help from virologists from the University of Bristol using a combination of scientific photographs and models.

— Caridad (2011): Harmful Viruses Made of Beautiful Glass

The video below shows how it’s done.

There is a lot more information on the art and the science at the Glass Microbiology website.