Santa Fe Immersion

Last week, Ms. Bryan and I took the middle schoolers out to Santa Fe, New Mexico. We drove out on Sunday (stayed overnight in Amarillo) and returned on Friday night. A brief overview of what we did:

Monday

  • Cadillac Ranch: Amarillo, TX:
    • A public art project. We brought our own spray paint and painted some cadilacs that have been stuck, front first, into the ground. (1 hr)
  • Petroglyph National Monument (Piedras Marcadas Canyon): Albuquerque, NM:
    • We walked the Petroglyph Viewing Trail which has some nice information about the petroglyphs and the basalts they have been carved into. We talked a bit about the geology of extrusive volcanics. (2 hrs)

Tuesday

  • Albuquerque Aquarium and Botanical Gardens
    • This was a student-chosen site (we had one student who really wanted to go to the aquarium, and persuaded the rest of the group). (2 hrs)
  • Indian Pueblo Cultural Center (for lunch)
    • We stopped by the restaurant at the Indian Pueblo Cultural Center in Alburquerque for a lunch of indigenous foods. (I had the three homemade stews, and they were excellent. The cornbread was also superb)
  • Cinder cones at Volcanos Day Use Area (Petroglyph National Monument):
    • We hiked the middle loop to the top of Black Volcano to look at the caldera. Also, saw nightshade plants, large millipedes, and storms in the distance. (2.5 hrs)
  • Bedtime Story: Global Atmospheric Circulation and the Biomes
    • A lesson contextualizing what we saw out of the windows as we drove from the deciduous forests of Missouri to the semi-arid southwestern US. (45 min+)

Wednesday

  • Cliff Dwellings at Bandolier National Monument
    • After a beautiful drive up into the mountains, we did a short hike on the Pueblo loop trail that let us climb into cliff dwellings that were carved into volcanic tuff (2 hrs).
  • Bradbury Science Museum in Los Almos
    • We made a brief stop (1/2 hour) at the Science museum in Los Almos, because I wanted to scope it out, but could easily have spent much more time there. The replicas of the bombs dropped on Japan at the end of WWII attracted the most attention, but was in close competition with the chair that let you feel the seismic vibrations that result from explosions of conventional and nuclear weapons.
  • Prairie Dog Glass
    • Artisan George O’Grady took the time to guide our students through making glasses, pumpkins, and peppers out of glass (2.5 hrs).
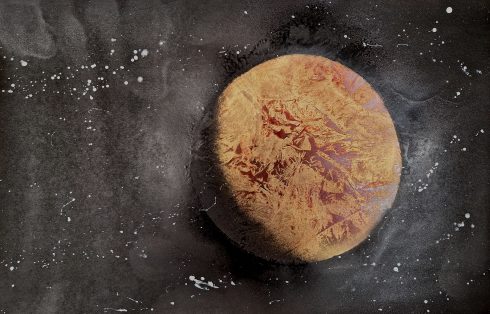
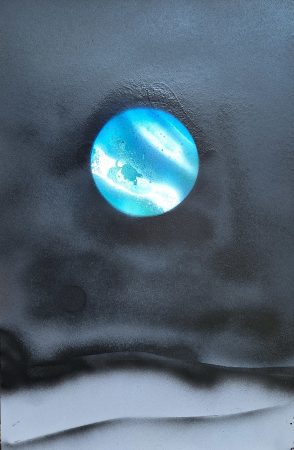
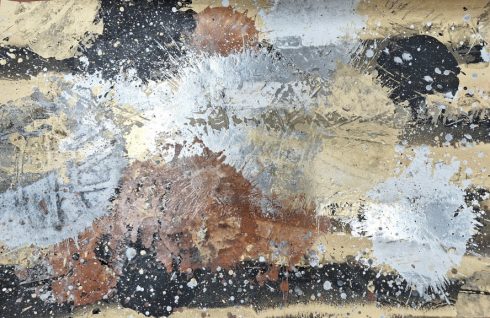
  • Lesson (Mrs. Bryan): Modern Art (in preparation for our visit to the O’Keeffe Museum) (45 min)
  • Bedtime Story: History of the Universe

Thursday

Friday

  • First Americans Museum in Oklahoma City:
    • One of our students’ grandparent insisted we stop by the First Americans Museum, and I am really glad they did. I had not even heard of it (it opened in 2021), but it is an awesome space that fills in a lot of information about the pre and post colonial history of the First Americans. (2 hrs)

Oblique Strategies

I had the chance to sit-in on a wonderful guest class by a local artist, Blaine Deutsch. He got us to try Brian Eno’s Oblique Strategies approach for when you’re stuck on something. It’s a set of cards, each with a short phrase aimed at rejiggering your thinking. I got the card below:

You can find the very nice card sets (and other merch) on Eno’s Oblique Strategies website, but there are also lots of webpages that will throw up a random one for you, including my own:

Spray Paint Planets

One of my students really got into spray-paint art this year, especially planets. By the time she was done she’d completed over two dozen pieces; some on paper, some on wood, some on clear plastic or acetate, and some of which we backlit with LED’s. Her paintings are all over the Makerspace, which generates a lot of interest.

However, now that this student has graduated, we’ve had to find another way to teach the process. I’m using the above video as a quick introduction to the process (note: it starts at 36 seconds because the author uses a single rude word in her preamble).

2020: Lofi Background Music/Art

One of my favorite pieces of art from this year, perhaps because it captures so much of the 2020 experience, and speaks to the way we try to cope during a pandemic.

Having to work from home for most of the first half of the year prompted the persuit of some mellow, non-distracting background music. This lead to the discovery of lofi hip hop channels on YouTube. One of the most popular of which (on the ChilledCow channels) has a simple lofi study girl animation. This image seems to have its roots in the wonderful, Japanese, Studo Ghibli movie Whisper of the Heart.

The image evolved into a meme, with the girl being relocated to different parts of the world–Bored Panda has a number of examples.

Switched on Pop has an excellent podcast episode on the Lofi Music phenomenon called Why lo-fi is the perfect background music. It delves into the history and economics, but focuses on the musical qualities–beats, semi-random elements, etc–that make it well situated for background music.

Apart from the visual and contextual appeal of the Lofi Cali Girl image at the top of this post, the biography of the artist is quite interesting in how it encapsulates an internet-era artistic trajectory. In addition to traditional drawing classes and a BA in Art she credits:

What helped me the most was actually being part of the deviantART community where I learned from other artists by observing their works, and the free tutorials they provided.

Yuumei, FAQ

Her extensive use of them has lead her to create and publish her own free tutorials.

Butterflies in Polar Coordinates

A butterfly outline drawn from a trigonometric function in polar coordinates.

I was looking for mathematical functions I could use to shape guitar bodies, and I came across Hubpages’ user calculus-geometry‘s beautiful page on how to generate butterfly outlines using functions in polar coordinates.

The butterfly above was generated using the function:

r(θ) = 12 – sin(θ) + 2 sin(3θ) + 2 sin(5θ) – sin(7θ) + 3 cos(2θ) – 2 cos(4θ)

The code I used (using VPython) is:

from visual import *

''' the main function '''
def r(theta):
    #r = 1+cos(theta)
    
    #Archimides' sprial
    #r = 0.5*(theta) 
    
    #heart: http://jwilson.coe.uga.edu/EMT669/Essay.ideas/Heart/Hearts.html
    #r = 5*sin(theta) - sin(5*theta)
    
    #butterfly: http://calculus-geometry.hubpages.com/hub/Butterfly-Curves-in-Polar-Coordinates-on-a-Graphing-Calculator
    #r = 8-sin(theta)+2*sin(3*theta)+2*sin(5*theta)-sin(7*theta)+3*cos(2*theta)-2*cos(4*theta)
    r = 12-sin(theta)+2*sin(3*theta)+2*sin(5*theta)-sin(7*theta)+3*cos(2*theta)-2*cos(4*theta)

    return r

'''convert to rectangular coordinates'''
def xy(r, theta):
    x = r * cos(theta)
    y = r * sin(theta)
    return vector(x, y)


path = curve(color=color.green, radius=.2)


theta = 0.0

print pi, theta, r(theta) , xy(r(theta), theta)

while theta <= 2*pi:
    rate(100)
    theta += 0.01
    path.append(pos=xy(r(theta), theta))


Sculpting the Guitar

Sanding and sculpting the guitar bodies was loud, dusty and took a while.

Sculpting the guitar body.

The shape of an electric guitar’s body does not matter that much–they’ve even been made out of 2×4 (inches) pieces of wood–, so there’s a lot of room for creativity when sculpting your guitar’s shape. There’s a little more restriction for the guitar bodies from the guitarbuilding project because they come with cutouts for the electronics that have to be avoided. However, your main limitation is time.

Even with the big rasp, sculpting is not easy, especially since some of the types of wood used for the bodies can be quite hard. The darker strip in mine was particularly difficult.

I chose to carve out two parts of the body. First, it’s a lot more comfortable if the bit where the guitar tucks into your ribs is curved and smoothed; second, shaving down the area where your strumming forearm comes across the guitar makes the strings easier to get to.

Once the sculpting was done, I used a router to round all the other edges.

Routing the edges with a table router.