PlottyBot: Pen Drawn Plots

The PlottyBot project looks like a nice introductory project for building computer controlled devices, like 3d printers, laser cutters, and CNC machines. It draws designs using a pen, and is built off a Raspberry Pi Zero, which I’ve been using a lot.

A PlottyBot in action (from https://ben.akrin.com/?p=10244)

It’s now on my list of potential Makerspace Projects.

LED Light Strip with Pi Zero

Raspberry Pi Zero controlling a LED strip, with a hardwired clear button.

I wanted to set up a small (20 LEDs) light strip using a Raspberry Pi Zero, so students could learn how to remotely log in to a device, work with the Linux command line, run python programs, and get visible, real feedback on their progress.

Instructions and code are in the Github rpi-led-strip repository.

Web control for the LED strip.

The repository also has instructions and code for setting up a local server on the Pi so you can control the LED strip via a webpage. Students working on their own LED projects in the Makerspace will appreciate this.

The main idea here was to make the project as simple as possible. The web page is basic with minimal styling, so it should be easy to edit, but I do test out some of the newer HTML input elements, like the color picker. The README in the repository also includes instructions on how to, step by step, add components to the webpage to control the Pi: the “Blue” button is used as the example (it sets the entire strip to blue).

With only 20 LEDs you don’t need an external power supply so everything can be run through the Pi.

Adafruit’s CircuitPython NeoPixel library makes controlling the lights really easy. There are a few example programs in the rpi-led-strip/pyLED/ directory of the repository.

The full strip.

I’ve also included a physical button (it’s optional) that I’m using right now to just clear the LED strip. I may change it to just reboot the Pi, because I anticipate that things will get interesting when I have an entire class trying to connect to one or two devices. So far, I’ve had a small group of four students try this with some success.

3d Printable Microscopes

A few interesting, low-cost but potentially lab-grade, microscopes that would be great Makerspace projects for students.

OpenFlexure: Out of the University of Bath, this has a Raspberry Pi at the core that can control the stage, focus, and sensor (using the RPi camera module). Since it’s modular the cost varies with the image quality you’re aiming for, but it looks like you can achieve even high resolution results relatively cheaply. They have great detail on their website, including their own version of Raspbian to install on the Pi, so this looks like an good starter project.

UC2: I really like the look of this building block, LEGO-style, system. It seems extremely flexible and there are some interesting projects that go beyond your standard microscope. There are a lot of designs you can go with, including an Arduino or using a Raspberry Pi and camera, but they claim to get good results just with smartphones. This is a big, sprawling project, which suggests a slightly steeper learning curve.

Hat tip to Maggie Eisenberger for introducing me to these.

Making 3D Periodic Tables

Laser cut, 3d periodic tables.

Ms. Fu’s chemistry class were given a project to make 3d periodic tables based on the properties of the elements. A few groups went with Makerspace options, using the new vinyl cutter and laser.

3d Periodic Table showing electronegativity.
3d Periodic Table showing electronegativity. Laser cut.

Periodic Table relief based on ionization energy. The blocks on this one have 1.5 inch square bases. The colors for the different regions  use stains including tea (assam) and blackberry juice extracted from berries from the canes on campus.
Periodic Table relief based on ionization energy. The blocks on this one have 1.5 inch square bases. The colors for the different regions use stains including tea (assam) and blackberry juice extracted from berries from the canes on campus.

The part that took the longest was marking all the columns for cutting. A worthwhile assignment would be to write a program to automatically make the cut-marks in an svg file that can be etched with the laser.

Periodic Table column heights based on density.
Periodic Table column heights based on density. Laser cut.

Paper columns and vinyl cut lettering on this periodic table.

Headless Pi Zero

Pi Zero‘s are even cheaper versions of the Raspberry Pi. The price you pay is that they’re harder to connect to since all the ports are small (micro-USB’s and mini-HDMI’s), so you need adapters to connect to keyboards, mice, and monitors. However, if you have the wireless version (Pi Zero W) you can set it up to automatically connect to the WiFi network, and work on it through there using the command line. This is a brief summary of how to do this (it’s called a “headless” setup) based on Taron Foxworth’s instructions. It should work for the full Raspberry Pi as well.

Set up the Operating System

You can install the Raspbian Stretch (or Raspbian Lite which does not include the desktop GUI that you will not use) on a SD card (I used 8 or 16 Gb cards).

  • Download Raspbian.
  • SD Card Formatter to format the SD Card. It’s pretty quick, just follow the instructions.
  • Etcher: to install the operating system on the SD Card

Set up automatic connection to WiFi

You may have to remove and reinsert the SD Card to get it to show up on the file system, but once you have you can set it up to automatically connect to WiFi by:

  • Go into the /boot partition (it usually shows up as the base of the SD Card on your file manager) and create a file named “ssh”.
  • Create a text file called “wpa_supplicant.conf” in the /boot folder, and put the following into it, assuming that the wifi router you’re connecting to is called “myWifi” and the password is “myPassword”.
  • country=US
    ctrl_interface=DIR=/var/run/wpa_supplicant GROUP=netdev
    update_config=1
    
    network={
     ssid="myWifi"
     scan_ssid=1
     psk="myPassword"
     key_mgmt=WPA-PSK
    }
    

Now put the SD Card into the Pi and plug in the power.

Find the IP address

First you have to find the Pi on the local network. On Windows I use Cygwin to get something that looks and acts a bit like a unix terminal (on Mac you can use Terminal, or any shell window on Linux).

To find the ip address of your local network use:

on Windows:

> ipconfig

look for the “IPv4 Address”.

Mac (and Linux?)

> ifconfig

look under “en1:”

Connecting

To connect you use ssh on the command line (Mac or Linux) or something like Putty

Static IP

Without a static IP address it is possible that the Pi’s IP address will change occasionally. I followed the instructions on Circuit Basics and MODMYPI, but basically you have to:

  • Identify your network information:
    • Find your Gateway:
    • > route -ne
      
    • Find your Domain Server:
    • > cat /etc/resolv.conf
      
  • Add the information to the end of your /etc/dhcpcd.conf file (here the wlan0 means you’re doing this to the wireless interface (WiFi) and the static ip is 10.0.0.99, the static router the gateway ip you found above, and the domain_name_servers takes the domain server ip):
  • interface wlan0
    static ip_address=10.0.0.99
    static routers=10.0.0.1
    static domain_name_servers=75.75.75.75
    
  • Now reboot and you should be able to ssh or sftp into the new static IP.
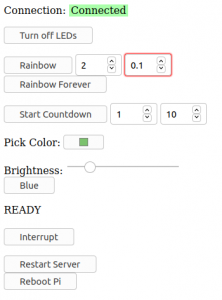
A Web Server

Adding a webserver (apache with php) is pretty easy as well, just run the commands (from the Raspberry Pi Foundation)

Apache web server:

sudo apt-get install apache2 -y

PHP for server-side scripting

sudo apt-get install php libapache2-mod-php -y

Now your can find the webpage by going to the ip address (e.g. http://10.0.0.1).

The actual file that you’re seeing is located on the Pi at:

/var/www/html/index.html

You will probably need to change the ownership of the file in order to edit it by running:

> sudo chown pi: index.html

The Wall (Mural)

Our seniors wanted to leave a mark, so after their initial application to paint the outside wall of the gym was turned down, they went with a mural on the inside–in our Makerspace.

For this project, we wanted to create a mural on the basementnasium wall. First, we measured the wall and went to Home Depot to get enough paint, paint brushes, drop cloths, and tape. Then, after cleaning the wall with a damp cloth, we covered the wall with tape in a triangular pattern similar to one we found online. After that, we used pencil to mark each triangle with a letter corresponding to one of the six colors that we bought. It took us the majority of the project to paint 3-4 coats on each triangle, and on the last day we pulled it the tape and touched up any mistakes with white paint.

Throughout this project, we found out that some people know how to paint, some people learned, and others didn’t learn. BUT IT WAS SO MUCH FUN!

-Team: Elliott, Abby, John, Zoe, Mary, Annemarie, and Josiah

-Abby R.

Longboard

Longboard built during the interim.
Finishing came afterwards.

For my makerspace project I made a longboard. What went well with the board was the wheels and trucks, it was a simple hole in the wood and screwing the trucks almost no measuring on my part. What didn’t go so well was the measuring and cutting of the board, it took me a full day to get all the measurements exact and even then they didn’t come out so good. What I would do next time is get a cnc machine so it does the measuring and gets the cuts exact every time. We could mass produce longboards with ease. If i did it again without a cnc machine i would get the measurements beforehand and then it would make measuring a lot easier.

– Isaac L.