Algebra in Programming, and a First Box

One of the first things you learn in algebra is to use variables to represent numbers. Variables are at the heart of computer programming, and in Python you can use them for more than just numbers. So open the IDLE text editor and get to work.

But first we’ll start with numbers. To assign a number to a variable you just write an equation. Here are a couple (you can copy and paste the code into the IDLE window, but usually typing it in yourself tends to be more meaningful and help you remember):

a = 2
b = 3

Now we can add these two variables together and create a new variable c.

a = 2
b = 3
c = a + b

Which is all very nice, but now we want our program to actually tell us what the result is so we print it to the screen.

a = 2
b = 3
c = a + b
print c

Run this program (F5 or select “Run Module” in the “Run” menu) to get:

Output from the first program: 2+3=5.

Basic Operations and Types of Numbers

Now try some other basic operations:

+ and – are easy as you’ve seen above.

× : for multiplication use *, as in:

a = 2
b = 3
c = a * b
print c

÷ : to divide use a /, as in:

a = 2
b = 3
c = a / b
print c

Now as you know, 2 divided by 3 should give you two thirds, but the running this program outputs 0:

2 divided by 3 to gives 0 because Python thinks we're working with integers.

This is because the Python thinks you’re using integers (a whole number), so it gives you an integer result. If you want a fraction in your result, you need to indicate that you’re using real numbers, or more specifically, rational numbers, which can be integers or fractions, but usually show up as a decimal (these are usually referred to as floating point numbers in programming).

The easiest way to indicate that you don’t just want integers is to make one of your original numbers a decimal:

a = 2.0
b = 3
c = a / b
print c

which produces:

Use a = 2.0 to indicate that we're using rational numbers.

Other Things Can Be Variables

In object oriented programming languages like Python you can assign all sorts of things to variables, not just numbers.

To create a box and give it a variable name you can use the program:

from visual import *
c = box()

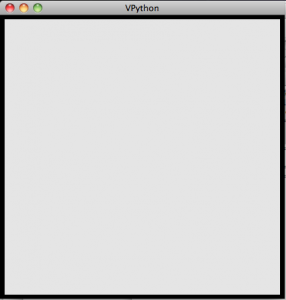
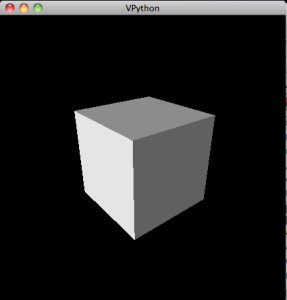
which produces:

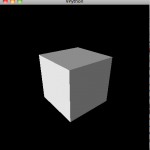
A box created with VPython. It looks much more interesting if you rotate it to see it in perspective.

A rotated, zoomed-out view of a box.

To rotate the view, hold down and drag the right mouse button. To zoom in or out, hold down the right and left buttons together and drag in and out. Mac users will probably have to use the “option” button to zoom, and the “command” button to rotate.

The line from visual import * tells the computer that it needs to use all the stuff in the module called “visual”, which has all the commands to make 3d objects (the “*” indicates all).

The c = box() line creates the box and assigns it a variable name of c. You don’t just have to use letters as variable names. In programming you want to use variable names that will remind you of what it’s supposed to represent. So you could just as well have named your variable “mybox” and gotten the same result:

from visual import *
mybox = box()

Now objects like this box have properties, like color. To make the box red you set the color property in one of two ways. The first method is to set the color as you create the object:

from visual import *
mybox = box(color = color.red)

The second is to set the property using the variable you’ve created and “dot” (.) notation.

from visual import *
mybox = box()
mybox.color = color.red

In both of these color.red is a variable name that the computer already knows because it was imported when you imported the “visual” module. There are a few other named colors like color.green and color.blue that you can find out more about in the VPython documentation (specifically here).

You can also find out about the other properties boxes have, like length, width and position (pos), as well as all the other objects you can create, such as springs, arrows and spheres.

At this point, its probably worth spending a little time creating new objects, and varying their properties.

Overview

We’ve just covered:

  • Assigning values to variables
  • Basic operations (+,-,×, and ÷)
  • Types of Numbers: Integers versus floating point
  • Assigning 3d objects to variables
  • Setting properties of 3d objects

Next we’ll try to make things move.

References

For how to install and run VPython, check here.

Infrared Cloak

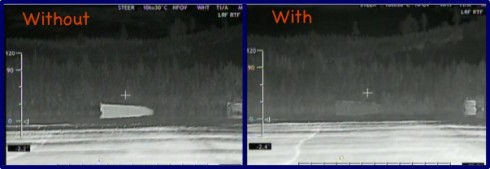
Image adapted from Wired.

In an interesting application of thermodynamics, BAE Systems has developed panels that can be placed on a tank to mask what it looks like to infra-red goggles, or help it fade into the background.

The panels measure the temperature around them and then warm up or cool so they’re the same temperature and therefore emitting the same wavelength of infrared light. So someone looking at the tank with infra-red goggles would have a harder time distinguishing the tank from the background.

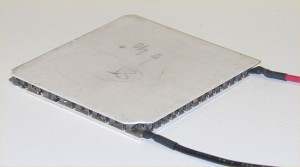
The panels are thermoelectric, which means they use electricity to raise or lower their temperatures, probably using a Peltier device.

Peltier devices, also known as thermoelectric (TE) modules, are small solid-state devices that function as heat pumps. A “typical” unit is a few millimeters thick by a few millimeters to a few centimeters square. It is a sandwich formed by two ceramic plates with an array of small Bismuth Telluride cubes (“couples”) in between. When a DC current is applied heat is moved from one side of the device to the other – where it must be removed with a heatsink. The “cold” side is commonly used to cool an electronic device such as a microprocessor or a photodetector. If the current is reversed the device makes an excellent heater.

— Peltier-info.com: Peltier Device Information Directory

A Peltier element - it cools on one side and heats on the other. Image via Wikipedia.

Supernova Viewing this Week

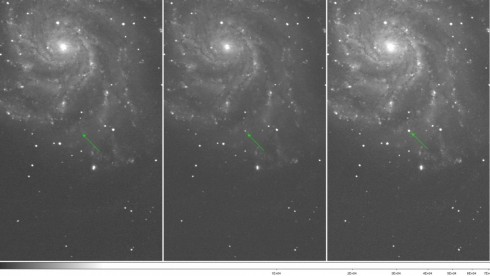
The green arrow points to the exploding star. (Image via LBL).

During the next week or so, you should be able to see this supernova in the Pinwheel Galaxy with a good pair of binoculars, or a small telescope, as it waxes to its maximum brightness on September 9th.

The supernova was discovered just hours after the explosion. Astronomers are pointing every telescope they can manage at it, so this is going to be very well studied over the next decade, something high-schoolers interested in astronomy might consider.

It’s worth reiterating that since the supernova is occurring 21 million light years away, this star exploded 21 million years ago.

The video below explains where to look to find it in the night sky.

Algebra and Programming with VPython

Computer programming is the place where algebra comes to life. Students seem to get really excited when they write even the simplest instructions and see the output on the screen. I’m not sure exactly why this is the case, but I suspect it has something to do with being able to see the transition from abstract programming instructions to “concrete” results.

So I’ve decided to supplement my Algebra classes with an introduction to programming. I’m using the Python programming language, or, more specifically, the VPython variant of the language.

Why VPython? Because it’s free, it’s an easy-to-use high-level language, and it’s designed for 3d output, which seems to be somewhat popular these days. The oohs and aahs of seeing the computer print the result of a+b turn into wows when they create their first box. I’ve used the language quite a bit myself, and there are a lot of other interesting applications available if you search the web.

VPython was created to help with undergraduate physics classes, but since it was made to be usable by non-science majors, it’s really easy for middle and high school students to pick up. In fact, NCSU also has a distance education course for high school physics teachers. They also have some instructional videos available on YouTube that provide a basic introduction.

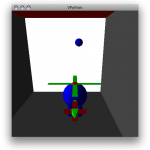
Image from a game created by middle school student Ryan W.

I use VPython models for demonstrations in my science classes, I’ve had middle school students use it for science projects, and I’ve just started my middle school algebra/pre-algebra students learning it as a programming language and they’re doing very well so far.

What I hope to document here is the series of lessons I’m putting together to tie, primarily, into my middle school algebra class, but should be useful as a general introduction to programming using VPython.

Getting VPython

You’ll need to install Python and VPython on your system. They can be directly downloaded from the VPython website’s download page for Windows, Macintosh or LINUX.

Running a Python program.

Once they’re installed, you’ll have the IDLE (or VIDLE) program somewhere on your system; a short-cut is usually put on the desktop of your Windows system. Run (double-click) this program and the VPython programming editor will pop up any you’re ready to go. You can test it by typing in something simple like:

a = 1
b = 2
c = a + b
print c

Then you run the program by going through the Run–>Run Module in the menu bar.

Which should cause a new window to pop up with:

Python 2.7.1 (r271:86882M, Nov 30 2010, 09:39:13) 
[GCC 4.0.1 (Apple Inc. build 5494)] on darwin
Type "copyright", "credits" or "license()" for more information.
>>> ================================ RESTART ================================
>>> 
3
>>> 

Even better might be to test the 3d rendering, which you can do with the following program:

from visual import *

box()

which creates the following exciting image:

A box created with VPython. It looks much more interesting if you rotate it to see it in perspective.

To rotate the view, hold down and drag the right mouse button. To zoom in or out, hold down the right and left buttons together and drag in and out.

A rotated, zoomed-out view of a box.

Lessons

Lesson 1: Variables, Basic Operations, Real and Integer Numbers and the First Box.

Lesson 2: Creating a graphical calculator: Coordinates, lists, loops and arrays: A Study in Linear Equations

Zipline to School

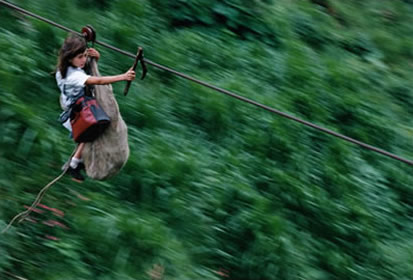
Nine year old Daisy Mora takes the zipline to school every day. Her five year old brother is in the bag. Image by Christoph Otto via the Daily Mail.

Photographer Christoph Otto has a few utterly amazing photographs of the kids of Rio Negro in Columbia, who have to take a zipline to get across the valley to school.

This video gives more details.

It might also be useful if students need some incentive to try the zipline at the challenge course.

The CoolMath Website

A colleague recommended the Cool Math website as something she uses as a supplement for her students. There are some games for the younger kids, and lessons in pre-algebra through algebra for secondary students. I’ve glanced through a few of the pre-algebra lessons, and like them. They’re short, fairly clearly written, and have good diagrams.

Algebra lessons at Coolmath.com

The site is also friendly to homeschoolers and their parents, with a decent teacher’s area that outlines the author’s perspective on teaching math.

Their Survivor Algebra is an interesting approach to encouraging peer teaching by breaking the class into “tribes” and giving bonus points on tests if all members of the tribe do well. I’m not sure I like the extrinsic motivation of the prizes and test score bonuses but I think there might be some good aspects of this type of classroom organization in very large classes.

It’s a very interesting site that’s worth investigating.

Global Warming Art

Global temperatures (averaged from 1961-1990). Image created for Global Warming Art by Robert A. Rohde.

Talk about evoking conflicting emotions. The image is astoundingly beautiful – I particularly like the rich, intense colors – but the subject, global warming, always leaves me with sense of apprehension since it seems so unlikely that enough will be done to ameliorate it.

The source of the image, Global Warming Art has a number of excellent images, diagrams and figures. The National Oceanic and Atmospheric Administration also has lots of beautiful, weather-related diagrams. I particularly like the seasonal temperature change animation I made from their data.

How to Write Lab Reports

If I have seen further it is only by standing on the shoulders of giants
— Isaac Newton (1676) via Wikiquotes.

Science advances when scientists share their results. If someone tests an hypothesis and finds that it’s wrong, if they share their results, others won’t have to waste time by repeating the same experiments. If someone makes a breakthrough and publishes what they found, then scientists all around the world can use that information to develop new experiments and new applications of that newly discovered principle. Sharing is essential, so it’s important for students to learn how to share well.

Scientists usually communicate their results by giving presentations to other scientists at conferences and publishing articles in scientific journals. Often these presentations are full of the specialized language different types of scientists use with each other, so sometimes science journalists will translate that into regular English news articles that everyone can read and understand. The New York Times and the BBC have good science sections, but what they present comes first from scientists’ formal presentations and articles.

As a result, good presentations and good lab reports are a great way to start learning how to communicate like a scientist.

Lab Reports

A good way to figure out what should go into a lab report is to look at a published article. We have a bunch of copies of Science, which has research articles toward the middle and the back. Articles in Science tend to be brief and fairly dense because it’s one of the premiere journals, so the outlines are not as explicit as you’d find in other places; an Open Access Journal might provide better examples, especially if you’re looking them up online.

Based on our observations, we decided on the following parts for a good lab report:

  • Title: Be short, but unique to give a good idea of what your project is about. Since my classes seldom all do the same experiment, this is very useful. Answer the questions: What did you do? Why did you do it? and What did you find?
  • Authors: Who gets the credit for the work. Usually authors are listed by who did the most work first, but since everyone’s expected to work equally on their group projects you can choose some random or arbitrary order.
  • Abstract: A brief summary of the work, include: what is the problem you’re trying to solve; what you did to solve the problem; and what results you came up with. The abstract should contain all the spoilers.
  • Introduction: Go into some more detail about what the problem is you’re working on, and why it’s important. State your hypothesis and how you’re going to test it. Overview previous work your project is based on.
  • Procedure/Methods: Describe, in detail, what you did, what apparatus you used. Both words and diagrams are useful here.
  • Results: Tell us what you found. Graphs, charts and tables will be very useful here.
  • Figure 1. An example of a diagram. In this case labels have been placed on a photograph of the apparatus. Notice also the caption, which you are reading at this very moment, that goes with the figure.
  • Note on Figures: You should have figures, charts, diagrams and tables in your Procedure and Results sections, but you can have them anywhere they’re appropriate. Each figure needs to have a caption explaining the figure. A useful approach to figures and captions is to try to write them so that someone could understand the entire article by only looking at the figures and reading their captions. One of my students says that popular magazines, like People, are written that way (or at least that’s how they’re read).
  • Analysis and Discussion: To paraphrase a student, “Explain why you think you got those results.” Even if the results are unexpected, or especially if they’re unexpected, you need to explain them. This is also your chance to explain why all of your critics are wrong and you were right all along. If you do that though, it should be written in scientific, passive-aggressive language.
  • Conclusions: Summarize. In the abstract you’re telling them what you’re going to tell them. In the Introduction, Procedure, Results and Discussion sections you’re telling them. In the Conclusion, you’re telling them what you told them. Hopefully by that time they’ll have had enough chances to figure out what you were trying to tell them.
  • Figure 2. An example of a citation for a website.
  • References: Be sure to include a list of the references you used to do your work. This is how you give credit to the people who’s work you are building on. The Yale Library has an excellent page on citing sources. There are a different citation styles you can use but remember the purpose: to give credit where it’s due, and to allow others to be able to find those references easily. All citations should have the author, the date published (or when you accessed it if it is a website), the title, and a way to track down the work.

Note that scientific magazines, like Science and Nature, are very different from a popular magazine like People, for one thing, as was pointed out to me today, the pages don’t smell like perfume (instead they smell like science).

Updates

This paper, on how to bend a soccer ball, is a good example of a student research paper.