Tree of life

One of the easiest and most elegant ways of explaining the classification of organisms, the history of life on Earth, and the relationships between different organisms is to construct a phylogenetic tree. I have a great exercise I like that takes just some bits of colored paper, string, a poster board and some thumbtacks.

To start, each student writes the Latin domain, kingdom, phylum, class, order, family, genus and species names on separate pieces of colored paper. I hand out paper in stacks and give them strict instructions not to rearrange the order of the colors. Wikipedia is actually a great resource for this because they tend to be quite reliable on this if they have the specie you’re looking for (and they have quite a bit).

Students then tape the pieces of paper together on a string, species at the bottom, domain at the top, and, one by one, tack them to the poster board. As each student attaches their string to the board they say the common name of their organism and then recite the phylogeny.

When I did the exercise on Monday, I asked the students to use the organisms they’re working on for their independent research projects so everything started with the domain Eukaria. Interestingly enough, the Wikipedia pages don’t have the domain classification, probably because they think it’s too obvious, but I had a number of kids spend quite a bit of time trying to figure it out; they probably benefited from doing so I didn’t mind at all.

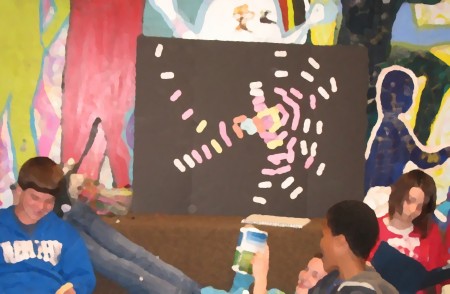
Constructing the phylogenetic tree.

Classifications that are the same are tacked one on top of the other, Eukaria on top of Eukaria, Mammalia on top of Mammalia and so on, so that, as students add their parts of the phylogeny, you begin to see the phylogenetic tree. We had insects, mammals, plants and reptiles, so there was quite a nice variety represented.

After about half a dozen lineages were on the board, the procedure began to get a bit repetitive, so I started to ask students to guess, based on the common name, where the next species to go on would diverge from the rest of the emerging tree. Students seemed to like this part of it. I had started with homo sapiens when I demonstrated the procedure so it was salutary for them to see how much the other organisms differed from humans.

When everything is tacked on, you end up with a cute picture of a the tree of life that makes a cute, but awfully real looking, phylogenetic tree. Students tack their pieces of paper on the string at different distances, some much closer together than others. As a result, the final tree is looks as though it shows the genetic divergence between the different groups. It a fake, but lends a sense of verisimilitude non the less.
Science of Cooking at the Exploratorium.

The Science of Cooking from the Exploratorium. (© The Exploratorium, www.exploratorium.edu)

The San Francisco Exploratorium has a wonderful website on the science of cooking.

They have a very nice bread science page that explains what happens with the yeast and gluten as you mix, kneed and bake bread. There is a set of recipes, including sourdough and Ethiopian Injera, that my students might want to try. They even have a great links page to pretty much everything you might want to know about the science of bread and how to manipulate it.

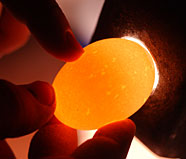
Checking eggs for cracks. (© The Exploratorium, www.exploratorium.edu)

I was also very interested in their pages on eggs, with the virtual tour of an organic egg farm, science of cooking, beating and mixing eggs, and a wonderful set of activities including removing the eggshell while keeping the membrane intact and demonstrating osmosis through the egg membrane.

And I haven’t even gotten into the pickles, meat and seasoning sections yet.

Salt on vegetables= Osmosis

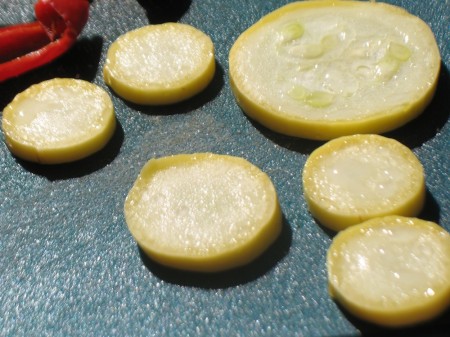
Water droplets extracted from slices of squash by a sprinkling of salt.

This year we have a lot of food in the curriculum. My objective is to make sure everything is edible and add as much more as I can.

Sprinkling salt on slices of squash creates the concentration gradient necessary for osmosis to suck the liquid out of the squash cells, creating little water droplets.

Now we batter them and fry them up to make tempura.

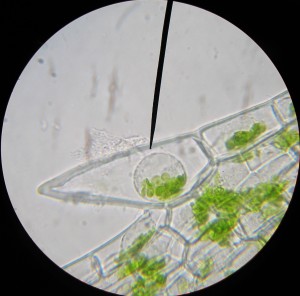
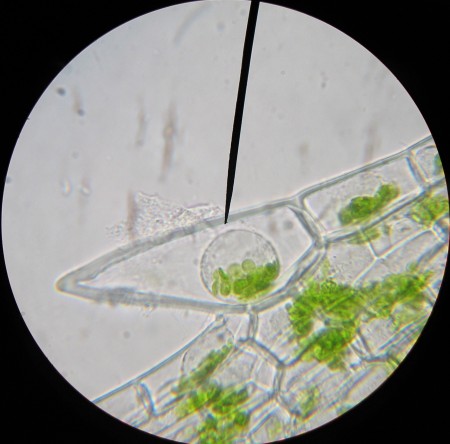
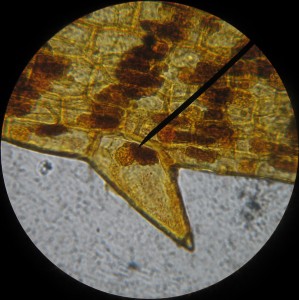
The effects of placing freshwater plant cells (Egeria densa) in salt water solution.

For comparison, the image adjacent shows what happens to the cells of a plant when the water leaves (osmosis under the microscope).

Mitosis dance

Anaphase.

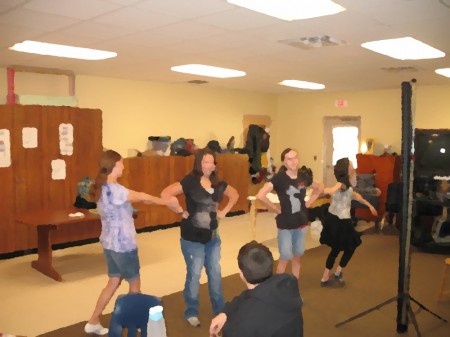
One way to represent the process of mitosis is through dance. One of my students suggested they do an interpretive dance for their natural world personal project. I think they were mostly kidding, but with a fair bit of encouragement they did end up doing it.

The dance is much more literal than it probably needs to be since I helped a bit with the final product. I still think it’s pretty useful though because it’s abstract enough that you have to know the mitosis process to figure out what’s going on. So much so, I had them perform it twice at the end of our synthesis discussion. The second time through I narrated it so the steps would be clear to everyone.

I think it might make for a good “spark the imagination” lesson if one was needed.

Right now the dance needs four people, two for the chromosomes and two for the centrioles, but it would be really neat if the entire class participated by representing the cell membrane.

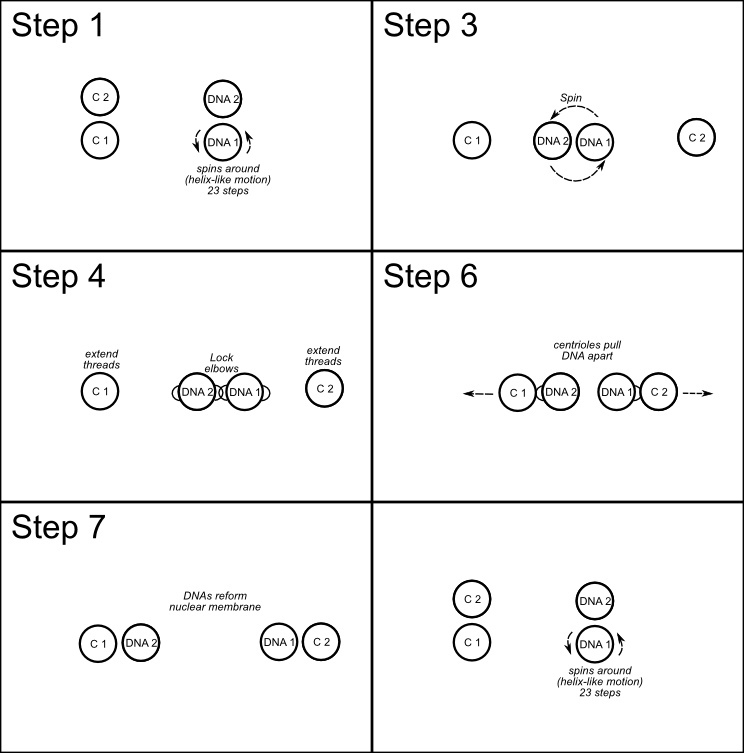
The diagram with the steps is: mitosis.svg. The instructions are below.

Steps

  1. The DNA (DNA 1 and DNA 2) stand facing the audience with DNA 2 hidden behind DNA 1 since the DNA have not yet duplicated.
    • The centrioles (C1 and C2) just stand there with C2 pretending not to be there.
    • DNA 1 mimes touching the nucleus walls while DNA 2 pretends not to be there.
    • DNA 1 dances the DNA helix, which probably involves lots of hand motions and spinning around taking 23 steps to represent the number of chromosomes in humans.
  2. Replicating: DNA 2 steps forward while C 2 moves around the two DNA to get to the other side
  3. The DNA join hands and spin around (because it’s fun to do, apparently)
  4. The DNA line up next to each other and lock elbows while the centrioles start extending their threads, which probably involves some type of waving hand motion.
  5. The centrioles move in, with their threads, and grab the open elbows.
  6. The centrioles pull the DNA apart.
  7. The two DNA act out the reforming of their nuclear membranes.
  8. The DNA-centriole pairs wave each other goodbye as they become separate cells. (This is where having the rest of the group as the cell membrane would be nice.)
Steps to the mitosis dance.

Luring vultures

The theme for this term’s Independent Research Project is Life on the Nature Trail, and my students are required to do some actual field work on the species or taxonomic group they’ve chosen to investigate. One students chose vultures because they saw one in the clearing just outside the trail and we’ve occasionally caught sight of one soaring over the campus.

He’s been trying to lure one in for a closer look.

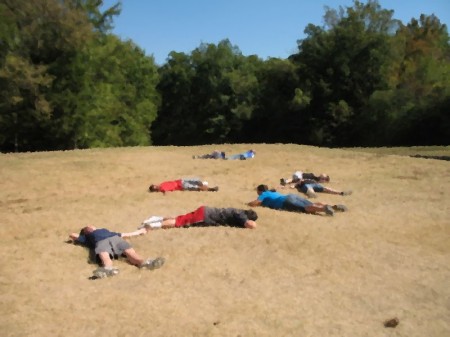
Since I’ve vetoed the idea of leaving fresh meat out, unless he finds professional to guide him, he’s asked for permission to lie out on the grass pretending to be carrion.

I let him take the camera (see above).

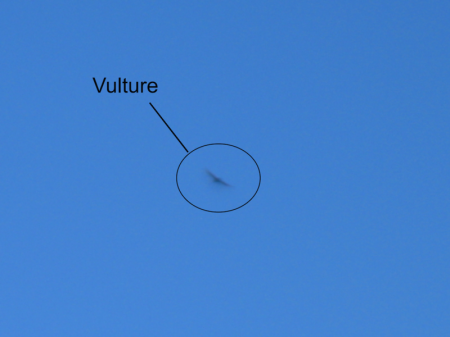
Today we saw one swoop past during P.E., so we took a couple minutes trying to lure vultures (see below).

Unfortunately, it did not seem to work.

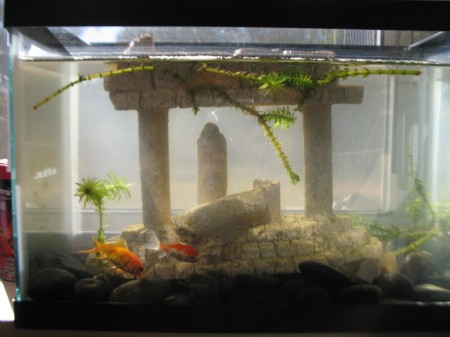
We have fish!

While we were working on the needs of living things a couple weeks ago, we acquired two fish; goldfish, fifteen cents apiece.

It was supposed to only be a mental exercise. If you put a water plant, Egeria densa in this case, in an enclosed jar and left it in the sunlight, the plant should use the carbon dioxide in the water to produce oxygen during photosynthesis. A similar jar kept in the dark would produce carbon dioxide and use oxygen as the plant respired.

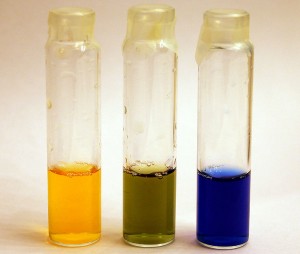
Bromothymol Blue pH indicator dye in an acidic, neutral, and alkaline solution (left to right). Image and caption from Wikipedia.

That was the practical part. Students measure the pH of the water before and after a day in the light and dark. The pH of the jar in the dark should go down as the added carbon dioxide makes the water slightly more acidic. Bromthymol blue solution in the water changes color very nicely within the pH range of this experiment, but, in a pinch, you can also use the pH color strips that are sold for testing aquarium water.

My students did the experiment, made their observations and came to conclusions. Then the lab activity asked them to think about what would happen if you put a fish into each of the jars, to see if students are able to extrapolate based on a well rounded knowledge of respiration and photosynthesis.

My students did the mental experiment, but the next day our two fish turned up, uninvited at least by me.

I’d anticipated something like this so I’d picked up a small fish tank at a yard sale over the summer. I’m not opposed to keeping animals in the classroom, as long as I don’t have to take care of them. Fortunately, since we’re studying life, keeping organisms and attending their needs is something the kids are learning and there is no better way to learn that via practice.

Our fish are surviving. The students have added some gravel and structures to provide habitat. The waterplants, still in there to provide oxygen, seem to be thriving despite some browsing by the goldfish.

One of the few rules is that anything added to the tank should have some purpose to help support the needs of the fish. I’m also encouraging the students to think of ways of maintaining conditions in the tank which would minimize their work. Hopefully some filter feeders, maybe small clams, and similar organisms will turn up and we can talk about ecology. I may have to nudge them in that direction though.

I’m not sure what the fish’s names are as there seems to be some controversy among the students. With a little luck they’ll survive until we start comparing religions. Two years ago we had a frog who passed away at just the right time for us to have to figure out what religion he/she was so we could perform last rites.

And no, I did not kill the frog.

Cells, cells, cells

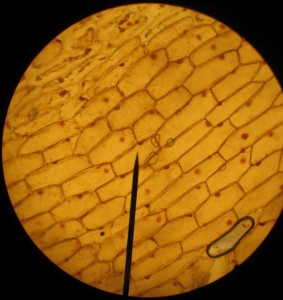
Onion cells stained with iodine. 100x magnification.

We spent the afternoon period on science. I’d given some individual microscopy lessons during the last immersion, where we looked at exciting protozoans moving around in pond water. This time they tried their hands at onion cells and staining with iodine, using a very nice and clear YouTube video posted below (kyliefansunited, 2008) as a reference.

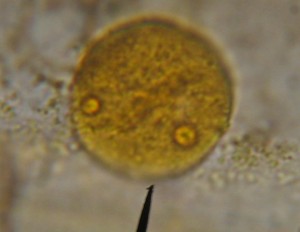
Nucleus of an onion cell stained with iodine and, for experimentation, Congo Red. 1000x magnification

The immersion oil had arrived in the mail earlier in the week so we got to try out the 100x oil lenses. We can now see structures inside the nucleus quite nicely.

Other things did not go so well. I’d written up, using the excellent recommendation of Anna Clarke, what I though was a neat exercise to look at the effect of osmosis on the cells of a waterplant, Egeria densa. The small group struggled with it, I think in large part because they were not quite prepared (had not done the background reading), and weren’t working very well together today. I’ll keep it on the schedule, but next time I’ll have to think hard on if it will be necessary to tweak the exercise.

Osmosis under the microscope

The effects of placing freshwater plant cells (Egeria densa) in salt water solution.

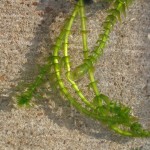
In a bit of a hurry, I swung by the pet store and picked up the aquatic water plant with the thinnest leaves I could find. It turned out to be Egeria densa, and while not the Elodea recommended by my expert contact Anna Clarke as a good subject for some microscope work, it seemed quite similar.

Egeria densa plants sitting in shallow water in the sun.

I needed the plant for an osmosis experiment. Dropping a little salt water on leaf cells of a freshwater plant should suck all the water out of the vacuoles and through the cell walls, potentially collapsing the cells (wouldn’t that be cool). I’d never done this before so I was quite curious to see what would actually happen.

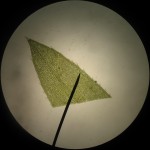
Leaf tip of Egeria densa. 40x magnification.

The leaves have multiple layers of cells, so it’s hard to distinguish much at the center of a freshly clipped leaf, especially at high magnification. But if you look at the cells at the edges of the leaves, you can see some really neat looking, spiky cells, for which, I’m willing to bet, biologists have some really cool, multisyllabic name.

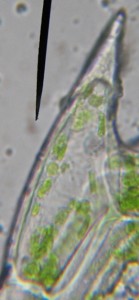
Spiky cell under 1000x magnification.

With a little bit of immersion oil and a 1000x objective, the spiky cells are good subjects for magnification: they’re a bit larger than their neighbors so they’re easier to see; their chloroplasts are distinct; and you can even make out the nucleus without staining.

Then I added the salt solution, and while the cell walls stayed strong, the cytoplasm collapsed into a little droplet at the center of the cell. The chloroplasts and the nucleus were all bundled together in this central blob (see the image at the top of the post). It’s quite the neat effect, though not exactly what I thought to see.

Spiky Egeria cells with iodine stain.

An interesting side note is that the cell nuclei show up very nicely with iodine stain, but the stain also discolors the chloroplasts.