Interim Planning Guide

Fjord Table Project

For interims we take a week-long break from regular classes where students design independent learning sessions and pursue the intense long-term projects. During the interim week, the schedule is divvied up into morning and afternoon sessions. Students can plan to use as many or as few of the sessions for their work, but most usually opt for doing one thing during the morning sessions, and another in the afternoon.

Despite it being my busiest time, it’s also my favorite part of the schedule because of all the interesting and creative work it spawns.

We start planning a least two weeks ahead and dedicate several extended morning meetings to getting everything lined up. This is the guide we’ve developed over the last year that seems to work pretty well.

1) Students’ initial proposals

Students propose projects with their learning objectives. Typically, each student submits two forms because most will not be doing a single project for the entire interim.

Interim Themes (Faculty Organizes)

Based on the students’ initial proposals, faculty organizes students into Interim Themes like Makerspace, Cooking, Robotics…

Student Calendar

Students Complete Interim Planning Calendar

  • Morning Meeting: Students organize into groups based on the Interim Themes and determine which and how many sessions they would like to do. 
  • They can decide to do all morning sessions for one theme, or dedicate each day to a different theme, or design a schedule of their choice. 
  • They should also seek to balance the number of students in each session, so there are not too few or too many students in one session.
    • They can try to recruit other students into their proposed sessions.
  • Each student gets a Planning calendar to fill in with what they’ll be doing for each of the week’s sessions.

Final Schedule (Faculty Organized)

  • Students are placed into the master schedule:
  • Faculty are assigned to supervise different sessions.

Students’ Final Planning

Students complete their proposals for each interim theme in which they’re involved. These may be different based on the theme, but there should be something for each theme. The objective is to make sure students will have the resources they need to accomplish their project: time, space, faculty guidance. For example.

  1. Cooking Planner (See above): Students specify what they will be cooking, when they will be cooking it, what ingredients they will need, and what equipment they will need. This allows us time to make sure we have all the equipment (cooktops etc.) necessary.
  2. Interim Trip Planning Form: Where they’re going, when they’re going, and confirmation if necessary that a visit is scheduled (for college visits for example).
  3. Makerspace Interim Planner: Students specify what projects they will be working on, what supplies and equipment they will need to use, and when they will be doing it.
  4. General Project Planning form: What project they will be working on, what equipment and supplies they need.

Student Summary (After the Interim)

  • Student Summary: Each student should fill out some type of form to summarize what they did and reflect on how it went, with the idea of figuring out how they or we can set things up to be better in the future.
    • For example: Makerspace students should do a post to the Makerspace Blog

    Debrief and Sharing

    The last hour of the interim week is set aside for debriefing and sharing. We try to include the lower school students in the sharing, which takes some time (there’s so much to see), so we regularly postpone the debrief to the next week’s morning meeting.
    The Wall (Mural)

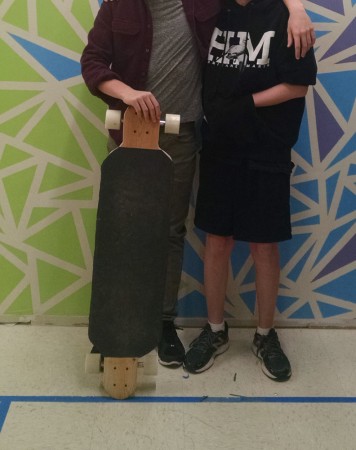
    Our seniors wanted to leave a mark, so after their initial application to paint the outside wall of the gym was turned down, they went with a mural on the inside–in our Makerspace.

    For this project, we wanted to create a mural on the basementnasium wall. First, we measured the wall and went to Home Depot to get enough paint, paint brushes, drop cloths, and tape. Then, after cleaning the wall with a damp cloth, we covered the wall with tape in a triangular pattern similar to one we found online. After that, we used pencil to mark each triangle with a letter corresponding to one of the six colors that we bought. It took us the majority of the project to paint 3-4 coats on each triangle, and on the last day we pulled it the tape and touched up any mistakes with white paint.

    Throughout this project, we found out that some people know how to paint, some people learned, and others didn’t learn. BUT IT WAS SO MUCH FUN!

    -Team: Elliott, Abby, John, Zoe, Mary, Annemarie, and Josiah

    -Abby R.

    Longboard

    Longboard built during the interim.
    Longboard built during the interim.
    Finishing came afterwards.

    For my makerspace project I made a longboard. What went well with the board was the wheels and trucks, it was a simple hole in the wood and screwing the trucks almost no measuring on my part. What didn’t go so well was the measuring and cutting of the board, it took me a full day to get all the measurements exact and even then they didn’t come out so good. What I would do next time is get a cnc machine so it does the measuring and gets the cuts exact every time. We could mass produce longboards with ease. If i did it again without a cnc machine i would get the measurements beforehand and then it would make measuring a lot easier.

    – Isaac L.

    Making Stools

    Upholstering a small stool.
    Upholstering a small stool.

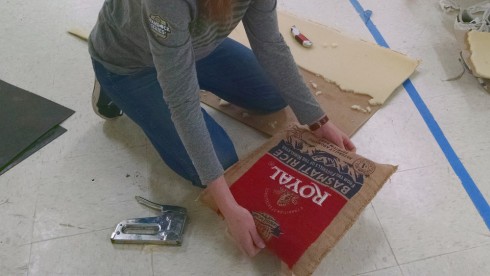
    After building our vegetable boxes, I had one of the students use some of the wood scraps to make some small stools. They make it easier for us to sit cross-legged on the floor. This last interim, as a small side project, another student chose to upholster them:

    During the interim, I worked on upholstering small wooden stools that Dr. Urbano had made. I worked in the basmentnasium and only used the materials available there. I used thin layers of foam from an old couch to pad the wooden seat; if the foam was too thin then I used two layers. I covered the foam and the seats’ edges with fabric Dr. Urbano brought: a burlap rice bag and old curtains. I attached the fabric to the bottom of the wooden seat with a staple gun; I attached it tight enough to keep the foam in place.

    – Mary R.

    Our Natural Bridge

    Crossing the bridge.
    Crossing the bridge.

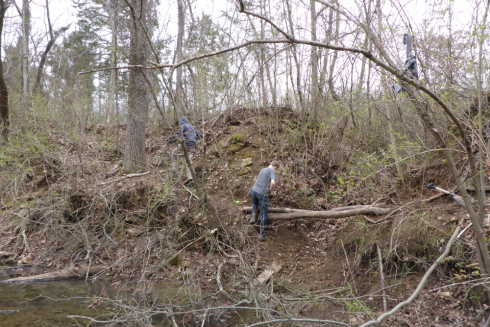
    Inspired by a video of a temporary bridge built out in the woods for mountain biking, my students wanted to try building a “natural” bridge with no fasteners–no screws, no nails–over a small ravine that feeds into our creek.

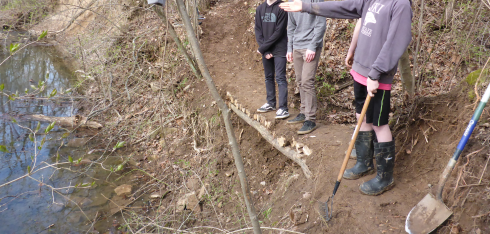
    The base of the bridge.
    The base of the bridge.

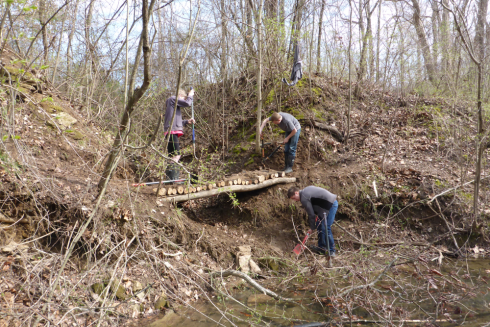
    We found a couple large fallen logs to cut into two 10 foot lengths for the basic structural support for the bridge. These were dug into the ground to anchor them on either side of the ravine. We then chopped a couple more logs into 2 foot sections to go across the structural logs. The dense mud from the banks of the creek was then packed onto the top to hold it all together.

    Packing mud.
    Packing mud.

    In the end, the bridge turned out to be pretty solid, and definitely usable.

    The bridge holds up.
    The bridge holds up.

    Building Bridges (Literally)

    Small, movable bridge.
    Small, movable bridge.

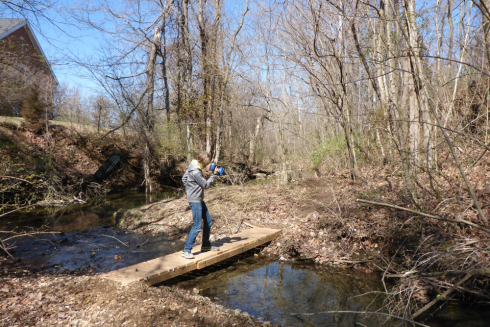
    My crew from the Gaga Ball pit decided to make a trail through the woods and across the creek. So they built two short (12 ft long) bridges to cross the creek itself, and a third, “natural” log bridge to cross a small ravine that runs into the creek and cuts across the trail.

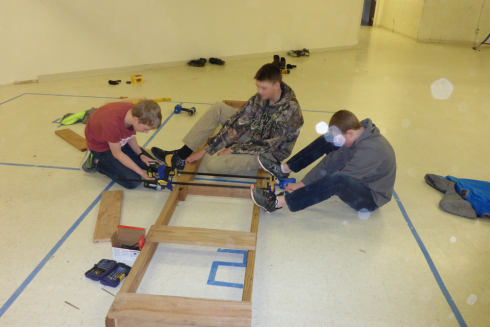
    The short bridges were made of overlapping 2×4’s for structure (held together by 2.75 inch structural screws), with 24 inch long, 1×6 planks across the top.

    Short bridge under construction.
    Short bridge under construction.

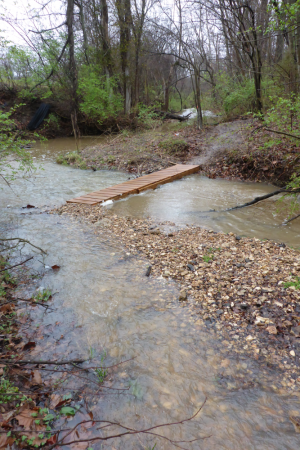
    The short bridges needed to be small and light enough to be moved when the creek rises, like it did today. I’ll attest that they can be moved, but not easily. They’re pretty heavy: it took a team of three or four middle schoolers to get it down to the creek, and it was hard going trying to drag it over to the side by myself this afternoon. Note to self: next time make sure the structural cross pieces are not at the very end of the bridge.

    The rising creek.
    The rising creek.