Beading DNA

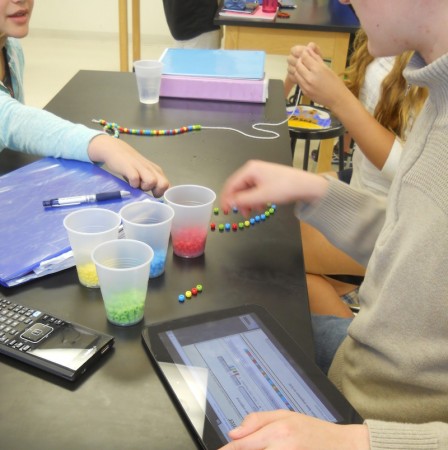
A small group of students use the DNA Writer website (on an iPad) to assemble a string of beads to represent a four genes on a piece of DNA.

Meiosis is a little hard to explain and follow, even with the videos to help, so I thought I’d try a more concrete activity — making DNA strands out of beads — to let students use their hands to follow through the process.

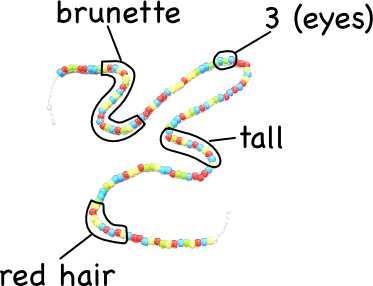
I started them off making a simulated human with four genes. They got to choose which genes, and they went with: hair color, number of eyes, height, and eye color. Then each group picked a different version of the gene (a different allele) for their person. Ravenclaw’s, for example, had brunette hair, three eyes, was tall, and had red eyes. Using the DNA Writer translation table , which maps letters and text to codons, they were then able to write out a string of DNA bases with their person’s information. I had them include start and stop codons to demarcate each gene’s location, and put some non-coding DNA in between the genes.

Ravenclaw’s Sequence

TAGGAATTGCATCACGATCTCCTATAGTAGCTATAACTAATCCCACCG
TTGGTGTAAACTCATATATGCTATGCATTGTAGACTATCATCTAAATG
GATTCGGACCATTCGTTGCACCTATACTAATCAGCATGCATC 

Since DNA is made up entirely of only four bases (A, C, T, and G), students could string together a different colored bead for each base to make a physical representation of the DNA strand. To make this a little easier, I adapted the DNA Writer to print out a color representation of the sequences as well. Most of the students used the color bars, but a few preferred to do their beading based off the original sequence only.
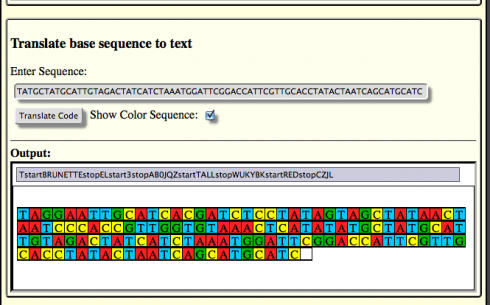
Ravenclaw’s DNA sequence color coded, and translated back to English (note the start and stop codons and the non-coding DNA in between each gene.

Just the beading took about 40 minutes, but the students were remarkable focused on it. Also, based on students’ questions while I was explaining what they had to do, the beading really helped clarify the difference between genes and alleles, and how DNA works.
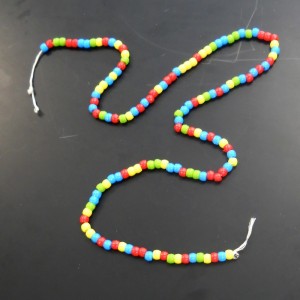
Ravenclaw’s bead strand.
Ravenclaw’s four genes on the DNA string annotated. Note that start and stop codons bracket each gene, and there is non-coding (junk) DNA between each gene.

Each of these DNA strands represents the half-sequence that can be found in a gamete. Next class, we’ll be using our DNA strands to simulate fertilization, mitosis and meiosis. Meiosis, should be most interesting, since it is going to require cutting and splicing the different strands (to simulate changing over), and following the different alleles as four new gametes are produced. This will, in turn, lead into our discussion of heredity.
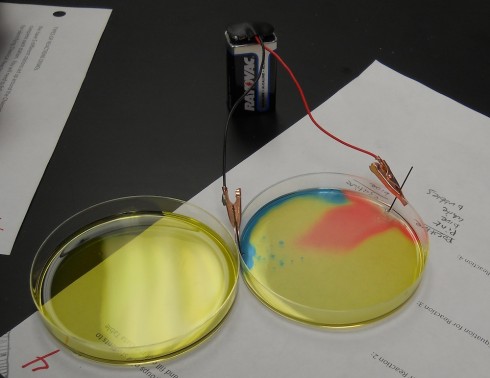
Electrolysis with Universal Indicator

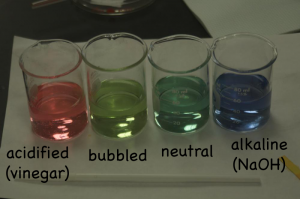
The universal pH indicator turns red for acids and blue for bases.

Ms. Wilson’s chemistry class did a beautiful electrolysis experiment by mixing a universal pH indicator into the salt solution. The indicator changes color based on how acidic or basic the solution is; we’ve used this behavior to show how blowing bubbles in water increases its acidity.

Changing colors of universal indicator show how blowing bubbles acidifies water (light green-second beaker) from neutral pH (dark green-third beaker) standard. For comparison, the first beaker (red) is acidified while the last beaker (blue) is made alkaline.

In this experiment, when electrodes (graphite pencil “leads”) are placed into salt (NaCl) water and connected to a battery, the sodium (Na) and chloride (Cl) split apart.

NaCl –> Na+ + Cl

The positive sodium ion (Na+) migrates toward the negative electrode, where it gets an electron and precipitates on the electrode as a plating. This is called electroplating and is done to give fake gold and silver jewelry a nice outward appearance.

Similarly, the water (H2O) also dissociates into hydrogen (H+) and hydroxide (OH) ions.

H2O –> H+ + OH

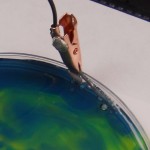
Hydrogen bubbles forming at the negative electrode.

The positive hydrogen ions (H+) go toward the negative electrode where they get an electron from the battery and are liberated as hydrogen gas (when they bond to another hydrogen you get H2 gas). However, releasing the positive hydrogen ion, leaves behind hydroxide ions in the area around the positive electrode.

The opposite happens at the positive electrode, with hydrogen ions left behind in the solution.

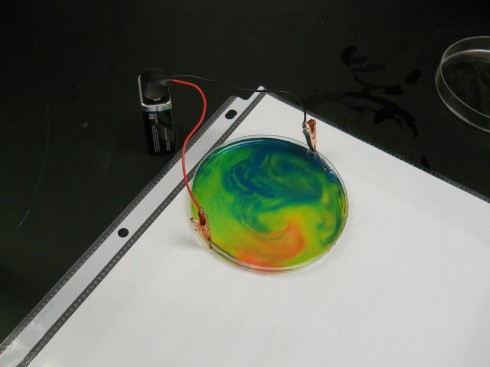
Since acidity is a measure of the excess of hydrogen ions in solution (H+), the left behind hydrogen ions make the solution near the positive electrode acidic, which turns the indicator solution red. The OH left near the negative electrode make the solution basic, which shows up as blue with the indicator.

If you gently shake the petri dish you end up with beautiful patterns like this:

Swirls.

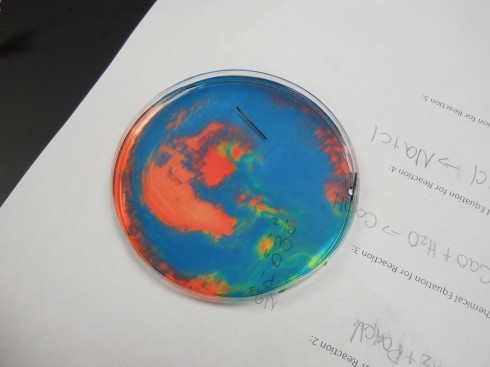
And this:

After the electrodes have been disconnected.

Note: if the solution is mixed completely the hydrogen and hydroxide ions react with each other to make water again, the solution neutralizes, and becomes uniform again.

Note 2: This is an experiment that I should also do in physics. It should be interesting for students to see this experiment from two different perspectives to see how the subjects overlap.