Making Printed Circuit Boards (PCBs)

It turns out that it’s pretty easy (and relatively cheap) to design and order printed circuit boards (PCBs).
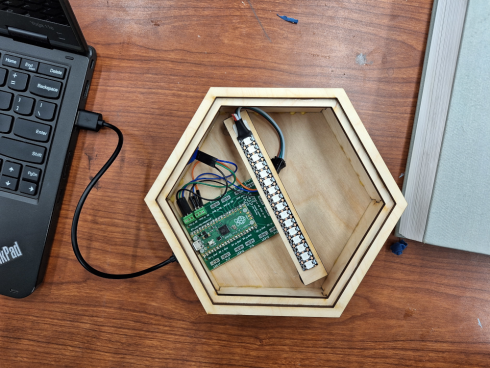
PCB wired up to a light box.

I’ve used Fritzing to design them. It’s simple to use with their PCB view window. They have a lot of parts available (such as the 3pin connectors), though I did have to get the fritzing part for the Raspberry Pi Pico off the Raspberry Pi website. Fritzing is very commonly used for circuit diagrams on the web, so it’s fairly easy to find parts you’re looking for. The current version (>1.0) requires a small donation, but the older version (0.9+) is free, and I’ve used both successfully.

The board above is used to connect a Raspberry Pi Pico to pairs of LEDs and touch sensors. In this case only one pair is in use to make a light box that can be turned on and off by touching the sides.
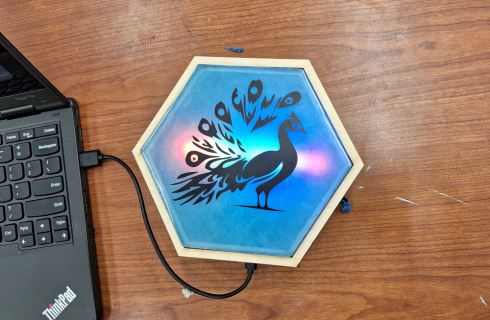
Light box in action.

There are a number of companies that will take the exported Gerber files and make you a PCB. In fact, there’s even an option within Fritzing to place an order. I’ve used PCBWay (this is my PCBWay referrer link that gets me a discount if you use it), which, as of this writing, costs about $5 for a batch of 5 PCBs (that’s the minimum order), plus about $10 for 15 day shipping to the US. The only change I made to their standard settings is to use the Lead-free solder.
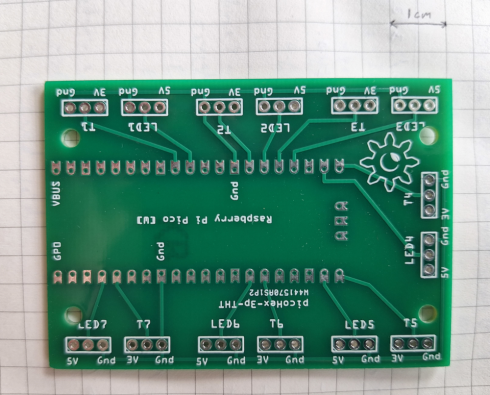
Image of PCB.
One of my first PCBs. It makes it easier to connect a Raspberry Pi Pico to a series of touch sensor and LED pairs. I messed this one up by not using the official raspberrypi.com part and not realizing that the one I chose did not have the holes drilled all the way through the board.

I’d like to have my physics and/or computer science students design and make their own starting next year.
Bright and Shiny Things: Programming with LED’s

Teaching programming using the LED light strips is going much better than expected. I tried it with the 9th grade Algebra class during our weekly programming session using a set of coding lessons I put together. I went so well that though we started by having everyone (about 10 kids) share two LED strips, by the end of the year I had three students from that class build their own.

Student built LED strip.
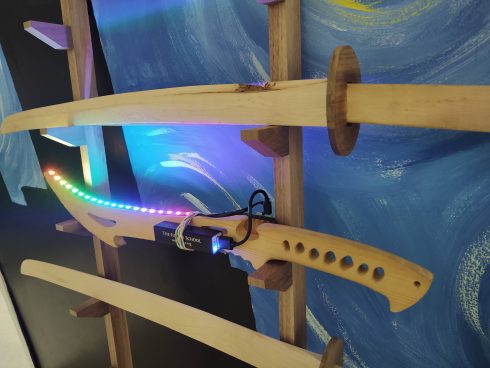
Student’s LED strip on a sword. The battery can power it for at least 15 minutes.

The coding lessons are still a work in progress, but it has them learn the basics by running some of the test programs, then then explore sequences using for loops. There are a lot of directions to branch off after the for loops. I’ve had some of my Algebra II students make static patterns using linear and exponential functions, while a couple of the kids in my programming class used different functions to make dynamic lighting patterns; our hydroponic system (see here and here) now has a neat LED indicator that runs different sequences depending on if the pumps are running or not.

Some of the students who built their LED strips in the Makerspace posted about their projects: LED Thingy and LED Light Strip Project. The process (rpi-led-strip) is not too hard but required them to be able to do a little physical computing (with Raspberry Pi’s), use ssh and terminal commands (terminal instructions), and then run and write python programs.

Raspberry Pi that controls one of the LED strips from a student’s project.

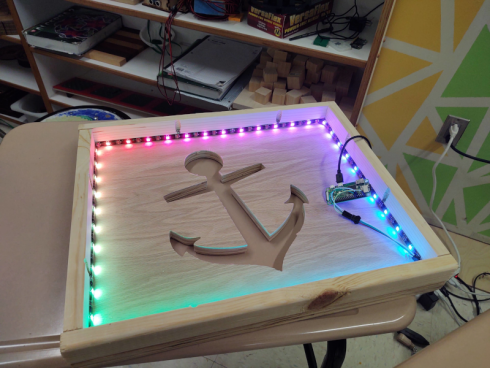
Since the setup uses the same GitHub repository (rpi-led-strip) it’s also easy to update some of our existing projects like the Wall Anchor.

Wall anchor project.

I am amazed at how much the students have engaged with what are, ultimately, very simple systems (a Raspberry Pi and a strip of 20 lights), and I’m really excited to see where it takes us.

LED Light Strip with Pi Zero

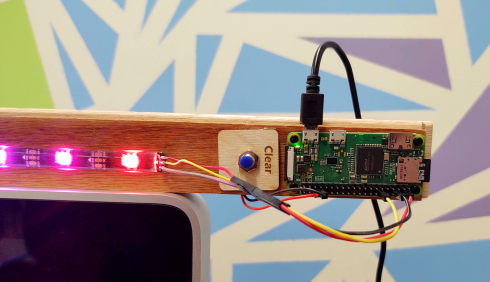
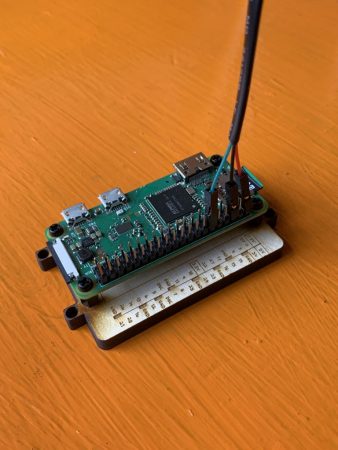
Raspberry Pi Zero controlling a LED strip, with a hardwired clear button.

I wanted to set up a small (20 LEDs) light strip using a Raspberry Pi Zero, so students could learn how to remotely log in to a device, work with the Linux command line, run python programs, and get visible, real feedback on their progress.

Instructions and code are in the Github rpi-led-strip repository.

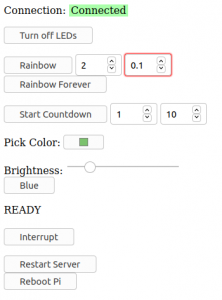
Web control for the LED strip.

The repository also has instructions and code for setting up a local server on the Pi so you can control the LED strip via a webpage. Students working on their own LED projects in the Makerspace will appreciate this.

The main idea here was to make the project as simple as possible. The web page is basic with minimal styling, so it should be easy to edit, but I do test out some of the newer HTML input elements, like the color picker. The README in the repository also includes instructions on how to, step by step, add components to the webpage to control the Pi: the “Blue” button is used as the example (it sets the entire strip to blue).

With only 20 LEDs you don’t need an external power supply so everything can be run through the Pi.

Adafruit’s CircuitPython NeoPixel library makes controlling the lights really easy. There are a few example programs in the rpi-led-strip/pyLED/ directory of the repository.

The full strip.

I’ve also included a physical button (it’s optional) that I’m using right now to just clear the LED strip. I may change it to just reboot the Pi, because I anticipate that things will get interesting when I have an entire class trying to connect to one or two devices. So far, I’ve had a small group of four students try this with some success.