Electricity and Magnetism Experiments

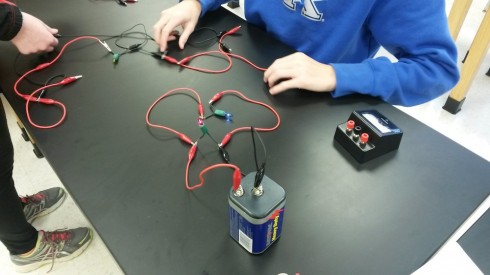
Building bulbs into parallel circuits.

Last week, my middle schoolers did a set of experiments on electricity and magnetism. They answered the questions:

  • How does the voltage across each light bulb change as you add more and more bulbs to a parallel circuit?
  • How does the voltage across each light bulb change as you add more and more bulbs to a series circuit?
  • How does the number of coils of wire wrapped around a nail affect it’s magnetism (as measured by the number of paperclips it can pick up)?
  • How does the amount of salt mixed into water affect its conductivity?
An electromagnetic nail lifts two paperclips.
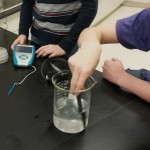
Students measure the conductivity of a salt water solution.

Each question is designed so that students have something to measure and will be able to use those measurements to make predictions. For example, once they’ve measured the voltage across four bulbs in series, they should be able to predict the voltage across the bulbs in a series of ten.

Some of the experiments, like the nail electromagnet, should have simple linear trends, with students choosing the advanced option having to find an equation to fit their data for the predictions. And I’ll challenge the students in Algebra II to find the equations for the inverse relationships–I’ve already asked their math teacher (Mr. Schmidt) to help them out if they need it.

This has also provided the opportunity for them to apply what they’ve just learned about drawing circuit diagrams (we use this set of symbols).
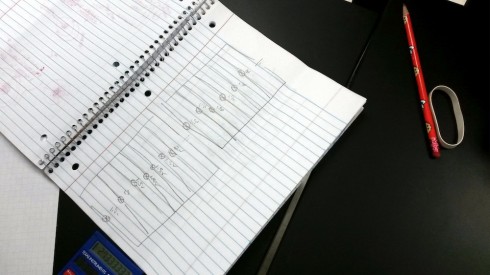
Circuit diagrams of bulbs in parallel. The voltage difference across each bulb is also noted.

Measuring Momentum

I had one of my middle school student groups try a conservation of momentum experiment that, while they made it out very well in the end, did not do a good job of conserving momentum.

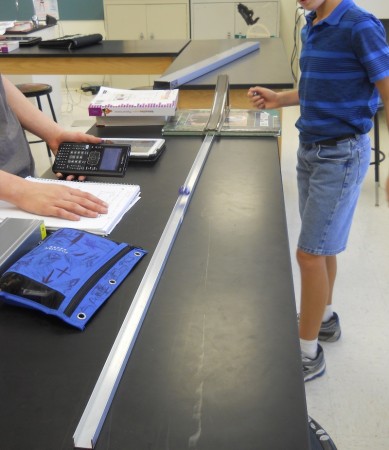
A marble moves along a track as students measure its velocity.

The students rolled a marble down a ramp by itself and measured its velocity across a horizontal track. The velocity measurement let them calculate the marble’s momentum across the track since they’d measured the mass of the marble before rolling it down the ramp:

momentum = mass x velocity

Note that since mass was measured in grams (g) and velocity in centimeters per second (cm/s), their units of momentum were gram-centimeters per second (g cm/s).

That was the easy part.

Next they put a second marble at the bottom of the ramp as a target, so the first marble would hit it and redistribute the momentum.

Momentum-apparatus

Because it was a collision between two marbles, there was no easy way to make the collision sticky, so they ended up with two marbles moving off at different speeds. Measuring the speeds of the two marbles at the same time was tricky, but they got it done.

Finally, they could calculate the momentum of the two marbles at the end, and the combined momentum should have been equal to the momentum of the one marble from before if momentum had been conserved.

When they did the math, the marbles after collision had about 80% of the momentum of the single marble. This difference allowed them to explain, in their presentation, that momentum was not completely conserved — and in real life it almost never is — because some energy was lost in the collision. Fortunately, we’d already had the presentation on friction so the context of energy losses, and resistive forces could be incorporated into the discussion.

I suspect that some significant portion of the difference in momentum measured was due to the fact that they were using stopwatches to measure the time the marbles took to move between two markers on the track. I’d love to have a motion detector or photogates for this experiment.

Beading DNA

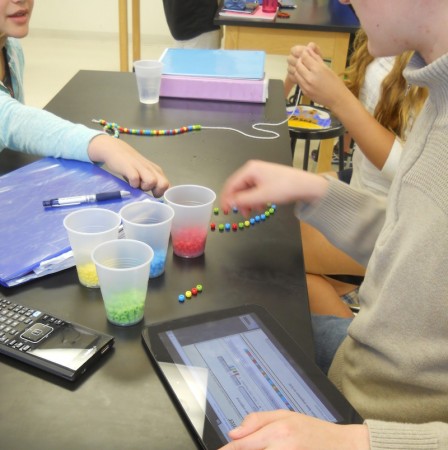
A small group of students use the DNA Writer website (on an iPad) to assemble a string of beads to represent a four genes on a piece of DNA.

Meiosis is a little hard to explain and follow, even with the videos to help, so I thought I’d try a more concrete activity — making DNA strands out of beads — to let students use their hands to follow through the process.

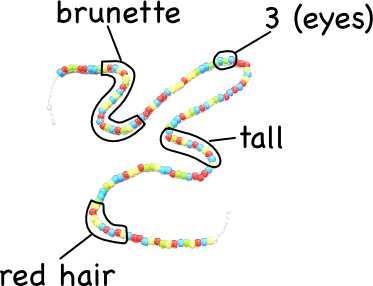
I started them off making a simulated human with four genes. They got to choose which genes, and they went with: hair color, number of eyes, height, and eye color. Then each group picked a different version of the gene (a different allele) for their person. Ravenclaw’s, for example, had brunette hair, three eyes, was tall, and had red eyes. Using the DNA Writer translation table , which maps letters and text to codons, they were then able to write out a string of DNA bases with their person’s information. I had them include start and stop codons to demarcate each gene’s location, and put some non-coding DNA in between the genes.

Ravenclaw’s Sequence

TAGGAATTGCATCACGATCTCCTATAGTAGCTATAACTAATCCCACCG
TTGGTGTAAACTCATATATGCTATGCATTGTAGACTATCATCTAAATG
GATTCGGACCATTCGTTGCACCTATACTAATCAGCATGCATC 

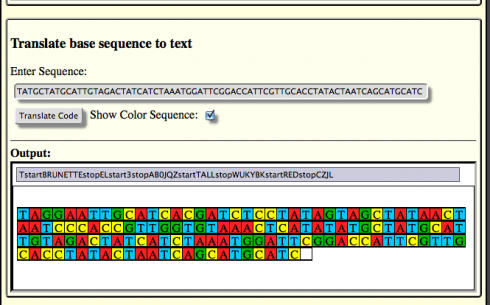
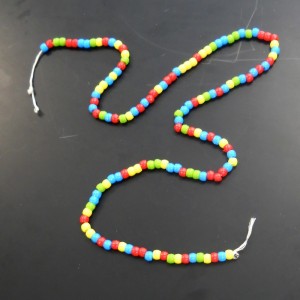
Since DNA is made up entirely of only four bases (A, C, T, and G), students could string together a different colored bead for each base to make a physical representation of the DNA strand. To make this a little easier, I adapted the DNA Writer to print out a color representation of the sequences as well. Most of the students used the color bars, but a few preferred to do their beading based off the original sequence only.

Ravenclaw’s DNA sequence color coded, and translated back to English (note the start and stop codons and the non-coding DNA in between each gene.

Just the beading took about 40 minutes, but the students were remarkable focused on it. Also, based on students’ questions while I was explaining what they had to do, the beading really helped clarify the difference between genes and alleles, and how DNA works.

Ravenclaw’s bead strand.
Ravenclaw’s four genes on the DNA string annotated. Note that start and stop codons bracket each gene, and there is non-coding (junk) DNA between each gene.

Each of these DNA strands represents the half-sequence that can be found in a gamete. Next class, we’ll be using our DNA strands to simulate fertilization, mitosis and meiosis. Meiosis, should be most interesting, since it is going to require cutting and splicing the different strands (to simulate changing over), and following the different alleles as four new gametes are produced. This will, in turn, lead into our discussion of heredity.

Shrimp

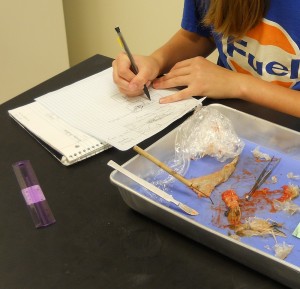
Drawing an external diagram of a jumbo shrimp.

Our middle-school dissections have moved on from hearts to whole organisms. This week: jumbo shrimp.

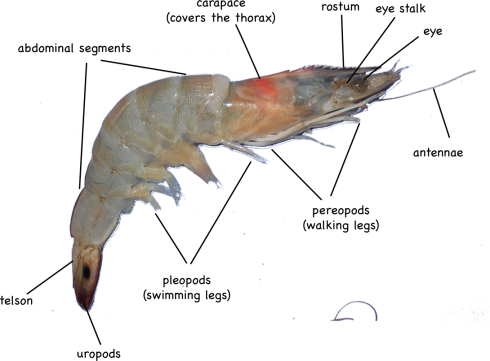
I particularly like these decapods because the external anatomy is simple but interesting, including: eyes on stalks; a segmented body; 5 pairs of swimming legs; 5 pairs of walking legs. The simple, clear layout make them a good subject for students to work on improving the accuracy of their full-scale drawings.

External anatomy of a shrimp.

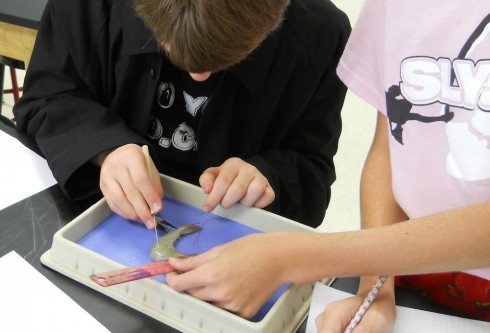
The internal anatomy is a bit harder to distinguish, however, since the organs are relatively small. Most of my students found it difficult to remove the carapace without smushing everything inside the thorax, which includes the stomach, heart, and digestive gland.

Dissecting the shrimp.

The abdominal segments were easy to slice through, on the other hand, and we were able to identify the hindgut (intestine), which runs the length of the back side, and the blueish-colored, nerve cord that is nearer the front (ventral) side.

Under the microscope, you could see little mineral grains in the contents of the gut. Although I did not manage to, I wanted to also mount the thin membrane beneath the carapace on a slide. If I had, we might have been able to see the chromatophores, “star- or amoeba-shaped pigment-containing organs capable of changing the color of the integument” (Fox, 2001).

References

Richard Fox (2001) has a good reference diagram and description of brown shrimp anatomy.

M. Tavares, has compiled some very detailed shrimp diagrams (pdf) (originally from Ptrez Farfante and Kensley, 1997)

Hearts

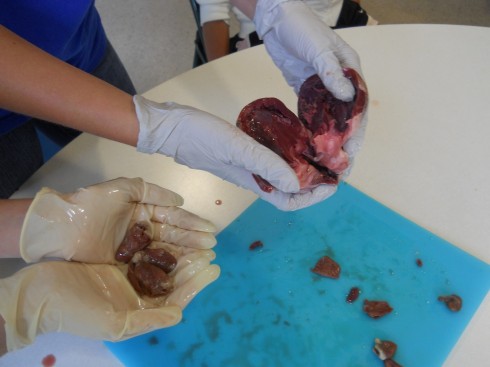
Chicken hearts (left) and a pig heart (right).

My middle school class has been looking at organ systems and we’ve started doing a few dissections. We compared chicken and pig hearts last week.

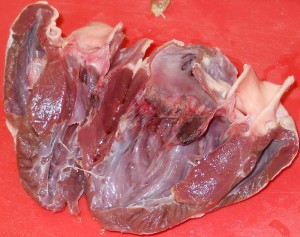
Pig heart.

Pig hearts are large and four-chambered like ours, so they should have matched up very well with the diagrams from the textbook. However, real life tends to be messy, which is one of the first lessons of dissection. It was tricky finding all the chambers, and identifying the valves, even when you knew what you’re supposed to be looking for. It is especially difficult, as one of my students noted, because everything isn’t color coded.

Chicken hearts are a bit trickier, because they’re a lot smaller. They also have four chambers, but the main chamber (the left ventricle) is so dominant that it’s easy to assume that there’s only the two (or even just one) chambers.

One student’s interesting observation was that the pig heart was a lot more pliable than the chicken heart. My best guess was that the chicken heart is made of a tougher muscle — it’s denser and more elastic (in that it rebounds to its original shape faster) — because has more work to do: chicken heart rates can get up to 400 beats per minute (Swinn-Hanlon, 1998) compared to 70 beats per minute for the pig.

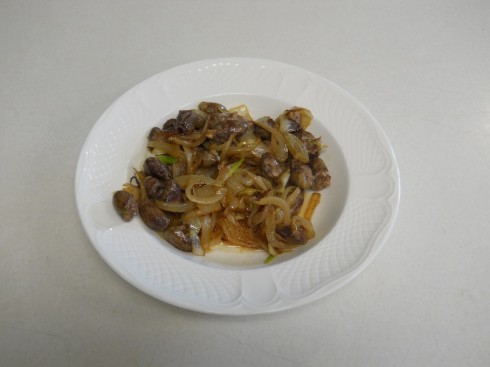
To get a better feel for the texture, and to engage our other senses in our observations on the hearts, at the end of the dissection, which was conducted in the dining room using kitchen utensils, I fried up some of the chicken hearts with onions for lunch.

Notes

There are a number of nice labs for heart dissections online:

The hearts were purchased at the Chinese supermarket, Seafood City. There seems to be a greater organ selection on the weekends.

The Digestive System

In his critique of research on the beneficial-bacteria storing role of the appendix, PZ Myers includes an excellent overview of the digestive system.

When you eat something, it first goes into the stomach, where it’s treated to an acid bath, some enzymes, and a lot of muscular churning to break it up. Then it’s squirted into the small intestine, where the acids are first neutralized and more enzymes are tossed onto the watery, mushy soup that the food has been rendered down into, called chyme. The primary job of the small intestine is to suck all the nutrients out of the chyme and pass them on to the circulatory system.

Once as much of the good stuff has been leeched out of the chyme as your system can do, the soup is passed on to the large intestine …. This stuff is still very watery — if you’ve ever experienced diarrhea, that’s what it is at this point. The primary job of the large intestine is to resorb water from the waste, condensing it down into the thick, pasty glop we all know and love as excrement. The large intestine is basically the sewage treatment plant here.

— Meyers, 2009: Evolution of the appendix? in ScienceBlogs.