Chasing Raindrops: A Hike in Natchez Trace State Park

In which we follow the path of a raindrop from the watershed’s divide to its estuary on the lake.

Droplets of water scintilate at the tips of pine needles. When they fall to the ground they continue their never-ending journey in the water cycle.

The most recent immersion. Coon Creek.

We stayed at Natchez Trace State Park and just a couple meters away from the villas is the head of the Oak Ridge Trail (detailed park map here).


View Natchez Trace Immersion Hike in a larger map

The first thing you notice is a small, rickety bridge whose main job is to keep your feet dry as you cross a very small stream. The stream is on its delta, so the ground is very soggy, and the channel is just about start its many bifurcations into distributaries that fan out and create the characteristic deltaic shape.

Delta and estuary of the small stream near the villas.

There’s a bright orange flocculate on the quieter parts of the stream bed. It’s the color of fresh rust, which leads me to suspect it’s some sort of iron precipitate.

It is quite easy to stick your finger into the red precipitate at the bottom of the stream.

Iron minerals in the sediments and bedrock of the watershed are dissolved by groundwater, but when that water discharges into the stream it becomes oxygenated as air mixes in. The dissolved iron reacts with the oxygen to create the fine orange precipitate. Sometimes, the chemical reaction is abiotic, other times it’s aided by bacteria (Kadlec and Wallace, 2009).

The bark has been chewed off the top half of this stick. The tooth marks are characteristic of beavers.

Past the small delta, the trail follows the lake as it curves around into another, much bigger estuary (see map above). We found much evidence of flora and fauna, including signs of beavers.

We even took the time to toss some sticks into the water to watch the waves. With a single stick, you can see the wave dissipate as it expands, much like I tried to model for the height of a tsunami. We also threw in multiple sticks to create interference patterns.

Observing interference patterns in waves.

The Oak Ridge Trail, which we followed, diverges from the somewhat longer Pin Oak Trail at the large estuary (which is marked on the map). The Pin Oak Trail takes you through some beautiful stands of conifers, offering the chance to talk about different ecological communities, but we did not have the time to see both trails.

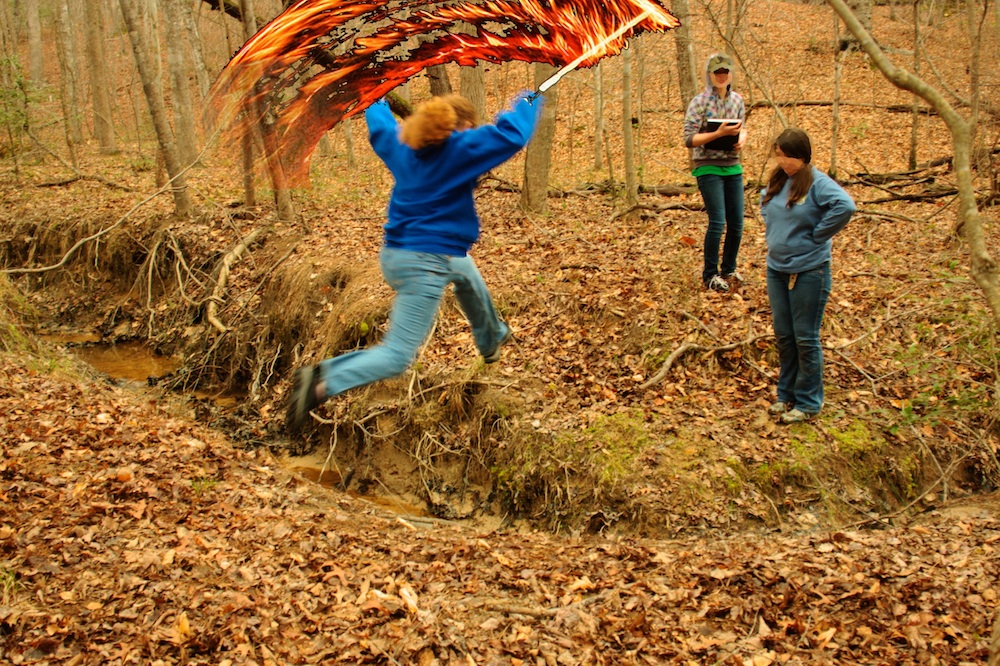
Instead, we followed the Oak Ridge Trail up the ridge (through one small stand of pines) until it met the road. The road is on the other side of the watershed divide. I emphasized the concept by having my students stand in a line across the divide and point in the direction of that a drop of water, rolling across the ground, would flow.

At the watershed divide.

Then I told them that we’d get back by following our fictitious water droplet off the ridge into the valley. And we did, traipsing through the leaf-carpeted woods.

Students imitating water droplets find a dry gully.

Of course there were no water droplets flowing across the surface. Unless its actively raining, water tends to sink down into the soil and flow through the ground until it gets to the bottom of the valley, where it emerges as springs. Even before you see the first spring, though, you can see the gullies carved by overland flow during storms.

Spring.

Following the small stream was quite enjoyable. It was small enough to jump across, and there were some places where the stream had bored short sections of tunnels beneath its bed.

The stream pipes beneath its bed. Jumping up and down over the pipe caused sediment to be expelled at the mouth of the tunnel.

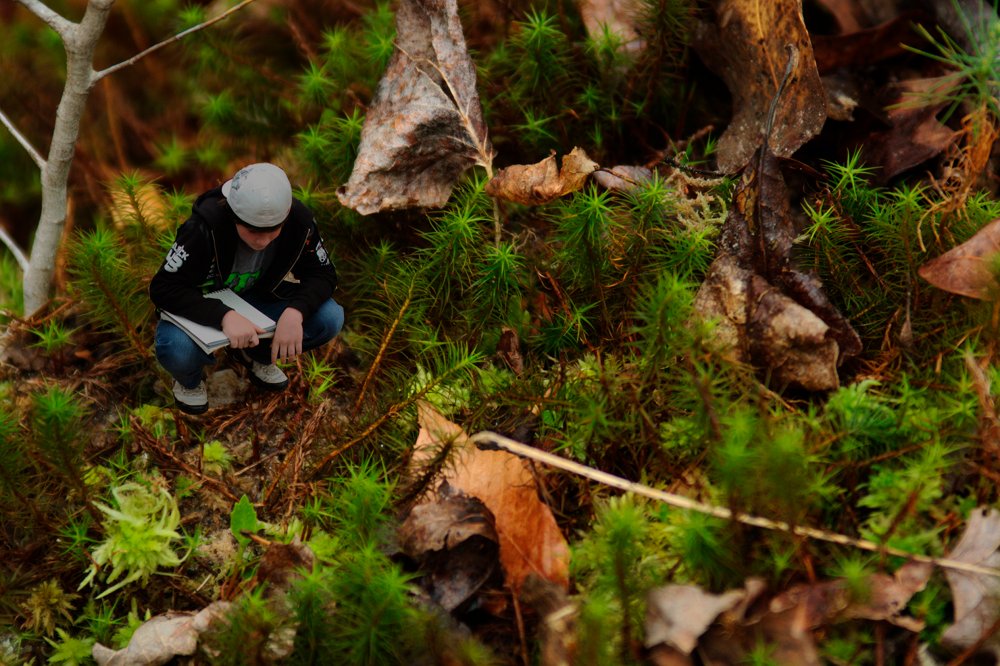
I took the time to observe the beautiful moss that maintained the banks of the stream. Students took the time to observe the environment.

Taking a break at the confluence of two streams.

Downstream the valley got wider and wider, and the stream cut deeper and deeper into the valley floor, but even the small stream sought to meander back and forth, creating beautiful little point bars and cut-banks.

A small, meandering channel. Note the sandy point bars on the inside of the bend, and the overhanging cut-banks on the outside of the curve.

As the stream approached its estuary it would stagnate in places. There, buried leaves and organic matter would decay under the sediment and water in anoxic conditions, rendering their oils and producing natural gas. We’re going to be talking about global warming and the carbon cycle next week so I was quite enthused when students pointed out the sheen of oils glistening on isolated pools of stagnant water.

The breakdown of buried organic matter produces gas and oils that are less dense than water.

Finally, we returned to the estuary. It’s much larger than the first one we saw, and it’s flat, swampy with lots of distributaries, and chock full of the sediment and debris of the watershed above it.

View of the lake from the estuary. The red iron floc in the stream made for a beautiful contrast with the black of the decaying leaves. There is so much red precipitate that it is visible on the satellite image.

This less than three kilometer hike took the best part of two hours. But that’s pretty fast if you value your dawdling.

Salt and Sugar Under the Microscope

Sugar crystals under 40x magnification.

Salt and sugar crystals have wonderfully distinctive crystal forms. They might well be good subjects for introducing minerals, crystals and some of the more complex geometric solids.

Cube shaped salt crystals under 40x magnification.

The salt crystals are clearly cubic, even though some of the grains seem to be made up of overlapping cubes.

The atoms that make up salt's atomic lattice are arranged in a cubic shape, which results in the shape of the salt crystals. The smaller grey atoms are sodium (Na), and the larger green ones are chlorine (Cl).

Salt is an ionic compound, made of sodium and chloride atoms (NaCl). When a number of these molecules get together to form a crystal, they tend to arrange themselves in a cubic pattern. As a result, the salt crystals are also cubic. In fact, if you break a salt crystal, it will tend to break along the planes that are at the surfaces of the planes of the atomic lattice to create a nice, shiny crystal faces. Gem cutters use this fact to great effect when they shape diamonds and other precious stones.

Of course different crystals have different atomic arrangements. The difference is clear when you compare salt to sugar.

A single sugar crystal looks a bit like a fallen column.

Sugar crystals look a bit like hexagonal pillars that have fallen over. According to the Beet-sugar handbook (Asadi, 2007), sugar crystals actually have a monoclinic form, which could end up as asymmetric hexagonal pillars. Salt crystals, on the other hand, have the habit of forming cubes.

A Fish Anatomy Lesson

Proper respect for other living things requires us to minimize the waste we produce, and learn from the creatures we eat.

First off, three cheers for Viet Hoa, the Vietnamese food market on Cleveland Ave in Memphis. I’ve been searching for a source of fresh, uneviscerated, marine fish in this mid-continental city for quite a while, and I’ve finally found them. The market was the source of the subjects of an excellent anatomy lesson, and a delicious dinner.

I’d grabbed three fish, and a few goodies, and packed them on ice on the day before our trip. The large red snapper was a little pricey because it was fairly big, but I knew it would be quite tasty and I was hoping the internal organs would be big and clearly visible. The milk fish was an unknown, but it was big and cheap so worth experimenting on. The last fish was the smallest, and I’m not quite sure what kind it is, except that it’s marine. I’d tried one at home the previous week and found that while it had an excellent taste, the internal bits were on the small side.

Red Snapper

On the first night of the immersion I started with the biggest fish, the red snapper, with everyone around the table. I’m happy to say that all my students were there for the lesson, facing the table, even the more vegetarian minded. I’ve always believed that there is a certain, necessary, ethic to knowing where your food comes from, and what went into preparing it for you. If you’re going to eat meat, you should be able to spare a moment to think about the animal.

Small intestines are very long (and stretchy).

The digestive system was the easiest to identify and trace. The mouth and anus are pretty obvious on the outside. After cutting through the skin of the belly, you can follow the intestines from the anus all the way to the stomach. The intestines are quite long.

Shrimp-like stomach contents.

We found two partially digested, shrimp-like creatures in the stomach of the red snapper.

From the other end of the digestive system, once you get all the contents out of the body cavity, you can stick a probe through the mouth (watch out for sharp teeth) down through the esophagus to the stomach.

Pulling back the gills, you can see all the way through to the mouth. One student noticed how bright red the gills were, so we talked about oxygenation of blood and compared the fish’s gills to the human respiratory system.

The fish's respiratory system.

Judging from the fish anatomy diagram on the La Crosse Fish Health Center website, we found the air bladder (tucked in the center right next to the spine), the liver, the kidneys, and probably the heart. We pulled them out and photographed them.

Organs from the red snapper.

Baked Fish Recipe

Finally, I laid the fish on a bed of thinly sliced onions, surrounded it with wedges of tomato (seeded), covered it with lemon slices, dribbled a tablespoon of olive oil on top, and forgot to add the cup of white wine (which we did not seem to have on hand for some reason) and the bay leaf. It was a big fish so we ended up baking it for about 40 minutes at 400 degrees Fahrenheit.

Then we ate it. I say we, but it really was just a couple of students and myself who did most of the eating, although I believe I convinced everyone to at least try it. Of the more serious students of anatomy, the eyeballs were highly prized; with only three fish we did not have enough to go around.

Dinner is served.

By the time we were done with dinner the skeletal system was very nicely exposed.

The Other Fish

Opening the body cavity of the Milk fish.

A couple of my students did the honors of cleaning the other two fish. With its large organs, the milk fish was an excellent subject for dissection, but it was not particularly palatable. We did however find the gall bladder.

The breached gall bladder is on the lower right of the picture.

Even the smallest fish proved a worthwhile subject for the more patient student.

Up to the knuckles in fish.

Instead of eating the rather unappetizing, baked milk fish I combined it in a soup with some clams I’d picked up from Viet Hoa. I’d grabbed the clams so we compare modern bivalve shells to the cretaceous ones we’d find at Coon Creek. A bit of boiling with a few herbs, made for an excellent broth the following night.

In Summary

Cleaning fish for an anatomy lesson worked very well. As we excavated each internal organ, we could talk about what it did, why the fish needed it, and what was its analogue in humans. And, in the end, they made for a couple excellent meals.

P.S. – From the Gulf Coast Research Lab’s Marine Education Center, here’s a reference image for a perch dissection.

Perch dissection reference.

Epic Rain-Garden

They're making dirt-angels, actually.

Talk about a long day! (“What an understatement,” she says.)

The 'before' picture.

We moved about 45 tons of sand, gravel and compost today, filling in the moat we dug last week. We were lucky enough to have the help of a backhoe for the digging, but all the filling in today was done by hand, with shovels and wheelbarrows.

Digging the moat.

Despite rumors about it being a first line of defense against the Cordovan barbarian hordes, the moat was actually intended to become a rain garden, which was designed by the Rhodes College Hydrogeology class to intercept some of the runoff slope that funnels water directly down toward the school during the intense rainfall that we get with our spring and fall mid-latitude cyclones.

So we had to get rid of the heavy, dense, silty-loam soil that is really slow to let water seep through, and makes it hard to grow anything on the Memphis side of the Mississippi River. The fine grained silt was blown over from the Mississippi River floodplain about 20,000 years ago when the ice-age glaciers were melting and all their ground up rock flour was being washed down the Mississippi. This type of wind-blown sediment is called loess. I like the sound of the word because if you stretch out the “oe” properly it does something to the back of your throat that feels distinctly German; however, if you ask someone from the deep south to pronounce it, you’ll hear the name of Clark Kent’s girlfriend.

Middleschooler pushing a wheelbarrow full of silty-loam.

The backhoe dug two trenches, each about 2 m wide, 6 m long, and about 60 cm deep, and piled the soil up next to the holes. Moving this stuff is not trivial. My middle-school students gave it a try on Friday afternoon and though they made a small dent, there is an awful lot more to do (my students also helped figure out how long it would take to finish pumping out Friday morning’s collected rainwater from the trenches).

Five cubic yards of pea gravel.

Then, on Saturday, with large piles of the old soil still sitting there, we replaced the impermeable loam with a fifty-fifty mix of sand and compost, underlain by five centimeters of pea-sized gravel on top of five centimeters of crushed limestone. This material was delivered by dump truck on Friday afternoon, while school was still in session. It was loud, exciting, and according to one member of the pre-school aged audience, “the best day ever!”

Enjoying the 'best day ever.'

I have to agree. It was kind-of exciting. Although for me, the bright, brown pile of pea gravel evoked fond memories of pyramids of powdered curry, saffron and tummeric sitting on the spice-seller’s stall in a market in Morocco .

Rhodes students slacking off (after lugging soil and gravel all day).

For others the pea gravel was a more tactile experience: snuggling into it, after a hard day’s work, appeared to be quite therapeutic.

Girl Scouts taking a well earned break.
Middle school students slacking off (after ...?).
Hauling silty clay.
Dr. Jen raking in the first of the gravel in the not yet drained pit.
Wagon team.
Team Z. on the top of the mound.
Gravel tossing.
It begins.
Mixing soil.
More mixing.
Grading.
The last of the pile. Job well done.

To be continued…

It’s 10 PM and the Moat is Empty

Full moat.

My students and I had a great chance to use the our recent geometry work when we figured out how long it would take to drain the new moat in front of the school.

It’s not really a moat, it’s going to be a flower bed that will soak up some of the runoff that tries to seep into the school’s doors every time a spring or fall thunderstorm sweeps through.

The hole was dug on Thursday evening and filled with rainwater with water, half a meter deep, by Friday morning’s rain. At least we know now that the new beds are in the right place to attract runoff.

But to fill the trenches with gravel, sand and soil, we needed to drain the water. With a small electrical pump it seemed like it would take forever; except that we could do the math.

The pump emptied water through a long hose that runs around the back of the building where the topography is lower. I sent two students with a pitcher and a timer (an iPod Touch actually) to get the flow rate.

They came back with a time of 18.9 seconds to fill 4 liters. I sent them back to take another measurement, and had them average the to numbers to get the more reliable value of 18.65 seconds.

Then one of the students got out the meter-stick and measured the depth of the moat at a few locations. The measurements ranged from 46 cm to about 36 cm and we guesstimated that we could model the moat as having two parts, both sloping. After measuring the length (~6 m) and width (2 m), we went inside to do the math.

Rough sketch of the volume of water in the moat.

With the help of two of my students who tend to take the advanced math option every cycle, we calculated the volume of water (in cm3) and the flow rate of the pumped water (0.2145 cm3/s). Then we could work out the time it would take to drain the water, which turned out to be a pretty large number of seconds. We converted to minutes and then hours. The final result was about 7 hours, which would mean that the pump would need to run until 10 pm.

And it did.

The power of math.

Art and Science: Flow Paths

Butterfly.

I’ve been helping my wife model the fluid flow through her apparatus, and she has some really neat results from some experiments where two chemicals react and block off the regular, symmetrical flow.

The streamlines look a bit like butterfly wings to me, so I modified the image a little. The original flow paths through the circular apparatus are below. I’m not sure which image I like better.

Flow paths through a circular cell. Mineral precipitates (not shown) are blocking flow through the middle.

P.S. The other thing I learned from this little exercise is how to write Scalable Vector Graphics (svg) files (W3C has an excellent reference). With svg’s, like other vector graphics formats, no matter how big you blow them up you never loose resolution like you would do with a regular, rasterized image. Unfortunately, I still have to figure out how to include the svg files on this blog, so these png images will have to do for now.

The Gimp: Photoshop’s Free Cousin

Observing moss.

For those of us too cheap to buy Photoshop, or who want to support the open-source movement, the Gimp is a great little image manipulation program. I use the “Oilify” option a lot to obscure students’ faces. Gimp’s not as sophisticated as Photoshop, but if you’re not heavily into graphic design, and are not too picky, it does a good job.

Jumping the creek. Be careful with the flaming sword; someone might get hurt. (Image created by Piper Ziebarth; photographer Lensyl Urbano).

As a Photoshop clone, Gimp shares many of its basic principles. It also comes from the ImageMagick command line tools, which I’ve used to automate image processing in the past.

Gimp itself is, however, pretty easy to learn. I’ve shown one student how to use it, and we’ll see if and how the knowledge propagates through the class.

Triplets? Clones? Or maybe robots?

How Microscopic Shells can tell us the History of the Earth’s Climate

Seeing the bigger picture.

Looking at the smear slides of Coon Creek Sediment Matrix got me thinking about just how important these little, microscopic shells have been for what we know about the Earth’s past climate. In fact, they provide the background knowledge that we have about the changes in climate that we’re seeing today.

Deep sea drilling vessel, JOIDES Resolution. Image via the National Science Foundation.

Back in the 1970’s the Deep Sea Drilling Project collected a lot of sediment cores from all around the world. The deeper you drill under the sea bed the older the sediments are, so micropaleontologists could look at how the organisms that lived in a certain area changed over time. Certain forams that could only live in warm oceans were found living far to the north. By combining all the information from all the sediment cores, they could construct paleo-geographic maps showing what the climate was like in the far past. It’s one of the reasons we know that the Jurassic climate was a lot warmer than today’s climate.

Then they invented mass spectrometers.

Mass specs can find the mass of individual atoms. Calcium carbonate has the chemical formula CaCO3. Water, as we should know by now, is H2O. They both have oxygen atoms, but not all oxygen atoms are equal; some are more equal. Actually, the mass of any atom is made up of the mass of the protons plus the mass of the neutrons in its nucleus. Now, by definition, any atom with eight protons is oxygen; however, while oxygen usually has eight neutrons, it sometimes has nine or even ten.

Your standard oxygen, with eight protons and eight neutrons has an atomic mass of sixteen, and is written as 16O or oxygen-16. Well, oxygen with ten neutrons is going to have a mass of eighteen (8p + 10n) and be called oxygen-18 (18O). These different versions of the same element are called isotopes.

Oxygen-18 has two more neutrons than the much more common oxygen-16. Note that both atoms have eight electrons, but their masses don't count because electrons are really small compared to the protons and neutrons which have about the same mass.
Water molecule with a molecular mass of 20.

What does this have to do with climate? Well a water molecule with two hydrogen atoms, each weighing one atomic mass unit, and one oxygen-16 atom will have a molecular mass of 18, while a water molecule with an oxygen-18 atom will have a mass of 20. When water evaporates from the oceans, the water with the lighter isotope will have an easier time going from liquid to a gas in the atmosphere.

So, during an ice-age for instance, lots of water evaporates from the oceans, falls on land as snow, and then gets trapped in the enormous glaciers that cover entire continents. Since the lighter water molecules evaporate easier from the oceans, they’re the ones that will end up falling as snow and being compressed into glacial ice. The water molecules left behind in the ocean will tend to have the heavier oxygen-18 isotopes. Since the forams use the ocean water as part of the process of creating their calcium carbonate shells, the oxygen from the water ends up in the carbonate (CO3) of the shells. Since the ocean water has extra oxygen-18s during an ice-age, then the shells will have extra oxygen-18 isotopes during an ice-age.

Ridge of ice from the continental glacier in Greenland. Glacial ice will have lighter isotopes than the oceans the water originally evaporated from.Image by Konrad Steffen from the U.S. Antarctic Survey.

Therefore, by measuring the amount of heavy oxygen-18 isotopes that are in a single shell, we can tell how large the glaciers were at the time that shell formed, and tell what the global climate was like.

Of course there are some interesting complexities to the story, but that’s the general idea of how the microscopic shells of long-dead plankton can tell us about the history of the Earth’s climate.