Learning the Periodic Table: A Prototype

My middle school class is about to cover some very basic chemistry so I’ve asked them to memorize the first 20 elements in their correct order on the periodic table. To help, I’ve put together this interactive exercise where they drag an icon of the element to its correct place on the table. It says the name of the element whenever you start dragging a tile with the symbol. It’s also timed so students can quantify and compare how good they are.
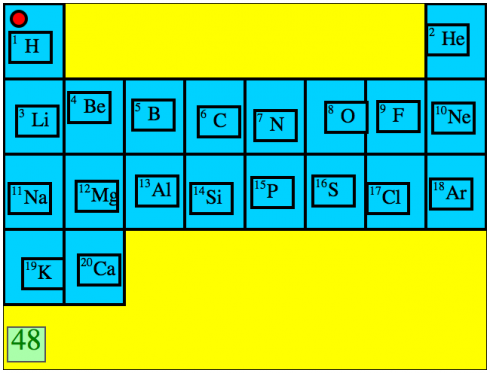
Prototype exercise for learning the first 20 elements of the periodic table.

In this first prototype the elements are presented in order, but I figure that additional levels could have:

  • The elements come up at random (done).
  • Have the elements come up by vertical column (group) (done).
  • Instead of tiles with the elements, have diagrams with their electron configuration.
  • The program say the name of the element and the student has to click on the right cell in the table.

This was put together using HTML5 and Javascript. KineticJS was particularly useful. It should, in theory, work in any browser (but I have only tested it in Firefox and Google Chrome) and on touch-screen tablets as well.
The Middle School Bank and Trust: A Personal Finance Simulation

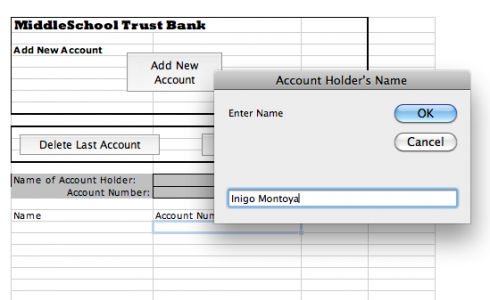
Excel program for running the Middle School Bank in the personal finance simulation. As you can see, I'm creating an account for my student, Inigo Montoya.

To get students a little more familiar with personal finance, we’re doing a little bank account simulation, and I created a little Excel program to make things a little easier.

It’s really created for the class where students can come up to the bank individually, and the banker/teacher can enter their name and print out their checks as they open their account.

Excel program for running the Middle School Bank in the personal finance simulation.

The front sheet of the spreadsheet (called the “Bank Account” sheet) has three buttons. The first, the “Add New Account” button, asks you to enter the student’s name and it assigns the student an account number, which is used on all the checks and deposit slips. The other two buttons let you delete the last account you entered, and reset the entire spreadsheet, respectively.

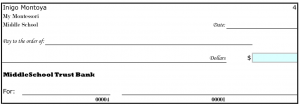
One of Inigo's checks (number 4).

Once you’ve created an account the spreadsheet updates the “Checks and Deposit Slips” sheet with the student’s name and account number. If you flip to that sheet you can print out eight checks and five deposit slips, which should be enough to get you through the simulation. The checks are numbered and have the student’s account number on them.

There are two other sheets. One is the “Checkbook Register”, which is generic and each student should get one, and the other is called “Customer Balances”. The latter is set up so you (the teacher) can enter all the deposits and withdrawals the students make, and keep track of it all on the same page.

Yes, it’s a bit of overkill, but I though that, since I was going through the effort, I should probably do a reasonable job. Besides, it gave me a chance to do a little Visual Basic programming to keep my hand in. While I teach programming using VPython (see this for example, but I’ll have to do a post about that sometime) you can do some very interesting things in Excel.

Note: I’ve updated the Excel file.