The last two weeks have been peak dandelion season here in eastern Missouri, so I’ve been experimenting with the culinary uses of the flowers.
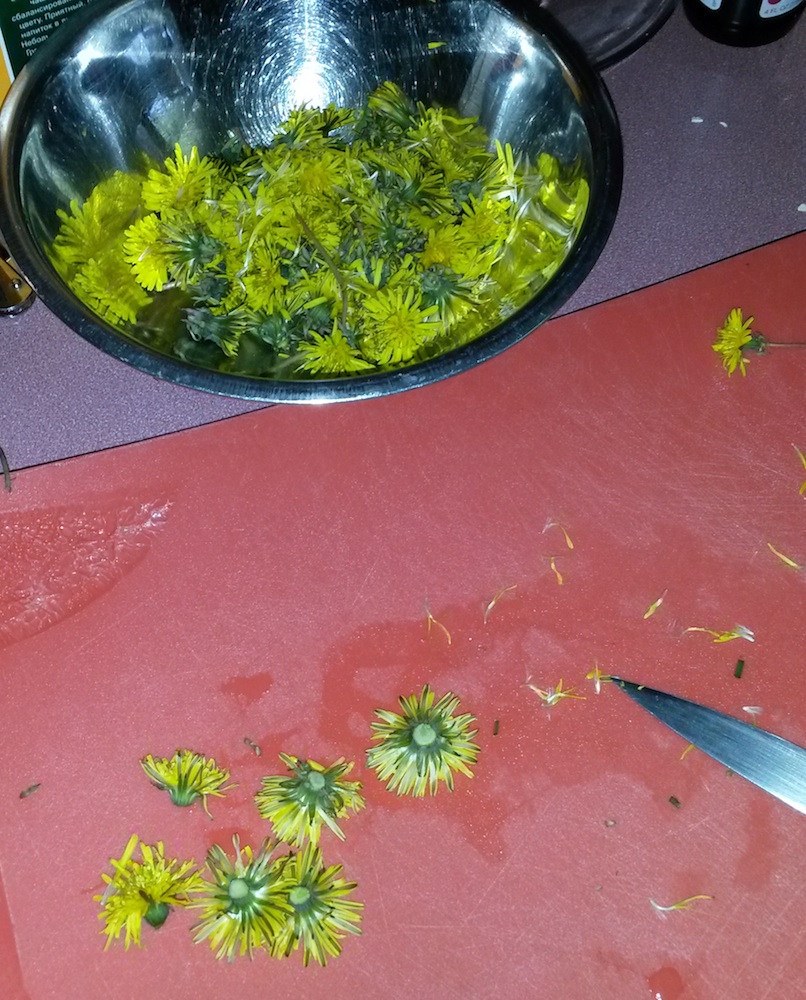
Dipped in batter and fried, the flower heads did not taste like much. Probably too much seasoning and too much batter. It was good advice to cut off as much of the green outer covering (the sepals) because they are bitter. However, if you cut too close to the base of the petals they fall out all over the place, which is good if you want to collect just the petals.
Dandelion flower fritter.
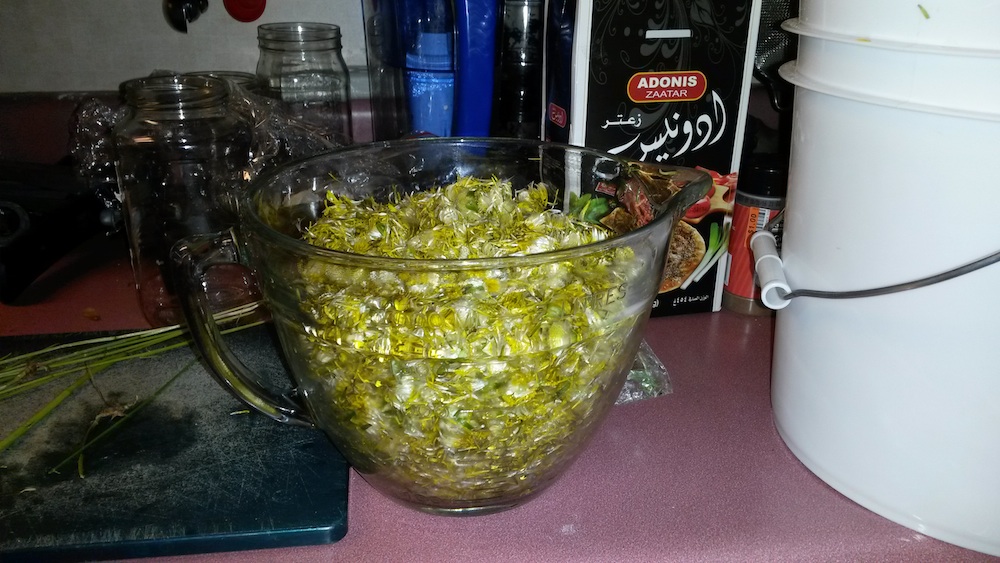
Collecting the petals only is great if you’re trying to make dandelion wine (I’m adapting the second recipe from here), except that I’m only using petals (2 quarts). I keep the same amount of sugar (3 lbs), oranges (4), water (1 gallon), and yeast (winemaker’s). This is the appropriate timing for this project since we just covered the differences between aerobic respiration and fermentation.
Two quarts (about 4 liters) of dandelion flowers for making a gallon of wine.
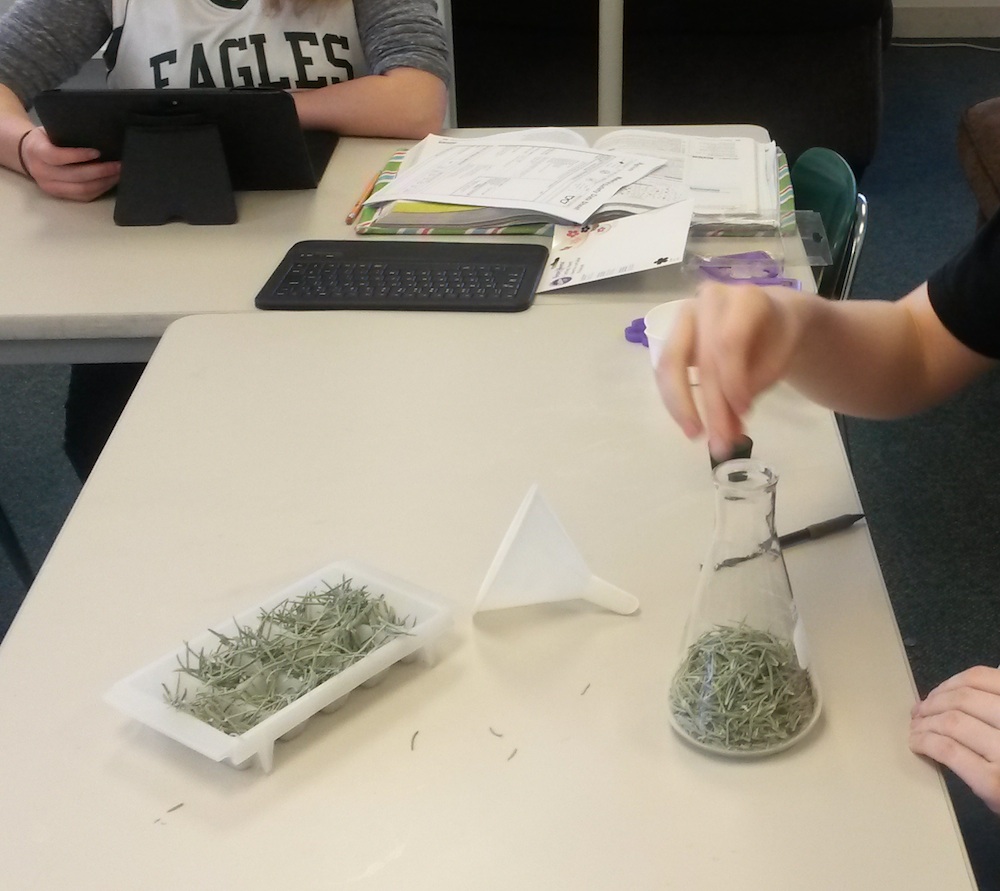
While steam distillation is the recommended method for extracting oils from herbs, we’re trying a quick an dirty method of simply heating up the lavender leaves in water (up to 40 ºC) and seeing if any of the oils float to the top. If this does not work, we’ll still have produced some lavender scented water for our soapmaking.
The lavender leaves came from the large bushes out by the preschool that the outddoor group trimmed for Ms. Dicker.
My chemistry students did a little experiment to investigate the effect of varying baking soda amounts on cookies. They did four batches of cookies based off of the recipe on the back of a bag of chocolate chips. The batches used:
No baking soda.
The amount of baking soda recommended by the recipe.
Double the baking soda.
The recommended amount of baking soda plus about 30 ml (1 tablespoon) of orange juice.
The last batch used orange juice for its acidity. We hypothesized that more baking soda, and more acidity, would increase the size of the cookies, making them fluffier. The hypothesis was supported by our rather tasty evidence.
Collecting data on cookie fluffiness and taste. Because of the smell emanating from the kitchen, there were no shortage of test subjects.
Although our focus was on the physical chemical reaction of the baking soda (sodium bicarbonate) and acid to produce the carbon dioxide bubbles that make the cookies rise, the making of the cookies also allowed us to talk a little about the food science behind the role of the flour. Specifically, we discussed the long chain gluten proteins that stretch out and trap the bubbles. We’ll talk a bit more about this next time when we make bread.
Scientific American has an article on “The Scientific Secret of Fluffy Pancakes” that nicely covers the chemistry of gluten. The article includes a recipe, but I tend to prefer buttermilk pancakes (Cook’s Illustrated has a great buttermilk pancake recipe that I find tastes even better if you leave out the sugar).
My wife has been experimenting with gluten-free pancakes and I’ve discovered that I like hers even better because of all the ground nuts it includes. However, in the gluten-free recipes, crucially, Xanthan gum is used to replace the gluten in capturing the carbon dioxide bubbles created by the baking powder reacting with the acid in the recipe. While the gluten is sensitive to how much the batter is mixed (stretching out the proteins), the quantity of Xanthan gum is more important in the gluten-free recipes.
In addition to eating the bulbs of the radishes, the leaves are also edible. I heartily endorse Clotilde Dusoulier’s Radish Leaf Pesto. The slight spiciness of the leaves gives it a delightful frisson.
Radish leaf pesto.
Pesto recipes are pretty flexible. I added some fresh cilantro from the garden, some frozen basil leaves, used ground almonds for the nut component, a bit of Manchego for the cheese, and doubled the garlic. I also added a little white wine to reduce the viscosity. I quite liked the end result — we had it on pasta — even if some others though it was a little too adventurous.
The radishes did well this year. Planted in containers on March 29th (in St. Louis, USA), they were harvested one month later. The short, early season means that they’re a workable crop for school. Students can plant, harvest, and consume them all within a semester.
The CDC’s Fruit and Vegetable of the Month website has a little history, some information about the varieties, nutritional information, recipes, and more information about radishes. The University of Illinois Extension also has information about planting and growing.
NutritionData.self.com has some very nice graphical representations of the nutritional value of the food (although their serving size is 1 cup of slices, which seems a bit much).
These sites, however, focus on the radish bulbs, and not on the fact that the leaves are edible. Radish Leaf Pesto is quite good.
Harvested radishes. Both the red bulbs and the green leaves are edible. You'll note that radishes also spot a long tap-root.
"Seasoning" a cast iron frying pan creates a non-stick coating. (Image by Evan-Amos via Wikipedia).
Back in the day, if you wanted a non-stick cooking skillet, your best option was to do it yourself by seasoning a cast metal pan. Sheryl Canter has an excellent post describing the science behind the “seasoning” process. The key is to bake on a little bit of oil to create a strong cross-linked polymer surface. This is a nice tie into our discussion of polymers and polymerization in the middle school science class; although I’m not sure how many of my students have actually seen a cast iron pan, or even know what cast iron is.
Normal polymers are long molecules made up of smaller molecules linked together, much like a paperclip chain.Cross-linked polymers are created when the long chained polymers are linked together by cross-links. It makes for a much sturdier molecule.
To season, you coat the pan with a thin layer of oil and bake it for a while (without anything in it). Baking releases free radicals from the metal that react with the oil to create a cross-linked polymer that’s really hard to break down or wear out, and prevent food from sticking to the pan. Different, cross linked polymers are used in car tires for their durability, but probably not for their lack of stickiness.
Apparently, linseed oil is the best seasoning agent, but it might be a bit hard to find.
Most non-stick, artificial surfaces, are also made of polymers of hydrocarbons, silicon oxides and other interesting chemicals.
Making a cross-linked polymer with borax and polyvinyl alcohol.