Steel is an alloy of iron and other elements in small amounts. The exact proportions of the small amounts of other elements can make the alloy stronger, more flexible, and/or more resistant to rusting among other things. Similar alloying is used to make aluminum stronger. You’ll often hear the saying, “Alloys are Stronger” (often used as an argument for more diversity). There is a lot of fascinating research and discoveries happening in the fields of metallurgical arts and sciences at the moment. However, YouTube user NurdRage demonstrates with some gallium and an aluminum can, alloys are not always stronger.
Tag: chemistry
Some People Just want to put Chemicals on Stuff to See it Burn
“We want to put chemicals on it and see what happens,” she said.
I was not quite sure how to respond. First of all, I didn’t know what “it” was. Secondly, I had no idea about what chemicals the three of them wanted to “put on it”. And thirdly, I was wondering why they even thought that students could just wander into the chemistry lab and get my permission to “put chemicals” on some random stuff, just to see what would happen.
For the last question, alas, I’m afraid to say that they may, perhaps, know me too well. However, given my visceral antipathy to inexact language — especially in a science lab where safety is always a concern — based on the first two questions, they don’t know me quite well enough.
An interrogation ensued.
“It” turned out to be two sad-looking pieces of dried apple. They weren’t dried when they’d been left in someone’s locker who knows how long ago, but they were pretty dessicated now.
The “chemicals”, on the other hand, they weren’t quite so sure about. Or at least they didn’t want to tell me right away. They may have had different ideas about what they wanted to see.
“We want to see it burn and smoke!” explained the second one happily. I didn’t have to express either skepticism or approbation verbally, my face responded automatically.
“We just want to see bubbles and stuff,” suggested the first one somewhat tentatively; eying my facial expression carefully.
The third one said nothing, but she tends to reticence. I looked at her inquiringly to give me a second to think.
That’s when I realized that they were all in chemistry together. They’ve been working with chemicals, studying different types of reactions for the last eight months, so they probably had at least some idea about what they were asking about.
The Montessori axiom is to follow the child, and here they were expressing an interest in chemistry. It was an ill-formed interest perhaps, but an interest non-the-less, so maybe there was something I could work with.
I needed a way to gauge just how serious they were about their project, and, at the same time, tie it back to what they’d been learning in class. Were they interested enough to puts some serious thought into it?
So I told them that, if they could tell me exactly what chemicals they wanted to use, and write the chemical equations to show what would happen, I’d let them do it.
They were on it.
The first thing was to figure out what was in the apples that could react. Well, the apples had come pre-sliced, and fresh in one of those small, clear, plastic bags. The first student, who was taking charge of the group, ducked out of the room to retrieve it from the garbage can across the hall.
I’d expected that the ingredient list to be very sparse. Ideally just the single word, “apples”, with maybe the type of apple listed if the packet labelers were feeling verbose. However, it turns out that those “fresh” slices needed something to keep them looking good and tasty. So these fresh apple slices appear to contain some amount of calcium carbonate. That was a chemical they knew.
Their first thought was a single replacement reaction. If they added potassium to it then the potassium would replace the calcium and they’d see something interesting. It took a few minutes, and a little nudging of the quiet one to help out with the charges, but eventually they wrote out and balanced the reaction:
2 K + CaCO3 –> K2CO3 + Ca
The problem is, I pointed out, there’s nothing in that reaction that would produce bubbles. I didn’t even want to bring up heat and the exothermic and endothermic reactions, nor the fact that potassium is a solid, as is the calcium carbonate, which would make getting them to react dramatically a little bit difficult. I didn’t even point out what would happen if the potassium came in contact with water (or even sodium), because I know Ms. Wilson is planning on doing that little demonstration in the near future.
So what reactions produce bubbles? This took some further thought. With a few dropped hints, they came up with acid-base reactions, particularly, the reaction between calcium carbonate and hydrochloric acid. I pretty much told them what the products would be, and, with a little more coaxing of the quiet one for help, they were able to balance the reaction.
CaCO3 + 2HCl–> CaCl2 + CO2 + H2O
Now they were finally good to go. Unfortunately, it was also time to go P.E.. And they’d managed to drop one of the apple pieces into a bucket of water that my calculus students had left lying around after their bottle draining experiment.
So I told them they could try it tomorrow. Unfortunately, tomorrow is the field trip, so they’ll have to do it the day after.
We’ll see how it goes.
Improvisational War

Fighting against a well armed military, the rebels in Syria have had to do a lot of improvisation. A basic knowledge of physics and chemistry has proven somewhat useful.
The Atlantic has a collection of photos of DIY (do it yourself) weapons, that includes catapults and sling-shots.

Sebastiano Tomada Piccolomini has a fascinating photo-essay in the New Republic showing the one item that members of one group of rebels considered as their most crucial weapon. These range from a radio, to a packet of cigarettes, to improvised grenades.
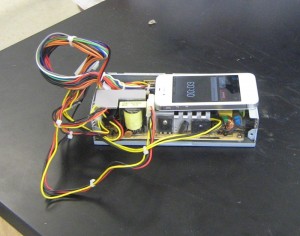
Finally, one of my students discovered that a cell phone and power-source from a computer can be made to look an awful lot like and improvised explosive device.
We are living in the future, but sometimes I wonder if it’s where we want to be.
Electrolysis with Universal Indicator
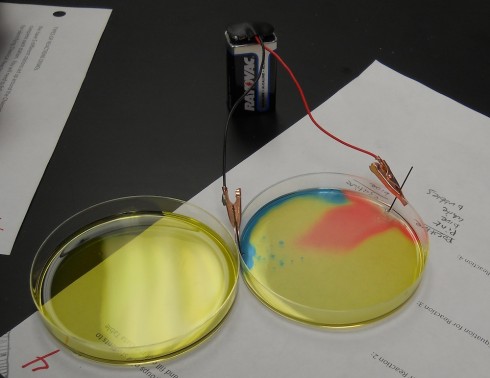
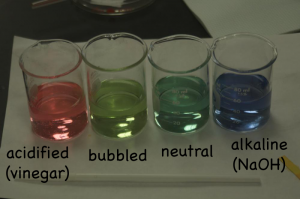
Ms. Wilson’s chemistry class did a beautiful electrolysis experiment by mixing a universal pH indicator into the salt solution. The indicator changes color based on how acidic or basic the solution is; we’ve used this behavior to show how blowing bubbles in water increases its acidity.
In this experiment, when electrodes (graphite pencil “leads”) are placed into salt (NaCl) water and connected to a battery, the sodium (Na) and chloride (Cl) split apart.
NaCl –> Na+ + Cl–
The positive sodium ion (Na+) migrates toward the negative electrode, where it gets an electron and precipitates on the electrode as a plating. This is called electroplating and is done to give fake gold and silver jewelry a nice outward appearance.
Similarly, the water (H2O) also dissociates into hydrogen (H+) and hydroxide (OH–) ions.
H2O –> H+ + OH–
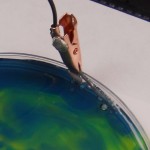
The positive hydrogen ions (H+) go toward the negative electrode where they get an electron from the battery and are liberated as hydrogen gas (when they bond to another hydrogen you get H2 gas). However, releasing the positive hydrogen ion, leaves behind hydroxide ions in the area around the positive electrode.
The opposite happens at the positive electrode, with hydrogen ions left behind in the solution.
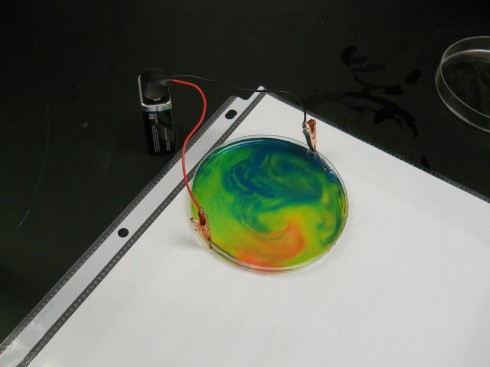
Since acidity is a measure of the excess of hydrogen ions in solution (H+), the left behind hydrogen ions make the solution near the positive electrode acidic, which turns the indicator solution red. The OH– left near the negative electrode make the solution basic, which shows up as blue with the indicator.
If you gently shake the petri dish you end up with beautiful patterns like this:
And this:
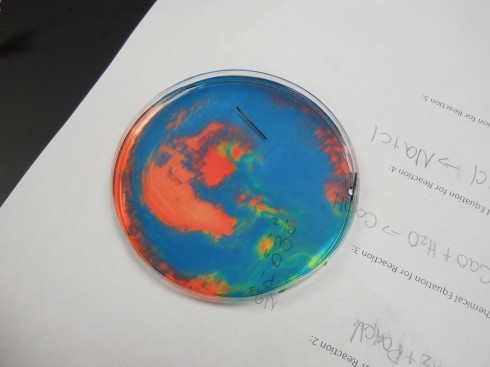
Note: if the solution is mixed completely the hydrogen and hydroxide ions react with each other to make water again, the solution neutralizes, and becomes uniform again.
Note 2: This is an experiment that I should also do in physics. It should be interesting for students to see this experiment from two different perspectives to see how the subjects overlap.
Nuclear vs. Chemical Energy
This curious video advocates for a new type of nuclear reactor (that runs on thorium) over traditional uranium reactors and chemical fuels. In doing so it gives a useful, but quick, explanation of how energy is produced from these sources.
Learning the Periodic Table: A Prototype
My middle school class is about to cover some very basic chemistry so I’ve asked them to memorize the first 20 elements in their correct order on the periodic table. To help, I’ve put together this interactive exercise where they drag an icon of the element to its correct place on the table. It says the name of the element whenever you start dragging a tile with the symbol. It’s also timed so students can quantify and compare how good they are.
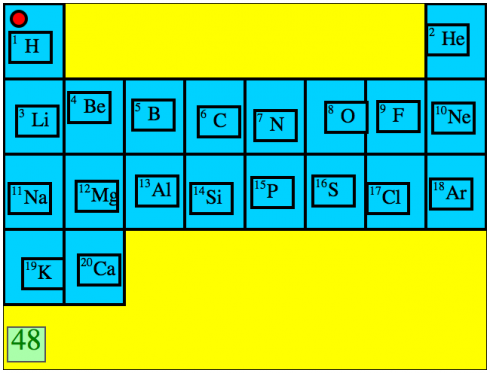
In this first prototype the elements are presented in order, but I figure that additional levels could have:
- The elements come up at random (done).
- Have the elements come up by vertical column (group) (done).
- Instead of tiles with the elements, have diagrams with their electron configuration.
- The program say the name of the element and the student has to click on the right cell in the table.
This was put together using HTML5 and Javascript. KineticJS was particularly useful. It should, in theory, work in any browser (but I have only tested it in Firefox and Google Chrome) and on touch-screen tablets as well.
Flame Tests
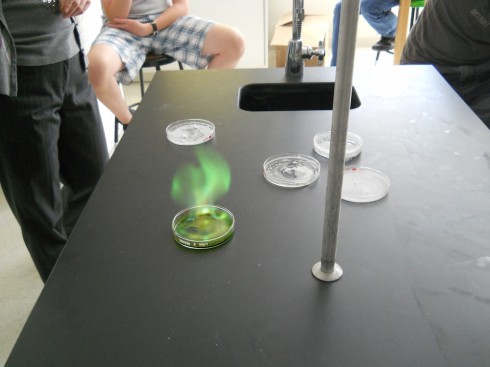
Elements can be identified from the color of light they give off when they’re ionized: their emission spectra. Ms. Wilson’s chemistry class today set fire to some metal salts to watch them burn.
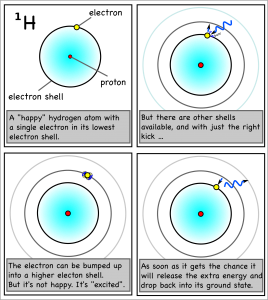
She placed the salt crystals into petri dishes, submerged them in a shallow layer of alcohol, and ignited the alcohol. As traces of the salts were incorporated into the flames, the metal atoms became “excited” as they absorbed some of the energy from the flame by bumping up their electrons into higher electron shells. Since atoms don’t “like” to be excited, their excited electrons quickly dropped back to their stable, ground state, but, in doing so, released the excess energy as light of the characteristic wavelength.
Table 1: Emission colors of different metals.
| Metal | Flame |
|---|---|
| Copper | 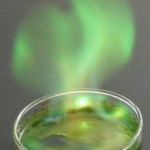 |
| Strontium | 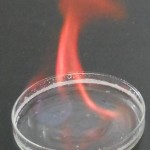 |
Sodium | 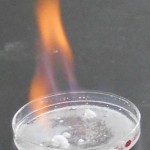 |
Lithium | 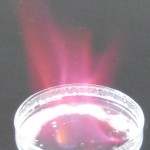 |
Carbide Cannon
Ms. Wilson’s chemistry class is looking at basic chemical reactions, and today they got to fire an acetylene cannon. When calcium carbide (CaC2) reacts with water (H2O) they produce acetylene (C2H2), which is quite explosive.
CaC2 + 2 H2O → C2H2 + Ca(OH)2
Acetylene is so flammable, because its carbons are held together by a triple bond: when the triple bond breaks it releases a lot of energy (about 839 kJ per mole).
Table 1: Bond strengths of simple hydrocarbons with carbon to carbon bonds
| Name | Chemical Formula | Diagram | Carbon to Carbon Bond Strength (kJ/mol) |
|---|---|---|---|
| Acetylene | C2H2 |  |
839 |
| Ethene | C2H4 |  |
611 |
| Ethane | C2H6 |  |
347 |
The explosion is a result of the combustion of the acetylene:
2C2H2 + 5O2 –> 2H2O + 4CO2
And this whole process — carbide plus water to give acetylene, which is then burned — was used by miners in the early 20th century to make headlamps (among other types of lamps).
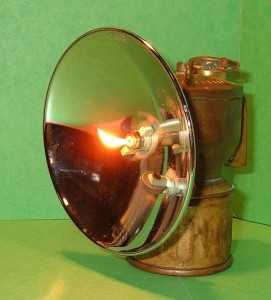
The cannon itself is a simple device, made of a 50cm tube of 2-3 inch diameter PVC (sorry about the mixed units), with a screw cap at one end. The carbide grains (about 0.5 g) are placed on the inside of the cap, which is then screwed on to the bottom of the tube. A few drops of water are then added through a small hole in the PVC using a plastic dropper — you can listen for the sizzling to tell if the carbide decomposition reaction is happening. Finally a flame is applied to the same hole as the water. The sock, by the way, is just lightly tucked in near the top of the PVC tube, about 5 cm in.
The explosion was loud, and Ms. Wilson’s sock traveled about 10 meters. It was suitably impressive. I think the student who was the most impressed was the one who had weighed out the calcium carbide, becaues 0.5 grams is really only four or five grains.
