Interim Planning Guide

Fjord Table Project

For interims we take a week-long break from regular classes where students design independent learning sessions and pursue the intense long-term projects. During the interim week, the schedule is divvied up into morning and afternoon sessions. Students can plan to use as many or as few of the sessions for their work, but most usually opt for doing one thing during the morning sessions, and another in the afternoon.

Despite it being my busiest time, it’s also my favorite part of the schedule because of all the interesting and creative work it spawns.

We start planning a least two weeks ahead and dedicate several extended morning meetings to getting everything lined up. This is the guide we’ve developed over the last year that seems to work pretty well.

1) Students’ initial proposals

Students propose projects with their learning objectives. Typically, each student submits two forms because most will not be doing a single project for the entire interim.

Interim Themes (Faculty Organizes)

Based on the students’ initial proposals, faculty organizes students into Interim Themes like Makerspace, Cooking, Robotics…

Student Calendar

Students Complete Interim Planning Calendar

  • Morning Meeting: Students organize into groups based on the Interim Themes and determine which and how many sessions they would like to do. 
  • They can decide to do all morning sessions for one theme, or dedicate each day to a different theme, or design a schedule of their choice. 
  • They should also seek to balance the number of students in each session, so there are not too few or too many students in one session.
    • They can try to recruit other students into their proposed sessions.
  • Each student gets a Planning calendar to fill in with what they’ll be doing for each of the week’s sessions.

Final Schedule (Faculty Organized)

  • Students are placed into the master schedule:
  • Faculty are assigned to supervise different sessions.

Students’ Final Planning

Students complete their proposals for each interim theme in which they’re involved. These may be different based on the theme, but there should be something for each theme. The objective is to make sure students will have the resources they need to accomplish their project: time, space, faculty guidance. For example.

  1. Cooking Planner (See above): Students specify what they will be cooking, when they will be cooking it, what ingredients they will need, and what equipment they will need. This allows us time to make sure we have all the equipment (cooktops etc.) necessary.
  2. Interim Trip Planning Form: Where they’re going, when they’re going, and confirmation if necessary that a visit is scheduled (for college visits for example).
  3. Makerspace Interim Planner: Students specify what projects they will be working on, what supplies and equipment they will need to use, and when they will be doing it.
  4. General Project Planning form: What project they will be working on, what equipment and supplies they need.

Student Summary (After the Interim)

  • Student Summary: Each student should fill out some type of form to summarize what they did and reflect on how it went, with the idea of figuring out how they or we can set things up to be better in the future.
    • For example: Makerspace students should do a post to the Makerspace Blog

    Debrief and Sharing

    The last hour of the interim week is set aside for debriefing and sharing. We try to include the lower school students in the sharing, which takes some time (there’s so much to see), so we regularly postpone the debrief to the next week’s morning meeting.
    Santa Fe Immersion

    Last week, Ms. Bryan and I took the middle schoolers out to Santa Fe, New Mexico. We drove out on Sunday (stayed overnight in Amarillo) and returned on Friday night. A brief overview of what we did:

    Monday

    • Cadillac Ranch: Amarillo, TX:
      • A public art project. We brought our own spray paint and painted some cadilacs that have been stuck, front first, into the ground. (1 hr)
    • Petroglyph National Monument (Piedras Marcadas Canyon): Albuquerque, NM:
      • We walked the Petroglyph Viewing Trail which has some nice information about the petroglyphs and the basalts they have been carved into. We talked a bit about the geology of extrusive volcanics. (2 hrs)

    Tuesday

    • Albuquerque Aquarium and Botanical Gardens
      • This was a student-chosen site (we had one student who really wanted to go to the aquarium, and persuaded the rest of the group). (2 hrs)
    • Indian Pueblo Cultural Center (for lunch)
      • We stopped by the restaurant at the Indian Pueblo Cultural Center in Alburquerque for a lunch of indigenous foods. (I had the three homemade stews, and they were excellent. The cornbread was also superb)
    • Cinder cones at Volcanos Day Use Area (Petroglyph National Monument):
      • We hiked the middle loop to the top of Black Volcano to look at the caldera. Also, saw nightshade plants, large millipedes, and storms in the distance. (2.5 hrs)
    • Bedtime Story: Global Atmospheric Circulation and the Biomes
      • A lesson contextualizing what we saw out of the windows as we drove from the deciduous forests of Missouri to the semi-arid southwestern US. (45 min+)

    Wednesday

    • Cliff Dwellings at Bandolier National Monument
      • After a beautiful drive up into the mountains, we did a short hike on the Pueblo loop trail that let us climb into cliff dwellings that were carved into volcanic tuff (2 hrs).
    • Bradbury Science Museum in Los Almos
      • We made a brief stop (1/2 hour) at the Science museum in Los Almos, because I wanted to scope it out, but could easily have spent much more time there. The replicas of the bombs dropped on Japan at the end of WWII attracted the most attention, but was in close competition with the chair that let you feel the seismic vibrations that result from explosions of conventional and nuclear weapons.
    • Prairie Dog Glass
      • Artisan George O’Grady took the time to guide our students through making glasses, pumpkins, and peppers out of glass (2.5 hrs).
    • Lesson (Mrs. Bryan): Modern Art (in preparation for our visit to the O’Keeffe Museum) (45 min)
    • Bedtime Story: History of the Universe

    Thursday

    Friday

    • First Americans Museum in Oklahoma City:
      • One of our students’ grandparent insisted we stop by the First Americans Museum, and I am really glad they did. I had not even heard of it (it opened in 2021), but it is an awesome space that fills in a lot of information about the pre and post colonial history of the First Americans. (2 hrs)

    The Wall (Mural)

    Our seniors wanted to leave a mark, so after their initial application to paint the outside wall of the gym was turned down, they went with a mural on the inside–in our Makerspace.

    For this project, we wanted to create a mural on the basementnasium wall. First, we measured the wall and went to Home Depot to get enough paint, paint brushes, drop cloths, and tape. Then, after cleaning the wall with a damp cloth, we covered the wall with tape in a triangular pattern similar to one we found online. After that, we used pencil to mark each triangle with a letter corresponding to one of the six colors that we bought. It took us the majority of the project to paint 3-4 coats on each triangle, and on the last day we pulled it the tape and touched up any mistakes with white paint.

    Throughout this project, we found out that some people know how to paint, some people learned, and others didn’t learn. BUT IT WAS SO MUCH FUN!

    -Team: Elliott, Abby, John, Zoe, Mary, Annemarie, and Josiah

    -Abby R.

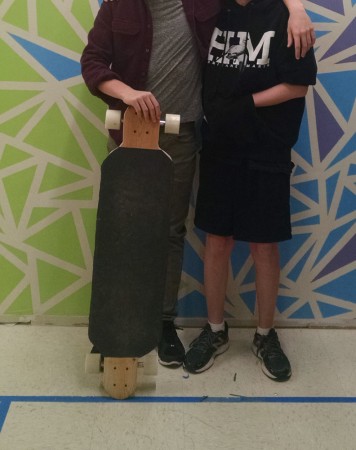
    Longboard

    Longboard built during the interim.
    Longboard built during the interim.
    Finishing came afterwards.

    For my makerspace project I made a longboard. What went well with the board was the wheels and trucks, it was a simple hole in the wood and screwing the trucks almost no measuring on my part. What didn’t go so well was the measuring and cutting of the board, it took me a full day to get all the measurements exact and even then they didn’t come out so good. What I would do next time is get a cnc machine so it does the measuring and gets the cuts exact every time. We could mass produce longboards with ease. If i did it again without a cnc machine i would get the measurements beforehand and then it would make measuring a lot easier.

    – Isaac L.

    Our Natural Bridge

    Crossing the bridge.
    Crossing the bridge.

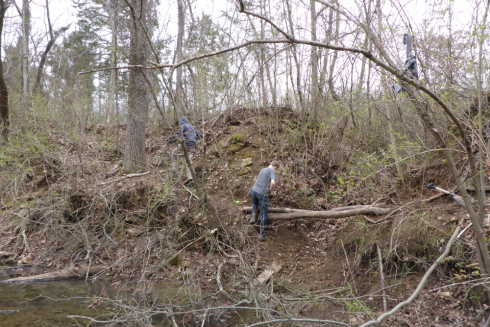
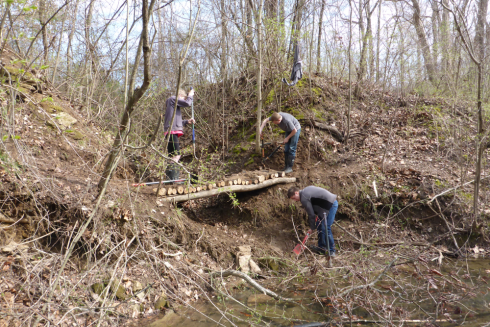
    Inspired by a video of a temporary bridge built out in the woods for mountain biking, my students wanted to try building a “natural” bridge with no fasteners–no screws, no nails–over a small ravine that feeds into our creek.

    The base of the bridge.
    The base of the bridge.

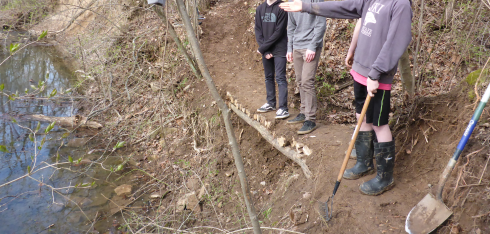
    We found a couple large fallen logs to cut into two 10 foot lengths for the basic structural support for the bridge. These were dug into the ground to anchor them on either side of the ravine. We then chopped a couple more logs into 2 foot sections to go across the structural logs. The dense mud from the banks of the creek was then packed onto the top to hold it all together.

    Packing mud.
    Packing mud.

    In the end, the bridge turned out to be pretty solid, and definitely usable.

    The bridge holds up.
    The bridge holds up.

    Model Skate Park

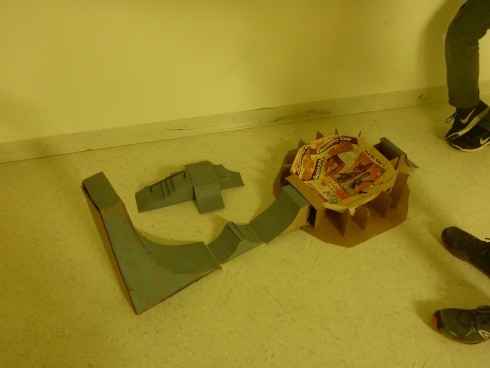
    Skate park bowl under construction.
    Skate park bowl under construction.

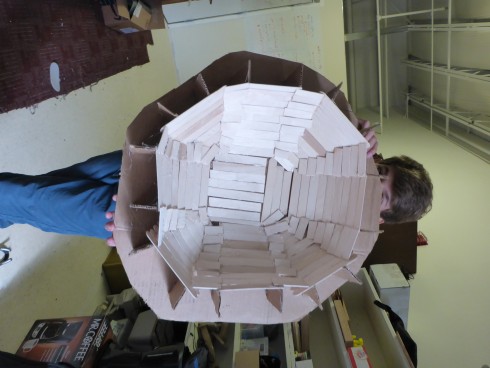
    After batting around a number of ideas, three of my middle schoolers settled on building a model skate park out of popsicle sticks and cardboard for their interim project.

    A lot of hot glue was involved.

    The ramps turned out to be pretty easy, but on the second day they decided that the wanted a bowl, which proved to be much more challenging. They cut out sixteen profiles out of thicker cardboard, made a skeleton out of popsicle sticks, and then coated the top with thin, cereal-box cardboard.

    When they were done they painted the whole thing grey–to simulate concrete I think–except for the sides, which were a nice flat blue so that they could put their own miniature graffiti over the top.

    It was a lot of careful, well thought-out work.

    Getting there: ramps, a rail, and bowl.
    Getting there: ramps, a rail, and bowl.

    Elephant Rocks

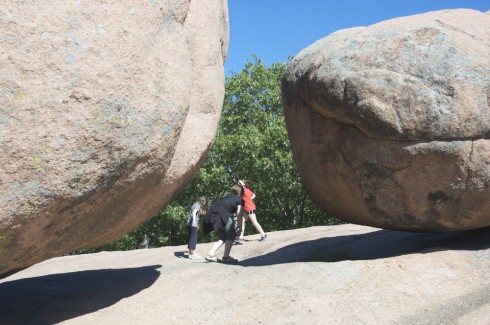
    Students explore the massive, spheroidally weathered boulders at Elephant Rocks State Park.
    Students explore the massive, spheroidally weathered boulders at Elephant Rocks State Park.

    We stopped at the Elephant Rocks State Park our way down to Eminence MO for our middle school immersion trip. The rocks are the remnants of a granitic pluton (a big blob of molten rock) that cooled underground about 1.5 billion years ago. As the strata above the cooled rock were eroded away the pressure release created vertical and horizontal cracks (joints). Water seeped into those joints, weathered the minerals (dissolution and hydrolysis mainly), and eroded the sediments produced, to create the rounded shapes the students had a hard time leaving behind.

    This was a great stop, that I think we’ll need to keep on the agenda for the next the next trip. I did consider stopping at the Johnson’s Shut-Ins Park as well, but we were late enough getting to Eminence as it was. Perhaps next time.

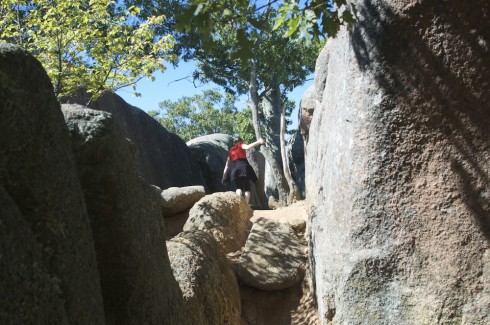
    Exploring the spaces between the rocks.
    Exploring the spaces between the rocks.

    Plate Tectonics on the Eminence Immersion

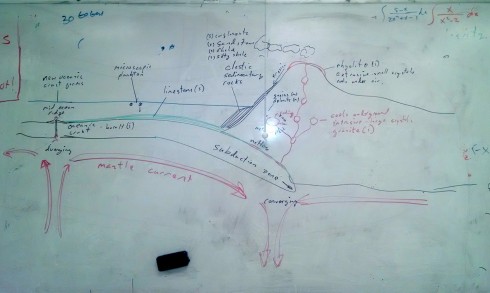
    tectonics-IMG_20141007_093449722

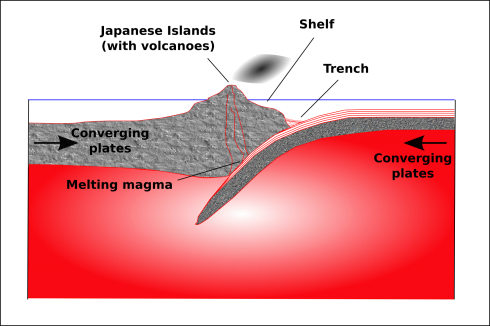
    The picture of a convergent tectonic boundary pulls together our immersion trip to Eminence, and the geology we’ve been studying this quarter. We saw granite boulders at Elephant Rocks; climbed on a rhyolite outcrop near the Current River; spelunked through limestone/dolomitic caverns; and looked at sandstone and shale outcrops on the road to and from school.

    An oceanic-oceanic subduction zone. The subducting plate melts producing volatile magma.
    The subducting plate melts producing volatile magma.