The post below was contributed by Michael Schmidt, our math teacher.
Parabolas can be a daunting new subject for some students. Often students are not aware of why a parabola may be useful. Luckily, nature always has an answer. Most children realize that a ball thrown through the air will fallow a particular arch but few have made the connected this arch to a parabola. Wonderfully, with a little technology this connection can be made.
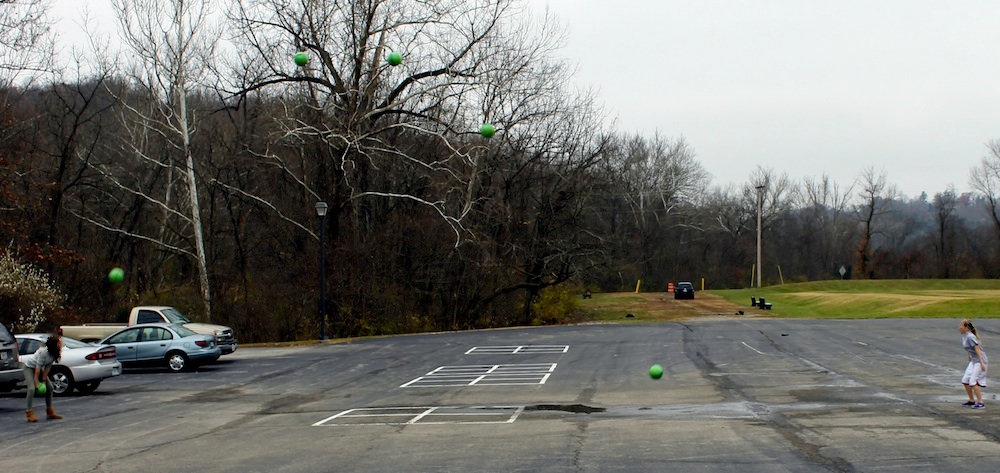
With Ms. Hahn’s Canon SLR, I had some of my students throw a ball around outside and took a series of quick pictures of the ball in flight. Since my hand is not very steady, I took the pictures and used the Hugin’s image_stack_align program to align each photo so I could stack them in GIMP.
Within GIMP, I layered the photos on top of each other and cut out the ball from each layer then composed those onto one image. Careful not to move the ball since our later analysis will be less accurate. The result will look something like the following:
Now that there is an image for student to see, we can determine the ball’s height at each point using their own height as a reference. We can then use this information to model a parabola to the data with a site like: http://www.arachnoid.com/polysolve/ .
For the more advanced student an investigation of the least-squares algorithm used by the site may be done.
Now, once we have an expression for the parabola, students can compare how fast they sent the ball into the air.