How to Write a Web Page from Scratch

<html>
	<head>
	
	</head>
	
	<body>
	
	</body>
</html>

I gave a quick introduction to writing HTML web pages over the last interim. The basic outline of a web page can be seen above (but there’s no content in there, so if you tried this file in a web browser you’d get a blank page). Everything is set between tags. The open html tag (<html>) starts the document, and the close html tag (</html>) ends it.

The head section (<head>) holds the information needed to set up the page, while the body section (<body>) holds the stuff that’s actually on the page.

For example, if I wanted to create a heading and a paragraph of text, I would just put it in the body, like so:

<html>
	<head>
	
	</head>
	
	<body>
		<h1>My Heading Here</h1>

		This is my text.
	
	</body>
</html>

Note that the heading is placed between h1 tags. And the result should look like this:

Basic webpage.
Basic webpage.

Now save this file as an html file, which means save it as a plain text file using a .html extension (e.g. test.html) and open the file in a browser.

Note on Editors: I’ve found that the best way to do this is by using a simple coding editor. I recommend my students use GEdit on Linux, Smultron (free version here) or GEdit on Mac, and Notepad++ on Windows. You don’t want to use something like Microsoft Word, because complex word processing software like it, LiberOffice and Pages need to save a lot of other information about the files as well (like the font style, who created the file etc.).

CSS Styling

But we typically don’t want something so plain, so we’ll style our heading using CSS. Usually, we’ll want all of our headings to be the same so we set up a style to make all of our headings blue. So we’ll add a styling section to our header like so:

<html>
	<head>
	
		<style type="text/css">
			h1 { color: blue; }
		</style>	
		
	</head>
	
	<body>
	
		<h1>My Heading Here</h1>
		
		This is my text.
	
	</body>
</html>

Which gives:

Styling the heading.

There are a few named colors like blue, but if you want more freedom, you can use the hexadecimal color codes like “#A3319F” to give a kind of purple color (hexadecimals are numbers in base 16).

DIV’s to Divide

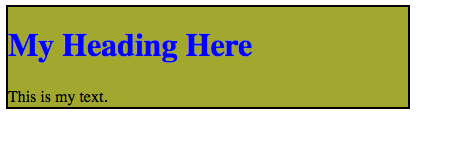
Finally, we’ll often want pages with separate blocks of information, so let’s make a little column for our heading and paragraph. We’ll make the background yellowish, put a border around it, and give it a set width.

To do this we’ll place our heading and paragraph into a DIV tag, which does not do anything but encapsulate the part of the web page we want into sections.

<html>
	<head>
	
		<style type="text/css">
			h1 { color: blue; }
		</style>	
		
	</head>
	
	<body>
		<div id="section1">
			<h1>My Heading Here</h1>
		
			This is my text.
		</div>
	</body>
</html>

Note that I’ve given the div tag an id (“section1), this is so that I can refer to that section only in the styling section using “#section”:

<html>
	<head>
	
		<style type="text/css">
			h1 { color: blue; }
			
			#section1 {
				background-color: #A2A82D;
				border: solid black 2px;
				width: 400px;
			}
		</style>	
		
	</head>
	
	<body>
		<div id="section1">
			<h1>My Heading Here</h1>
		
			This is my text.
		</div>
	</body>
</html>

to give:

More styling.
More styling.

Unleashed

With that introduction, I set students loose to make their own web pages. They had to make two page, both linking to the other, and one of them being an “About Me” page.

There are lots of places on line to find out what HTML tags and CSS styles are available and how to use them, so my goal was to introduce students to the language they needed to know.

One issue that came up was the use of copyrighted images. Current adolescents see everything online as part of a sharing culture–most of my students for this lesson had Pintrest accounts–and it took some explanation for them to understand why they should not use that cute gif of a bunny eating a slice of pizza without getting permission from the author (or at least finding out if the artwork was free to use).

Finally, I did do a quick intro on how to using JavaScript (with Jquery) to make their pages more interactive, but given that we only had two days for this project, that was pushing things a little too far.

Limiting Chemical Reactions

Figuring out the limiting reactant in a chemical reaction integrates many of the basic chemistry concepts including: unit conversions from moles to mass and vice versa; the meaning of chemical formulas; and understanding the stoichiometry of chemical reactions. So, since we’ll need a number of these, I wrote a python program to help me design the questions (and figure out the answers).

Program examples come zipped because they require the program file and the elements_database.py library:

Baking Powder and Vinegar (Common Molecules)

Limiting_component-Common.py: This has the baking powder and vinegar reaction limited by 5 g of baking soda. It’s nice because it uses a few pre-defined “common molecules” (which are defined in the elements_database.py library.

You enter the reactants and products and the program checks if the reaction is balanced, then calculates the moles and masses based on the limiting component, and finally double checks to make sure the reaction is mass balanced.

Limiting_component-Common.py

from elements_database import *
import sys

print "LIMITING REACTANT PROGRAM"
print 
print "  Determines the needed mass and moles of reactants and products if reaction is limited by one of the components"

c = common_molecules()

'''Create Reaction'''
rxn = reaction()
# Add reactants (and products)
#   Use rxn.add_reactant(molecule[, stoichiometry])
#       molecule: from molecule class in elements_database
#       stoichiometry: integer number
rxn.add_reactant(c.baking_soda,1)
rxn.add_reactant(c.hydrochloric_acid,1)
rxn.add_product(c.carbon_dioxide)
rxn.add_product(c.water, 1)
rxn.add_product(c.salt)

'''Print out the reaction'''
print 
print "Chemical Formula"
print "  " + rxn.print_reaction()
print 

'''Check if reaction is balanced'''
balanced = rxn.check_for_balance(printout=True)

'''Calculate limits of reaction'''
if balanced:
    rxn.limited_by_mass(c.baking_soda, 5, printout=True)

Outputs results in the Results table (using scientific notation):

LIMITING REACTANT PROGRAM

  Determines the needed mass and moles of reactants and products if reaction is limited by one of the components

Chemical Formula
  NaHCO3 + HCl  --> CO2 + H2O + NaCl 

Check for balance
 --------------------------------------------- 
| Element | Reactants | Products | Difference |
 --------------------------------------------- 
|   Na    |    1      |    -1    |     0      |
|   H     |    2      |    -2    |     0      |
|   C     |    1      |    -1    |     0      |
|   O     |    3      |    -3    |     0      |
|   Cl    |    1      |    -1    |     0      |
 --------------------------------------------- 
Balance is:  True

Given: Limiting component is 5 g of NaHCO3.
  Molar mass = 84.00676928
  Moles of NaHCO3 = 0.0595190130849

 Results
   ------------------------------------------------------------------ 
  | Molecule | Stoich.*| Molar Mass (g) | Moles req. |    Mass (g)   |
   ------------------------------------------------------------------ 
  |NaHCO3    |    1    |    84.0068     |  5.952e-02 |   5.000e+00   |
  |HCl       |    1    |    36.4602     |  5.952e-02 |   2.170e+00   |
  |CO2       |    -1   |    44.0096     |  5.952e-02 |   2.619e+00   |
  |H2O       |    -1   |    18.0156     |  5.952e-02 |   1.072e+00   |
  |NaCl      |    -1   |    58.4418     |  5.952e-02 |   3.478e+00   |
   ------------------------------------------------------------------ 
 * negative stoichiometry means the component is a product

  Final Check: Confirm Mass balance: 
     Reactants:    7.1701 g 
     Products:    -7.1701 g 
     --------------------------
          =      0.0000 g 
     --------------------------

General Example

If not using the common molecules database, you need to define the components in the reaction as molecules yourself. This example reacts magnesium sulfate and sodium hydroxide, and limits the reaction with 20 g of magnesium sulfate.

Limiting_component-General.zip

The main file is:

Chem_Exam-limiting.py

from elements_database import *
import sys

print "LIMITING REACTANT PROGRAM"
print 
print "  Determines the needed mass and moles of reactants and products if reaction is limited by one of the components"

# create reaction

rxn2 = reaction()
# Add reactants (and products)
#   Use rxn.add_reactant(molecule[, stoichiometry])
#       molecule: from molecule class in elements_database
#       stoichiometry: integer number
rxn2.add_reactant(molecule("Mg:1,S:1,O:4"))
rxn2.add_reactant(molecule("Na:1,O:1,H:1"), 2)
rxn2.add_product(molecule("Mg:1,O:2,H:2"))
rxn2.add_product(molecule("Na:2,S:1,O:4"))

'''Print out the reaction'''
print 
print "Chemical Formula"
print "  " + rxn2.print_reaction()
print 

'''Check if reaction is balanced'''
balanced = rxn2.check_for_balance(printout=True)

'''Calculate limits of reaction'''
if balanced:
    rxn2.limited_by_mass(molecule("Mg:1,S:1,O:4"), 20, True)

# print out masses
print "Masses Involved in Reaction"
print "  Reactants:"
for i in rxn2.reactants:
    #print "rxn", i
    print "    {m}: {g} g".format(m=i.molecule.print_formula().ljust(10), g=i.mass)
print "  Products:"
for i in rxn2.products:
    #print "rxn", i
    print "    {m}: {g} g".format(m=i.molecule.print_formula().ljust(10), g=-i.mass)

This program is slightly different from the common molecules example in that, at the end, it prints out masses calculated in a more easily readable format in addition to the other data.

Masses Involved in Reaction
  Reactants:
    MgSO4     : 20.0 g
    NaOH      : 13.2919931774 g
  Products:
    MgO2H2    : 9.69066512026 g
    Na2SO4    : 23.6013280571 g

When I have some time I’ll convert this to JavaScript like the molecular mass example.

Molar Mass of Molecules

Calculate the molar mass of a molecule:

The notation for the chemical formula is a little funky: you put the element symbol and then the number of atoms separated by a colon; each element/number of atoms pair are separated by commas, so sodium chloride (NaCl) would be “Na:1,Cl:1“.

This will have to do until I can write something to parse the regular chemical formula notation.

On the plus side, you can link to a specific molecular mass calculation by adding the formula to the url. So magnesium chloride (MgCl2) can be found with this url:

https://soriki.com/js/chem/chem_db/molecular_mass.html?formula=Mg:1,Cl:2

Updated Atom Builder

A couple of my students asked for worksheets to practice drawing atoms and electron shells. I updated the Atom Builder app to make sure it works and to make the app embedable.

So now I can ask a student to draw 23Na+ then show the what they should get:

Worksheet

Draw diagrams of the following atoms, showing the number of neutrons, protons, and electrons in shells. See the example above.

  1. 14C: answer.
  2. 32K+: answer.
  3. 18O2-: answer.
  4. 4He2+: answer.
  5. 32P: answer.

I guess the next step is to adapt the app so you can hide the element symbol so student have to figure what element based on the diagram.

Datalogging with the Arduino

30 seconds of temperature data recorded using the Arduino (over the serial port).

I wired a temperature sensor to my Arduino as part of the third project in the Arduino Projects Book. The project has the Arduino send the data to the serial port where the Arduino program (IDE) can show it. This data would be most useful to me, however, if it could be logged in a plain text file for data analysis. However, it’s a little annoying that there isn’t an easy way to save the data output by the Arduino.

So, I needed to use the terminal program “cat” to look at what was coming across the serial port. First I had to look up which port the Arduino was connected to in the Tools menu of the Arduino IDE: since I’m on a Mac, running OSX, this turned out to be something like /dev/cu.usbmodem411. (I could have looked this up by listing the contents of the /dev/ directory and then looking for anything connected to the usbmodem). To see the data I used:

> cat /dev/cu.usbmodem411 

To actually save the data I directed the output of the cat command to the file data-log.txt:

> cat /dev/cu.usbmodem411 > data-log.txt

The contents of the file looked like this:

T25.68
6003,25.68
7504,25.68
Time (milliseconds), Temperature (deg. C) 
0,25.20
1501,25.68
3002,25.68
4502,25.68
6003,26.66
7504,28.12
9006,30.08
10335,32.03
11663,33.98
12992,35.45
14321,36.91
15650,38.38
16979,39.84
18309,41.31
19559,42.77
20810,43.75
22062,42.77
23313,41.31
24563,40.82
25815,39.36
27144,38.87
28473,37.89
29802,37.40
31131,36.91
32459,35.94
33788,35.45
35118,35.45
36447,34.96
37776,34.47
39105,33.98
40434,33.98
41763,33.50
43091,33.01
44421,33.01
45750,33.01
47079,32.52
48408,32.52
49737,32.52
51066,32.03
52396,31.54
53724,31.54

I’m not sure what’s the deal with the first three lines, but if you ignore them you see the column headers (Time and Temperature) and then the time (in milliseconds) and temperature data) in a nice comma delimited format.

The Arduino program (sketch) that produced this output was:

const int T_sensor_Pin = A0;
const float baselineTemp = 20.0;
const int outPin = 4;

void setup(){
  
  Serial.begin(9600);
  pinMode(outPin, OUTPUT);
  
  Serial.println("Time (milliseconds), Temperature (deg. C) ");

}

void loop(){
  int T_sensor_Val = analogRead(T_sensor_Pin);
  
  float T_sensor_Voltage = (T_sensor_Val * 5.0)/1024.0;
  
  float T = (T_sensor_Voltage - 0.5) * 100;
  float T_F = (T * 1.8) +32.0;
  
  Serial.print(millis());
  Serial.print(",");
  Serial.println(T); 

  delay(1500);
  
}

Alternative Methods of Saving Data

Python

Based on the same Arduino sketch, you can write a Python program to read the data. This method enables you to use the data directly with VPython for visualization.

First you need to install the pySerial library (pySerial). Then you can read the serial data using:

data-log.py

import serial

ser = serial.Serial('/dev/cu.usbmodem411', 9600)

while True:
    print ser.readline()

CoolTerm

You can also use CoolTerm to save the serial data (see directions on how).

An SD Card

Another alternative, is to get a shield that can hold an SD card (SparkFun and Adafruit have ones for less than $20) and write to that.

Sumac Berry Juice

Sumac berries.
A bunch of sumac berries on the branch.

Ripe, bright-purple sumac berries are quite astringent. Steep a ripe bunch in a quart or two of hot water for a few hours (or cold water for a day) and the result is a tart tea. Add a third of a cup of sugar to make a delicious juice. (Note: Poison sumac is not found in Missouri, but it has been identified in adjacent, eastern states, so be careful.)

Arduino for Beginners

Arduino UNO connected to a breadboard from the starter kit.

I’ve been avoiding working with the Arduino microcontrollers because I’d prefer to be able to program in Python with the Raspberry Pi (for example). However, since the 3d printer we just built this summer uses an Arduino for a brain, I broke down and picked up the Arduino Starter Kit (via Adafruit).

The Arduino Projects Book is an excellent resource for the beginner.

What I liked most about the Starter Kit most is the Arduino Projects Book that comes with it. It’s a wonderful introduction to circuits, electronics, circuit diagrams, and microcontrollers at the beginners level. If I offer an Arduino elective, I’ll use it as a textbook. Indeed, I’ll probably use bits of it as a reference when I teach circuits in middle school and Advanced Physics.

As for the programming, the basics, at least, are pretty straightforward. I got a blinking LED controlled by a switch input up an running pretty quickly. The code requires two loops, one to set up the inputs and the output, and a loop for the program to follow. The code below has a blinking light that’s controlled via pin 4, but changes to a solid light when the switch is pressed (the input for the switch is pin 2). The wiring for the circuit is shown in the picture at the top of the page.

blink_circuit

int switchOn = 0;

void setup(){
  pinMode(2, INPUT);
  pinMode(4, OUTPUT);
}

void loop(){
  switchOn = digitalRead(2);
  
  if (switchOn == HIGH) {
    digitalWrite(4, HIGH);
  } else {
    digitalWrite(4, LOW);
    delay(500);
    digitalWrite(4, HIGH);
    delay(200); 
  }
  
}